
Admin Onboarding - Setting up Tags
Step 6b of admin onboarding — create the few tags that flag items for attention, group them into collections per item type, and know when a custom field is the better tool.
A tag is a coloured label on an item. It is for drawing attention or grouping across the hierarchy: Needs client approval, Ideation, Compliance. Tags can be set by hand or by an automation, filtered on, and reported on. An item can carry many tags; a tag can sit on many items.
Tags come right after custom fields because the two are easy to confuse. Decide this first:
| Use a tag when | Use a custom field when |
|---|---|
| It is a flag you want to see at a glance on cards and lists | It is data every item of a type should carry |
| An item may have several at once | Exactly one value applies (a pick list) |
| An automation will apply or react to it | You will calculate, sort, or report on the value |
Most organizations need 10 to 20 tags. More than that and the cards become noise.
DevStride reserves two tags you cannot edit or remove: Bug (red) and Blocked (orange). Blocked is set by the blocked indicator on an item.
Tags and automations together
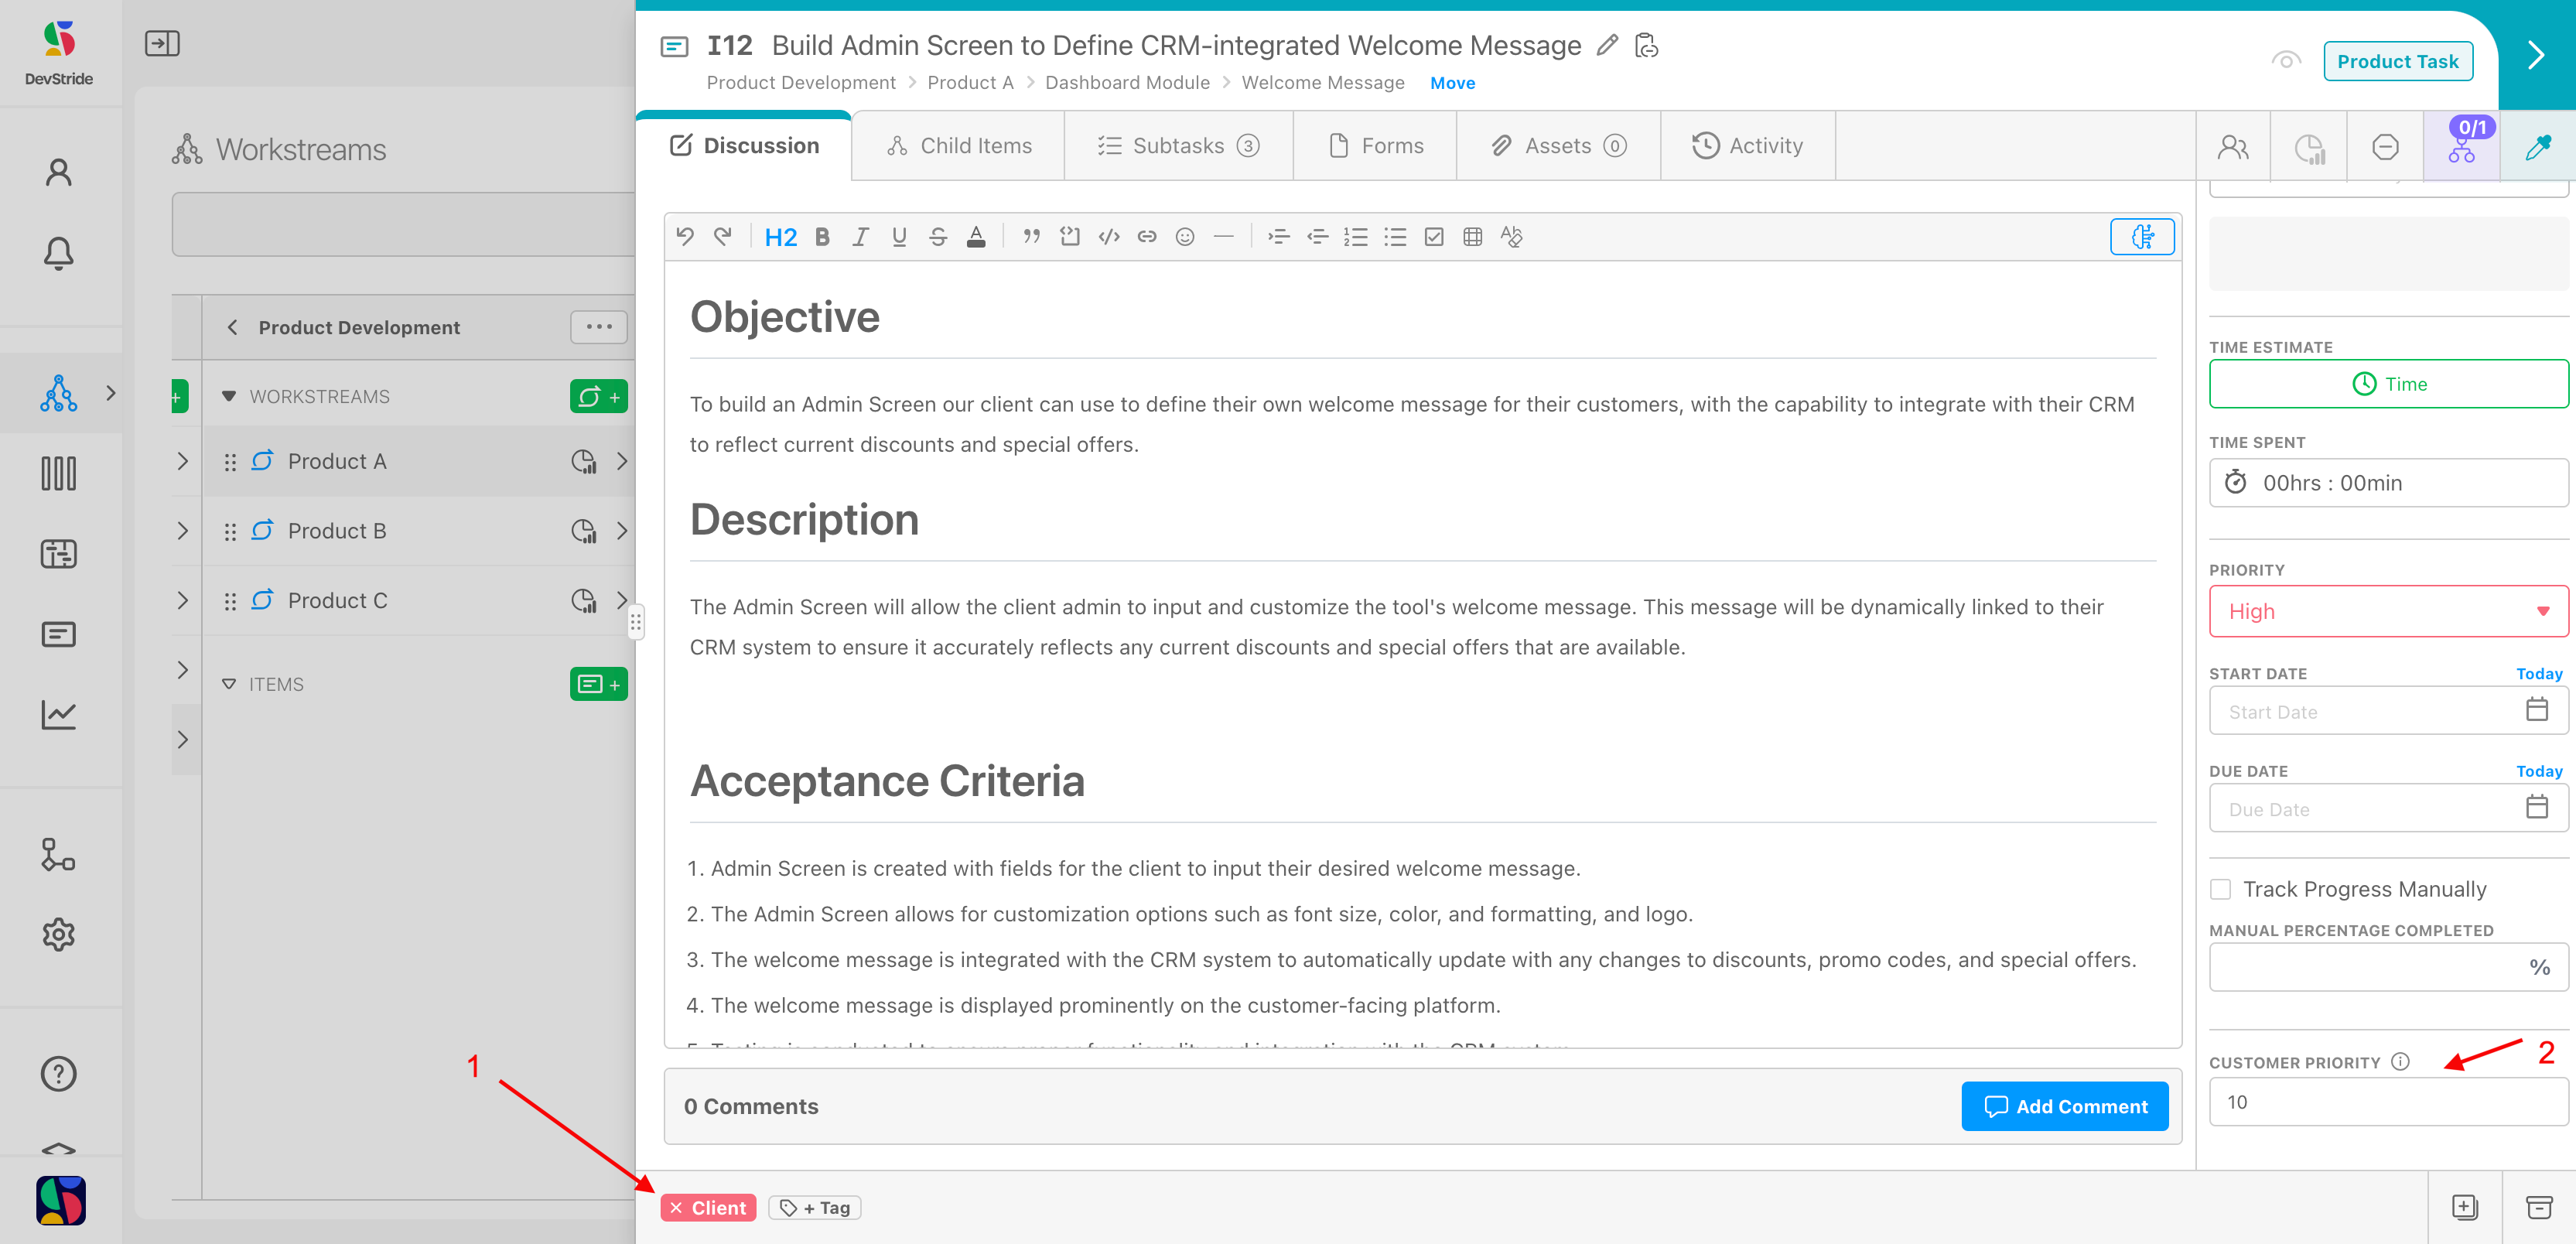
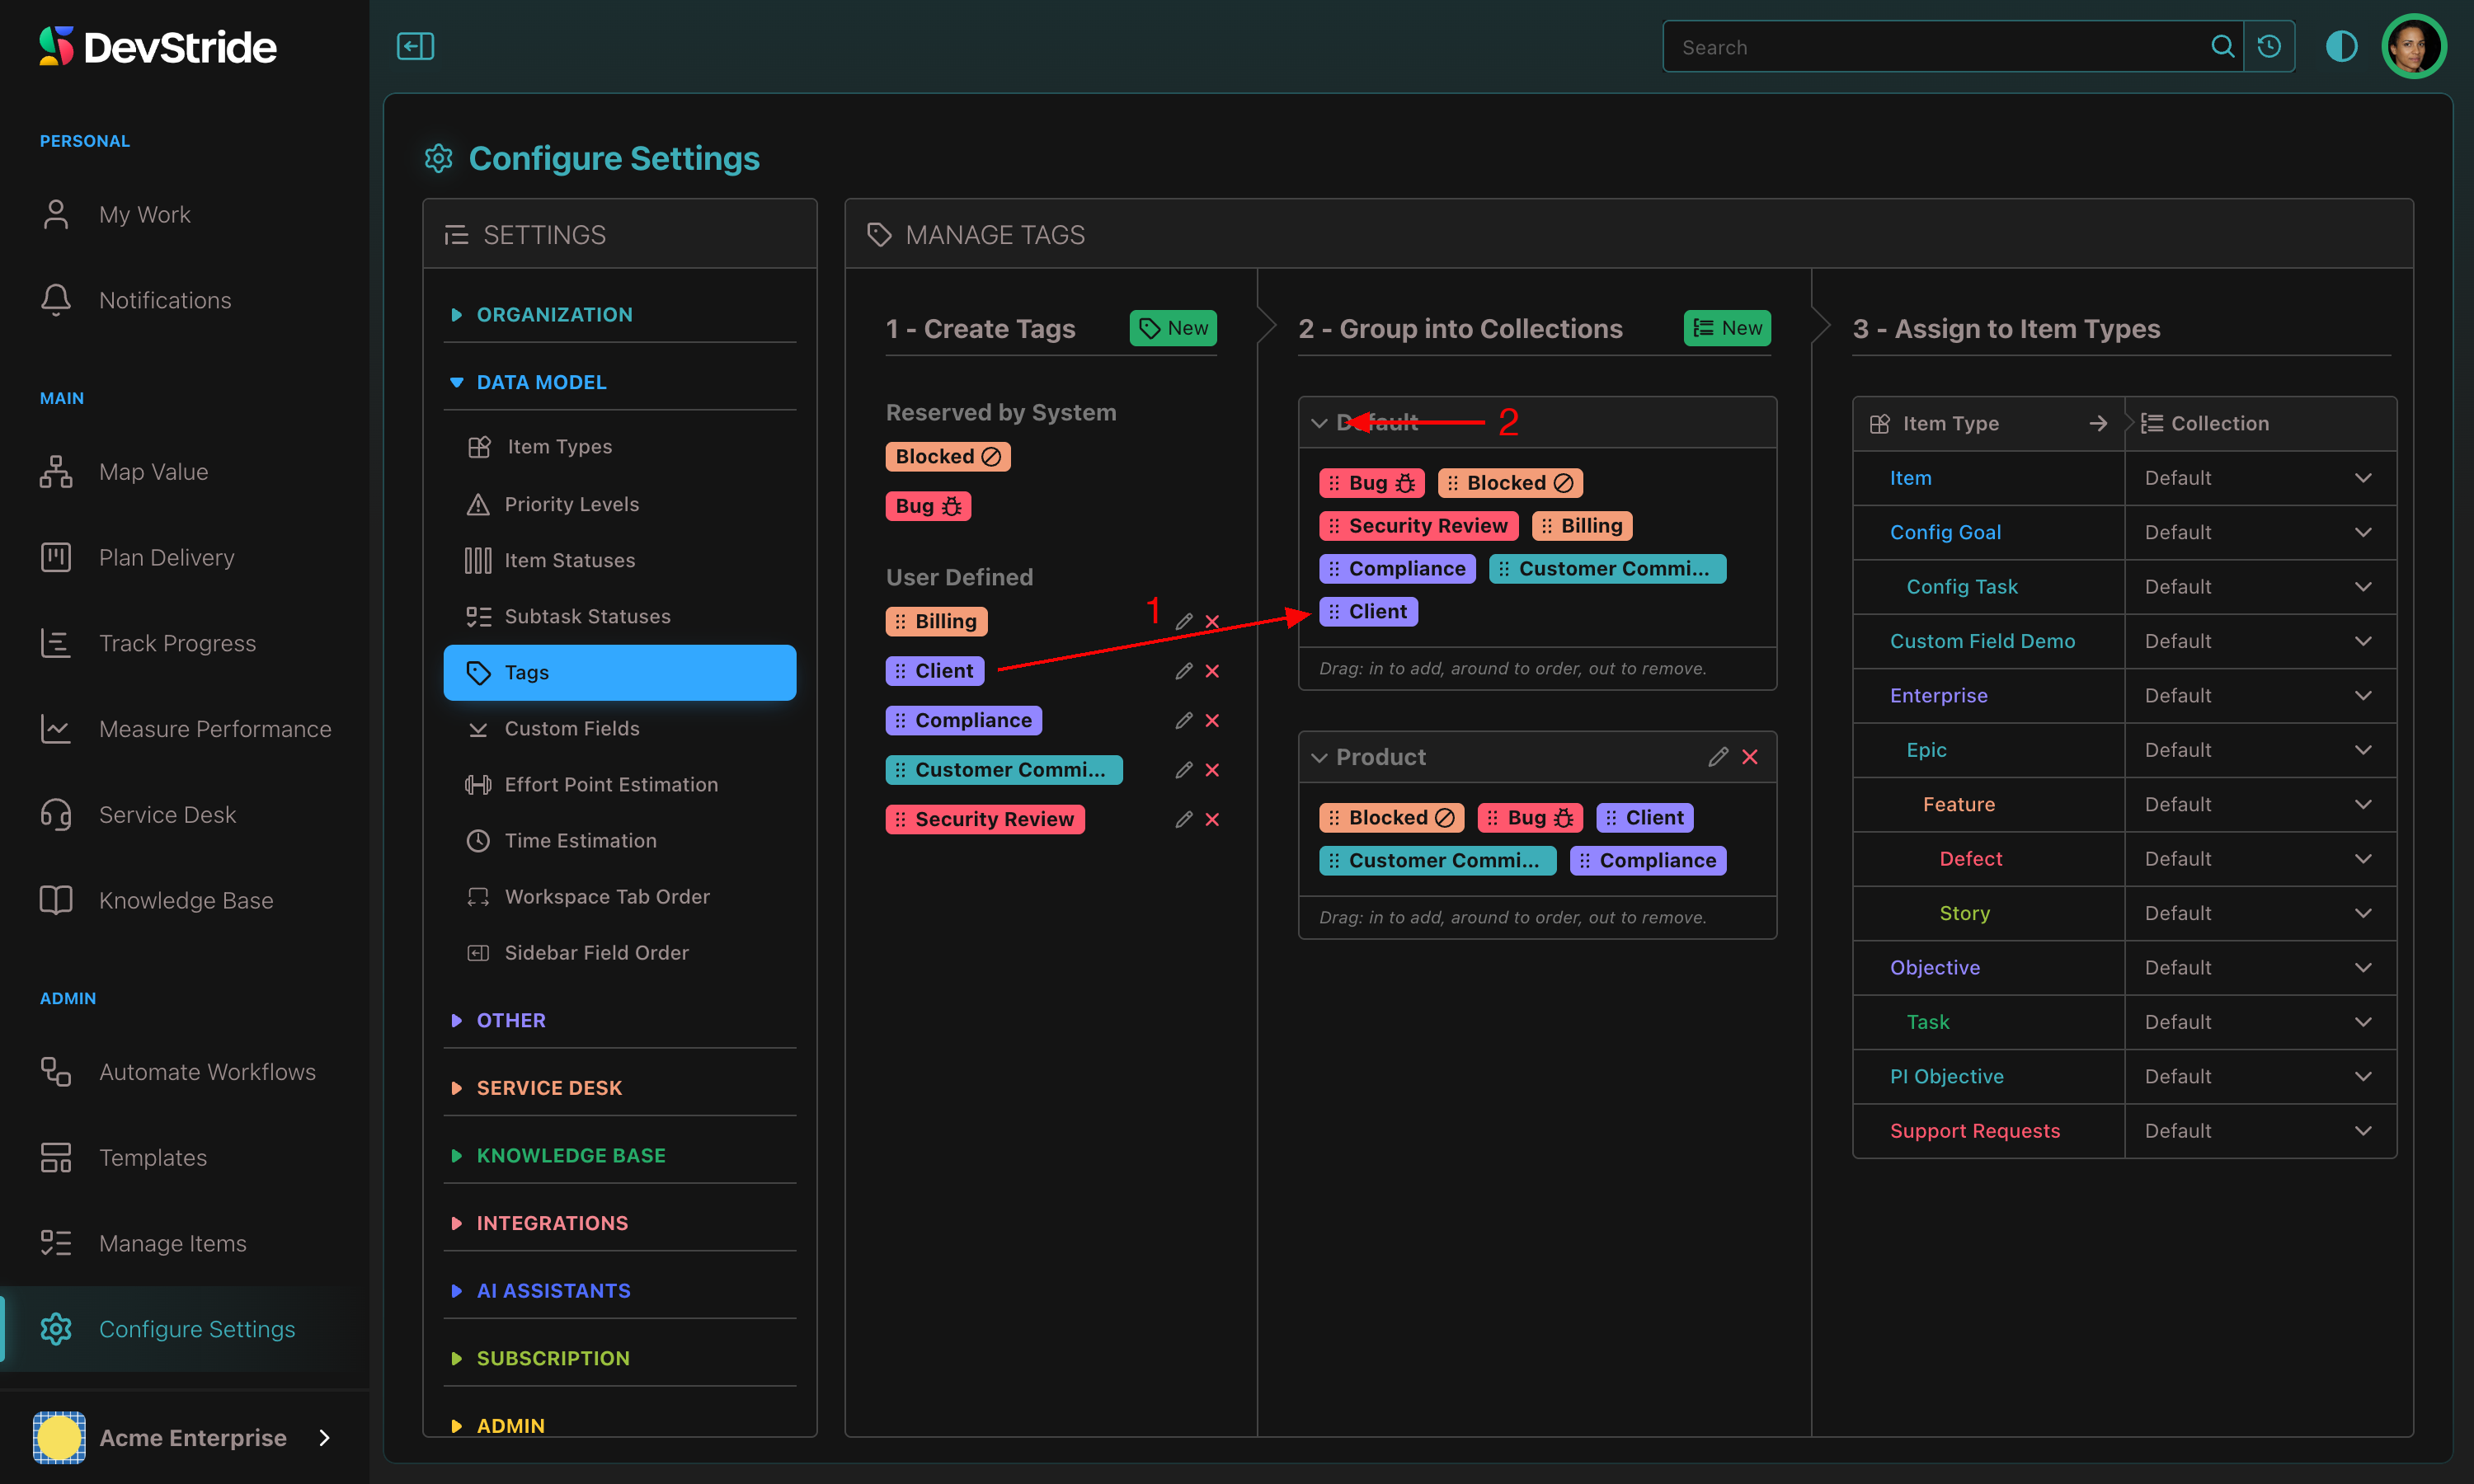
In this example a Client tag is applied automatically whenever an item's Customer Priority custom field is 5 or higher, so high-value requests stand out on every board. Automations are covered later; see Setting up automations.
Step 1: Create tags#
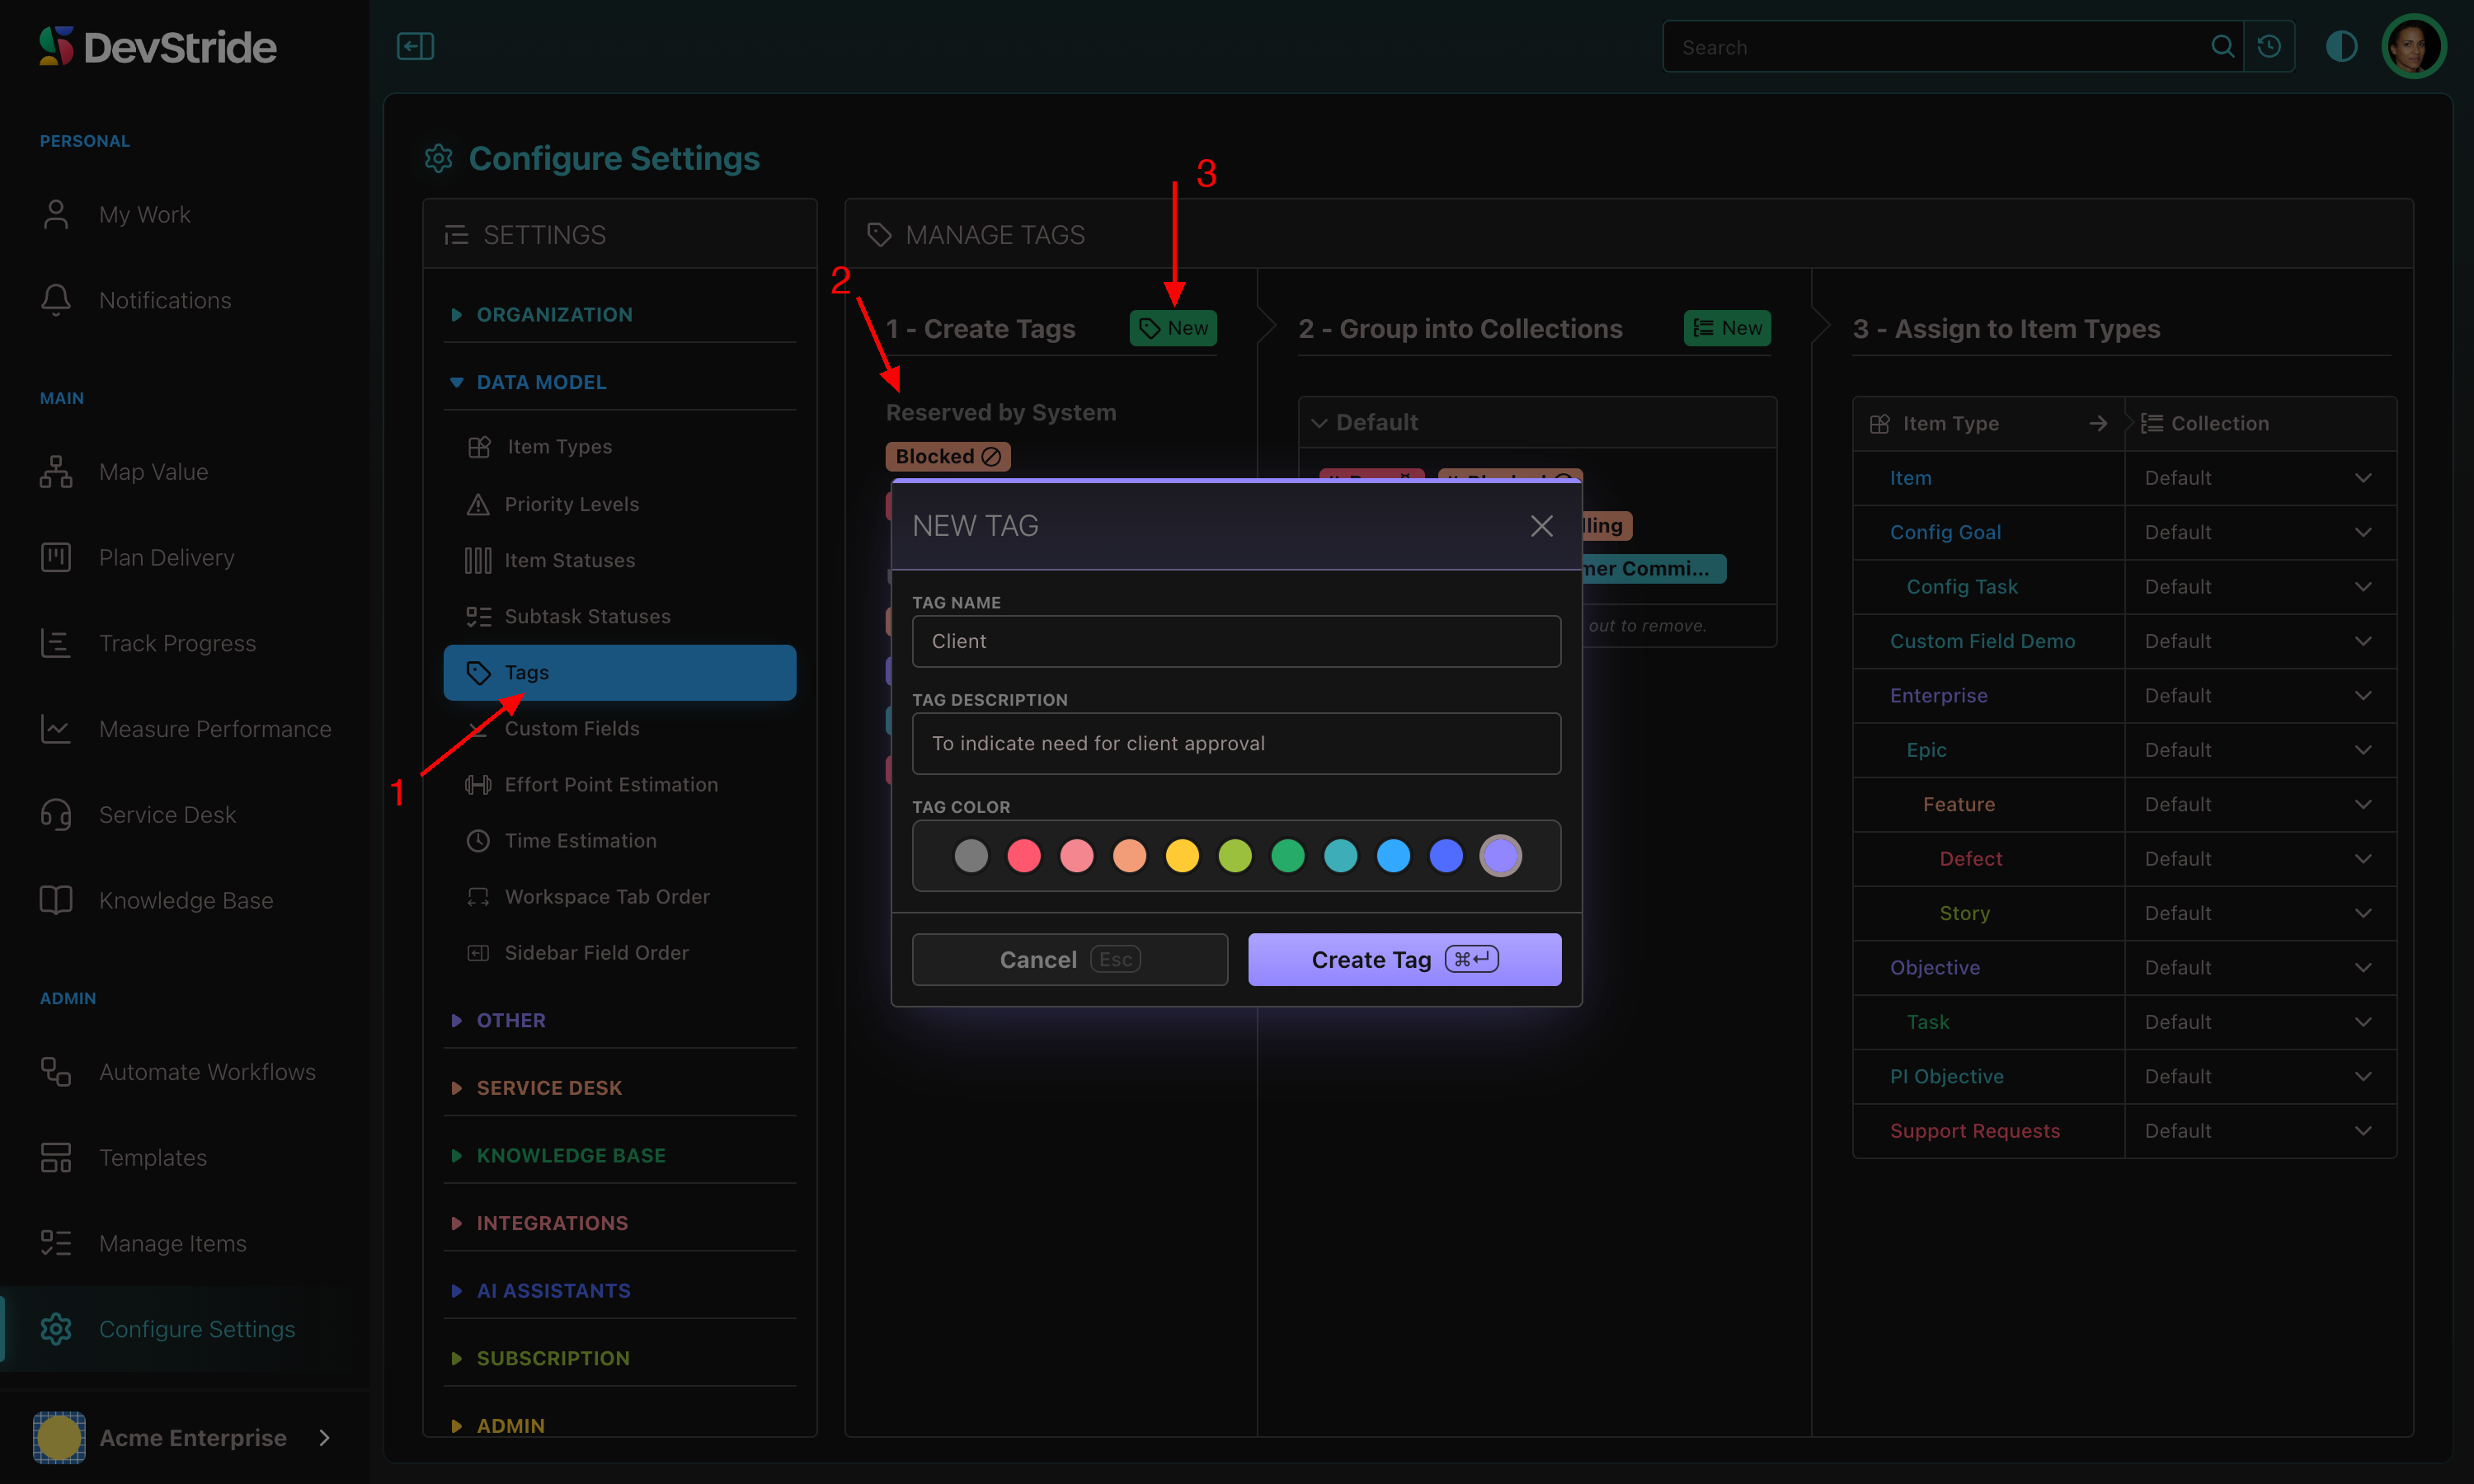
Open Configure Settings → Data Model → Tags. The left pane, 1 - Create Tags, lists Reserved by System and User Defined tags. Click New, then fill in Tag Name, an optional Tag Description, and Tag Color, and save.
Step 2: Group into collections#
Collections decide which tags each item type offers.
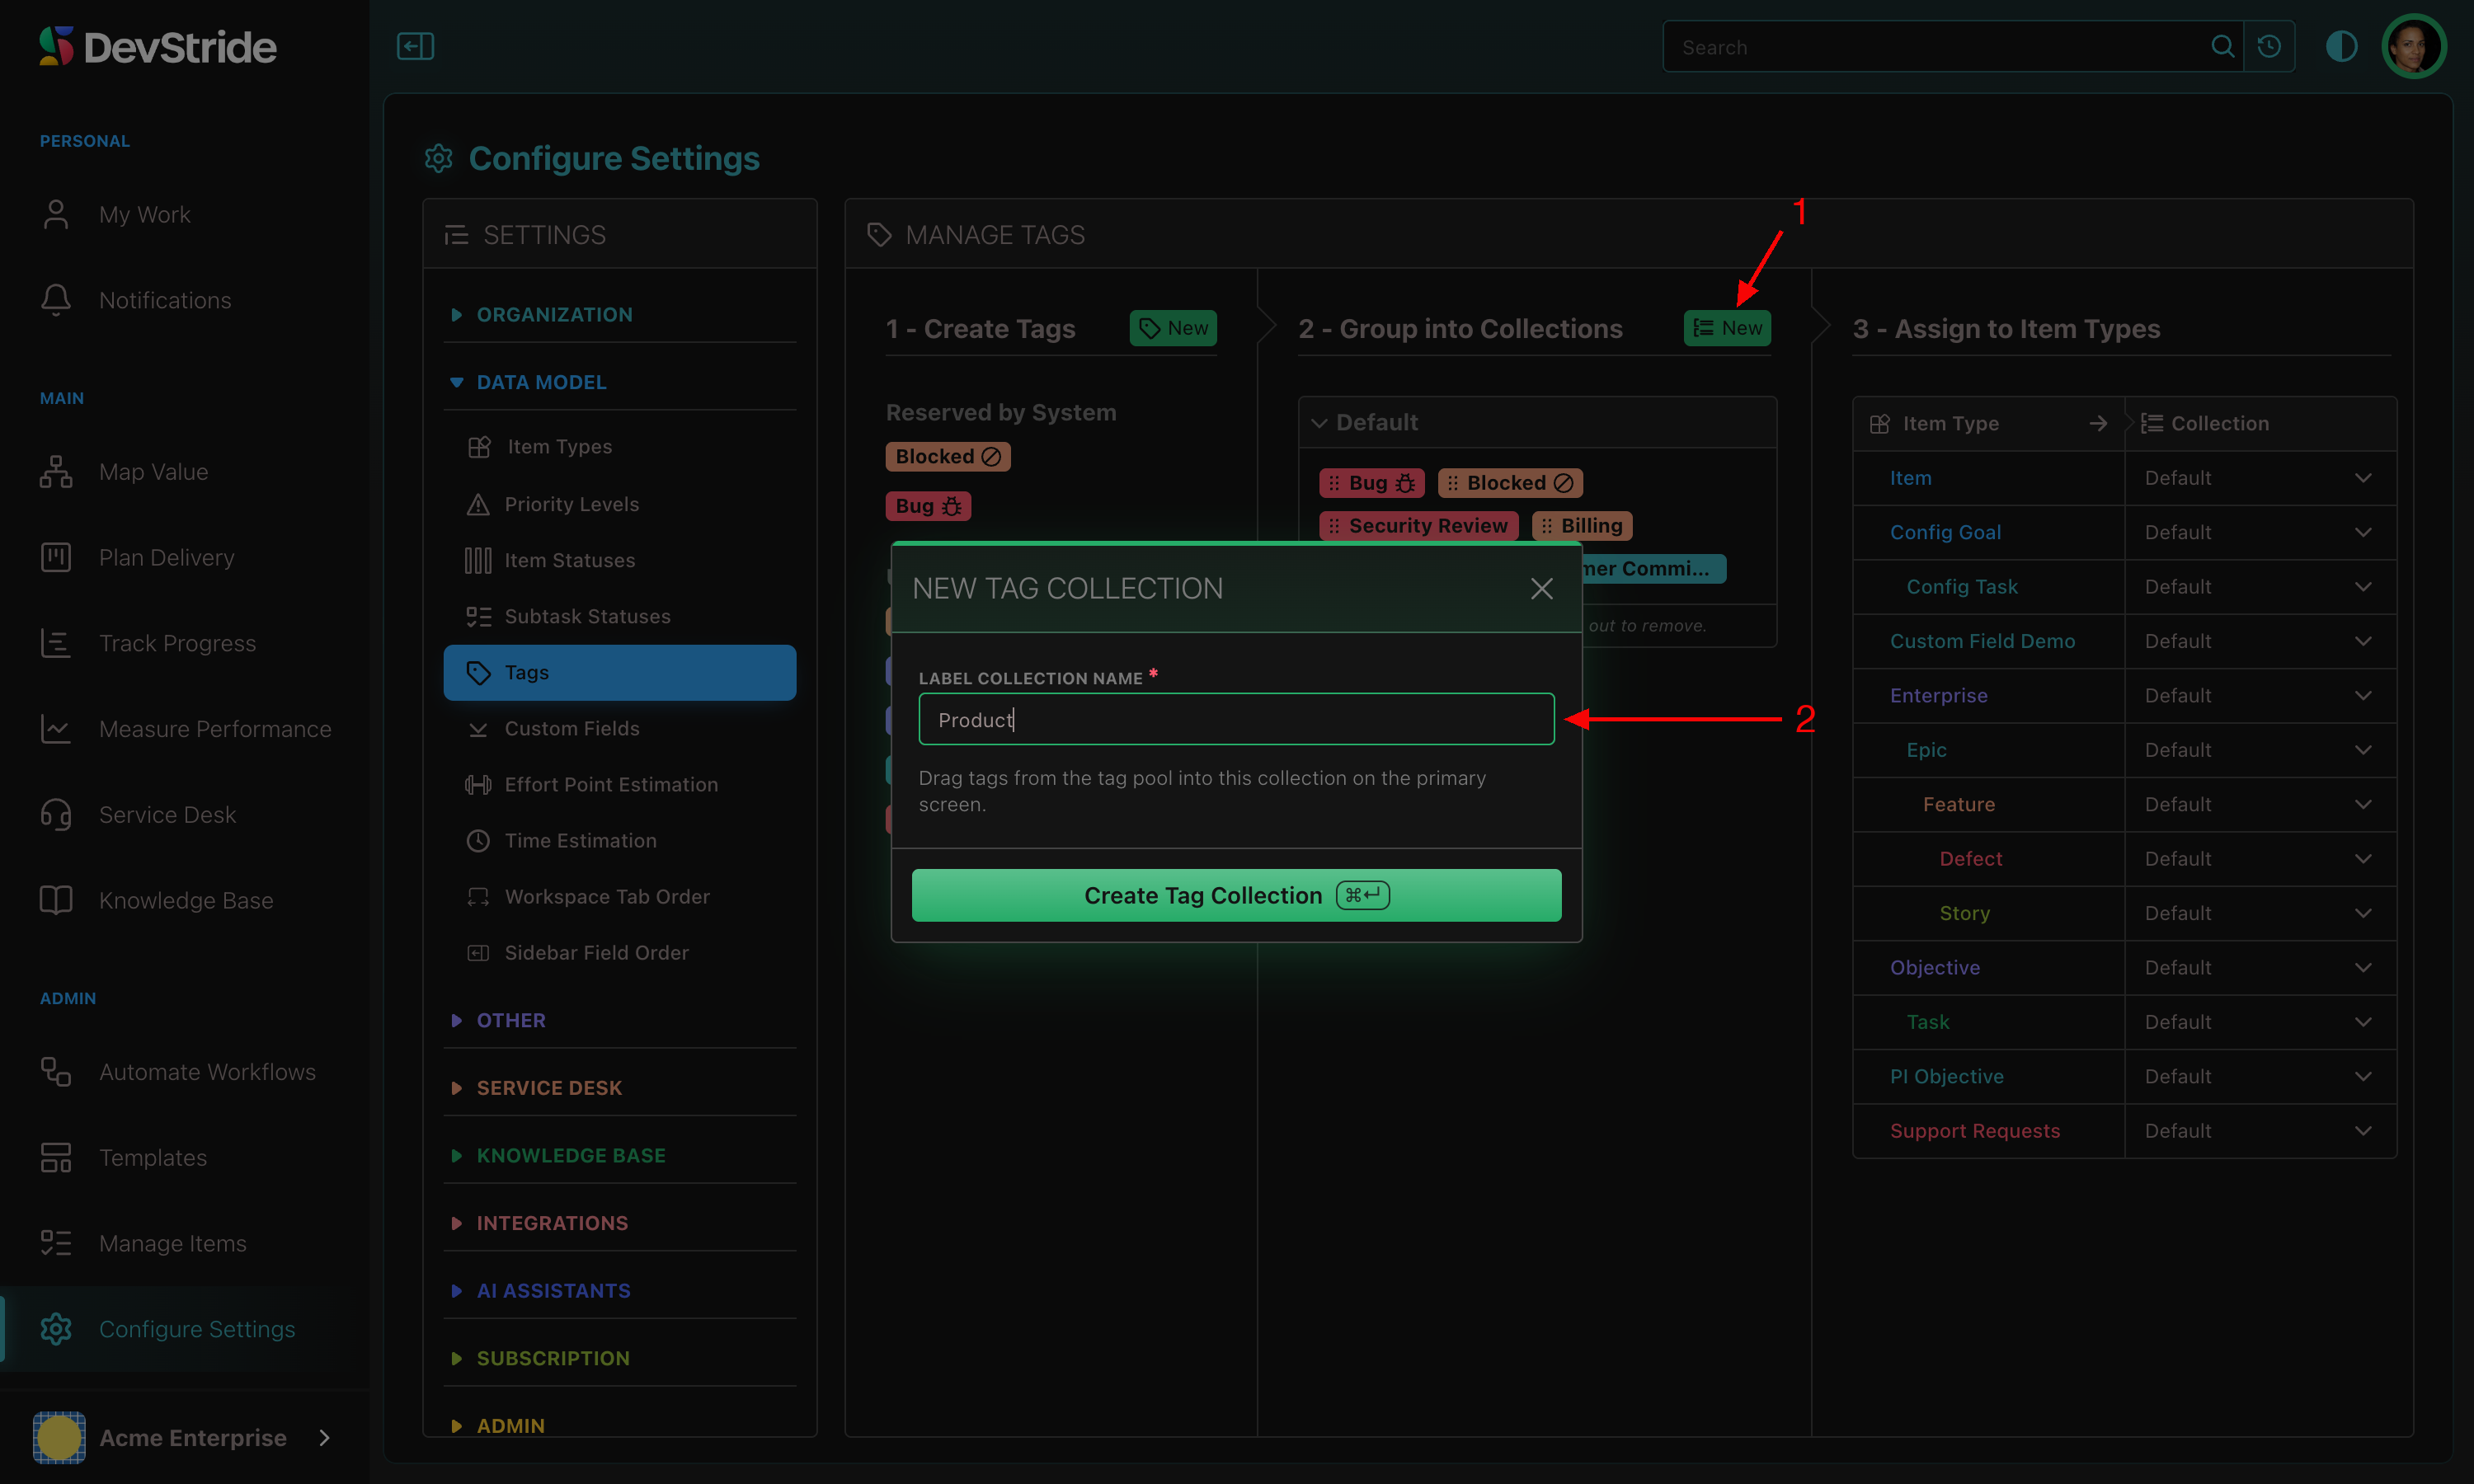
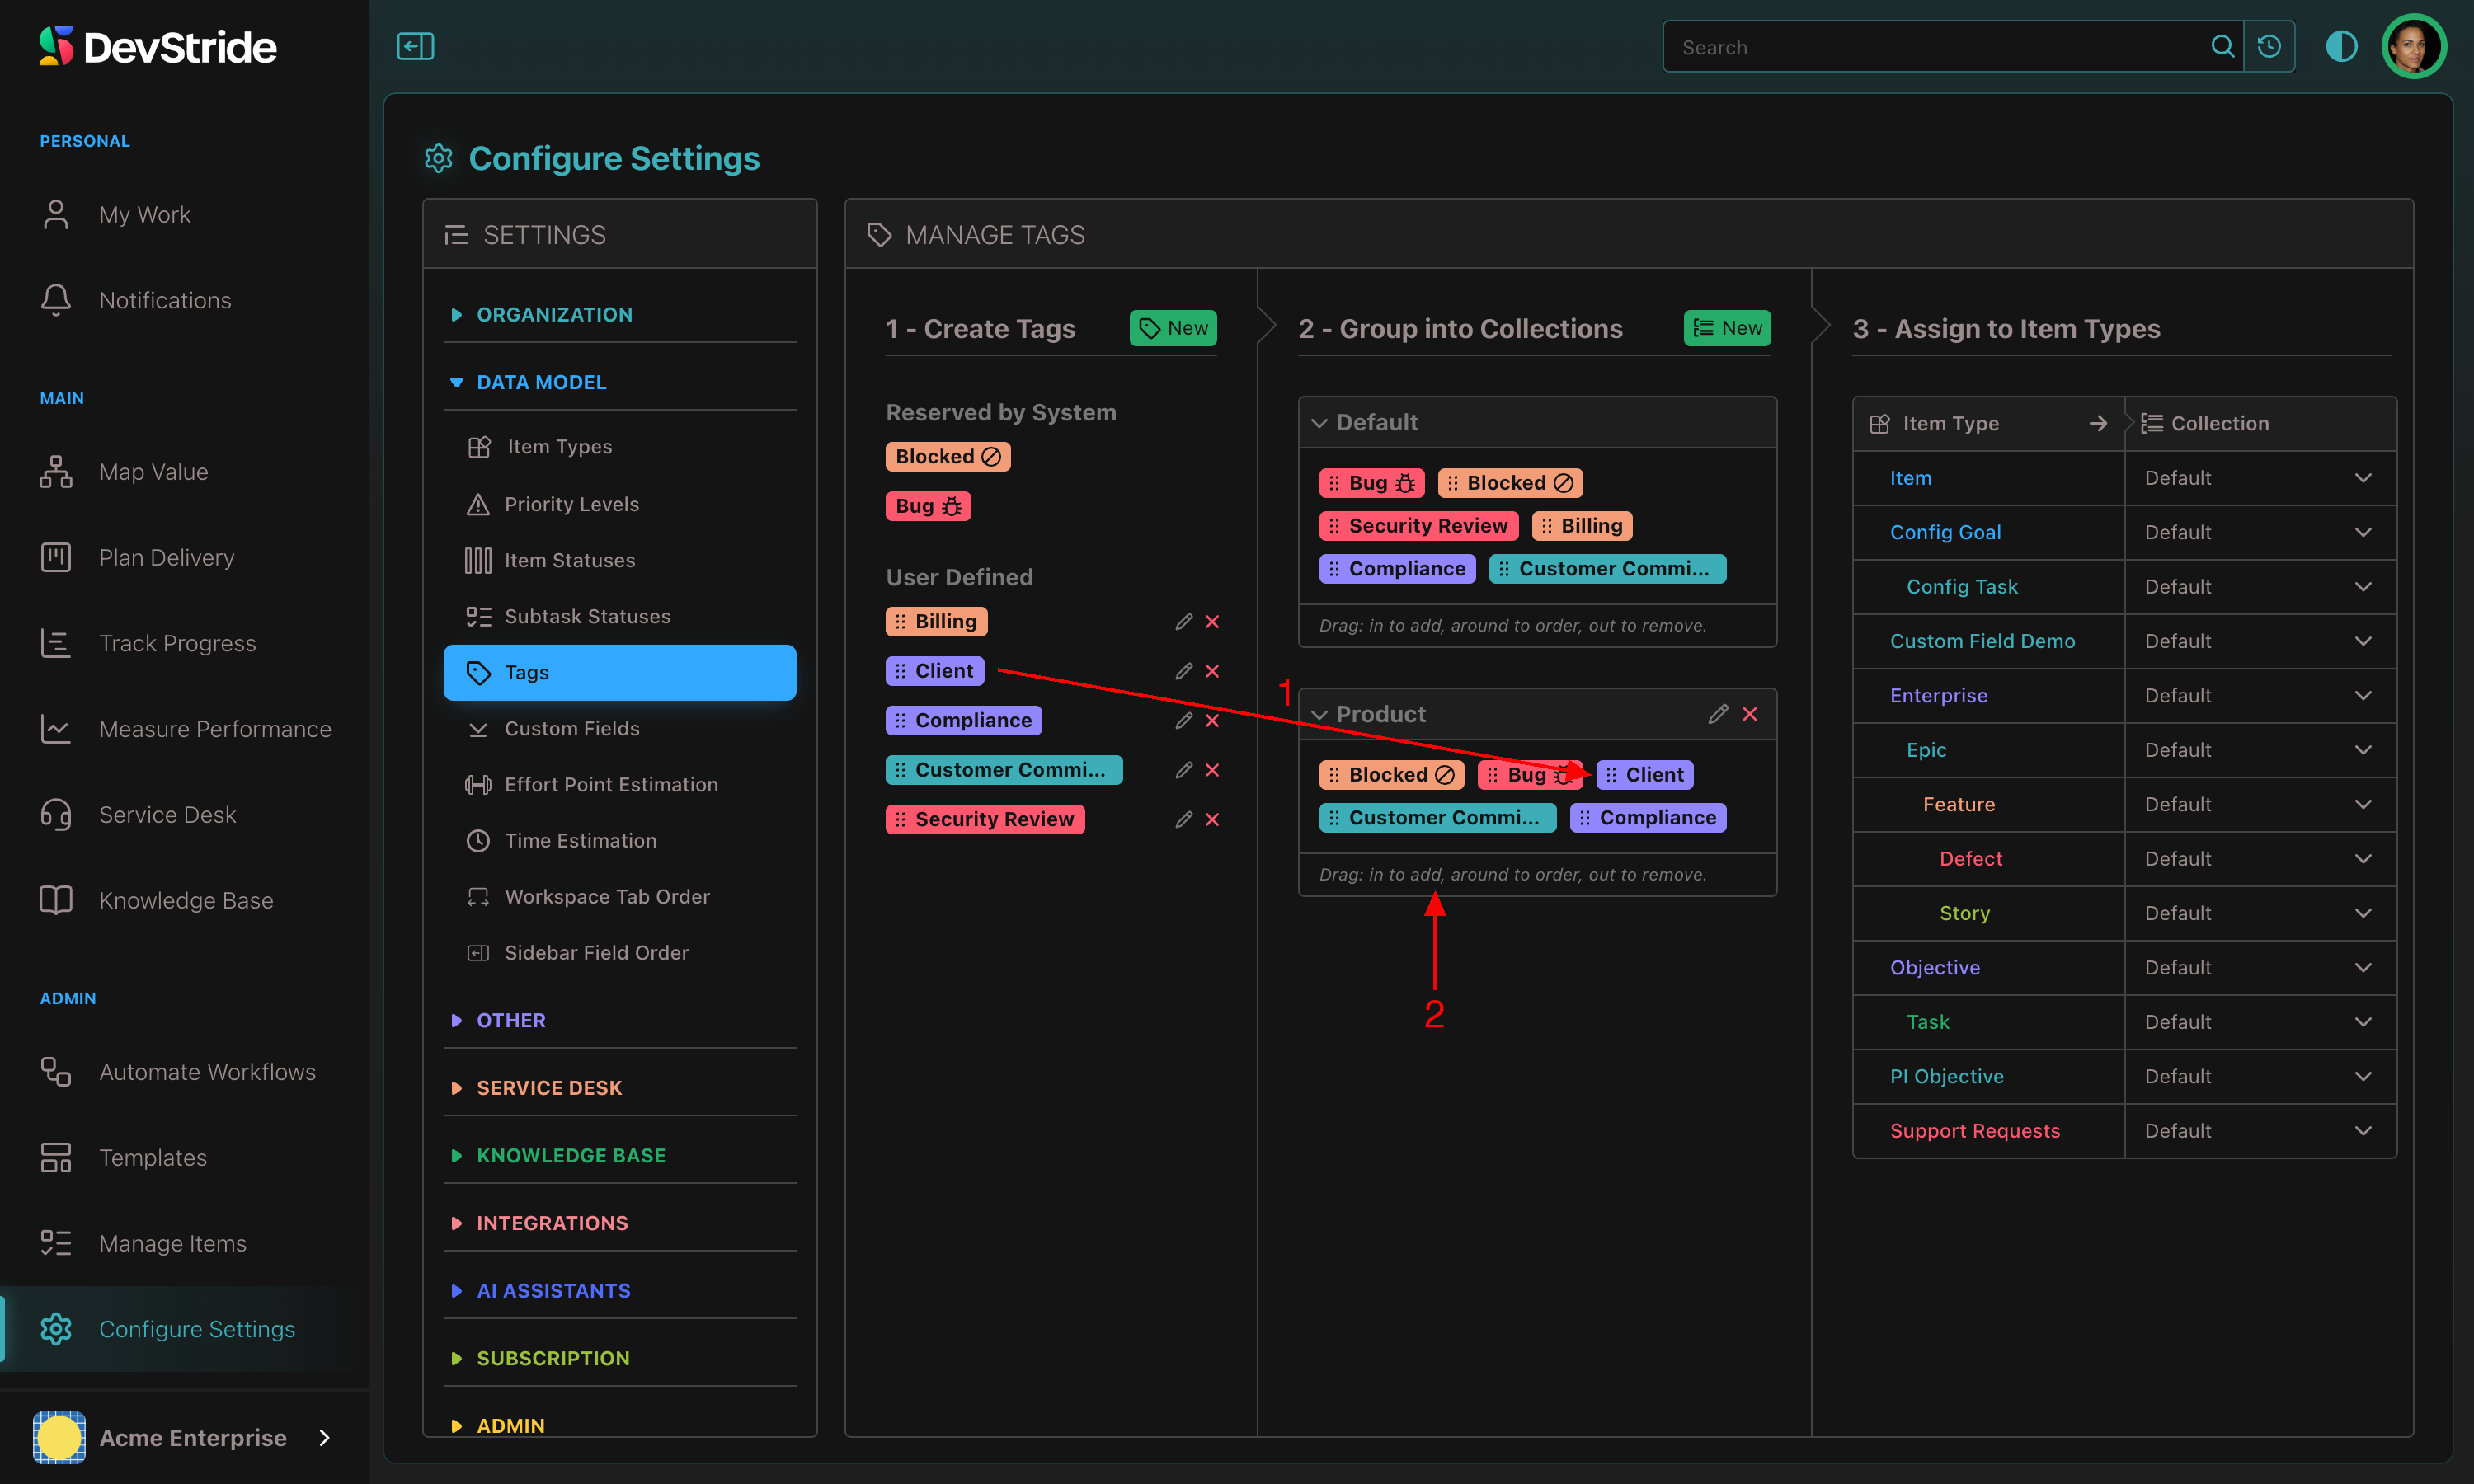
- In 2 - Group into Collections, click New, name the collection (Product), and click Create Tag Collection. The system tags are added automatically and cannot be removed from it.
- Drag the tags you want from the left pane into the collection. Drag to reorder; drag out to remove.
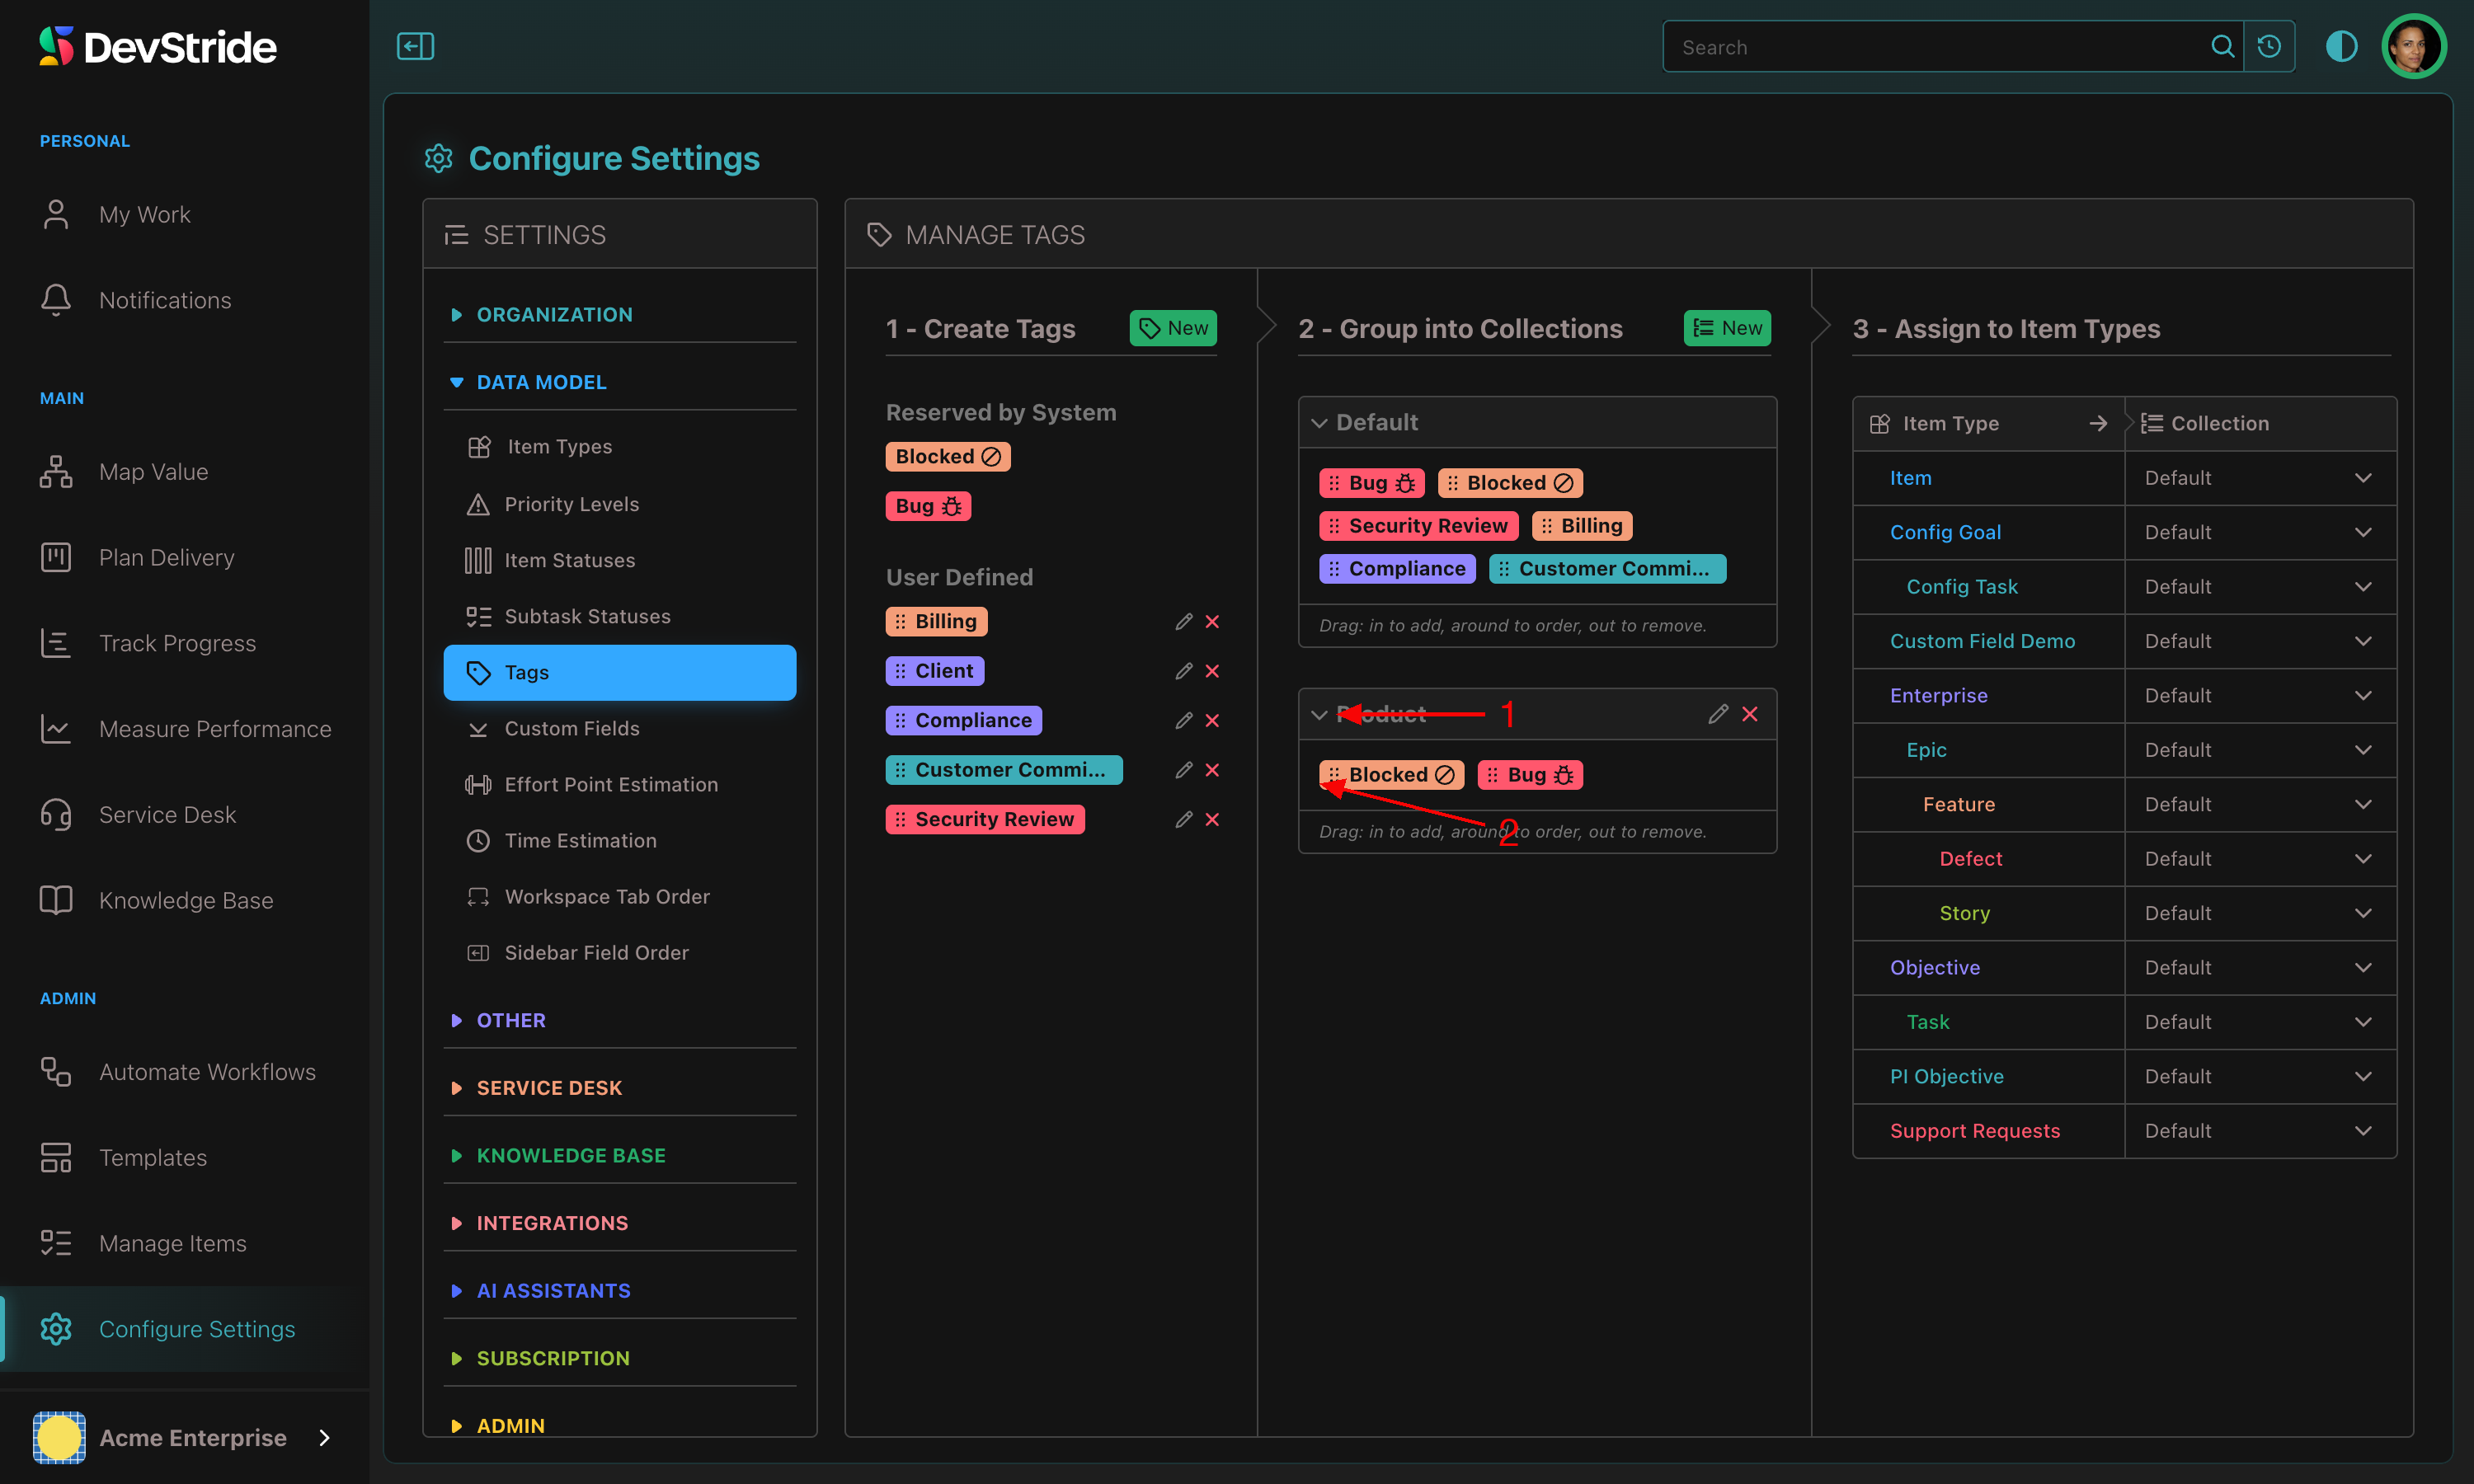
The Default collection (which cannot be renamed or deleted) is what every item type uses until you assign another; tags you add to it are available everywhere.
Step 3: Assign to item types#
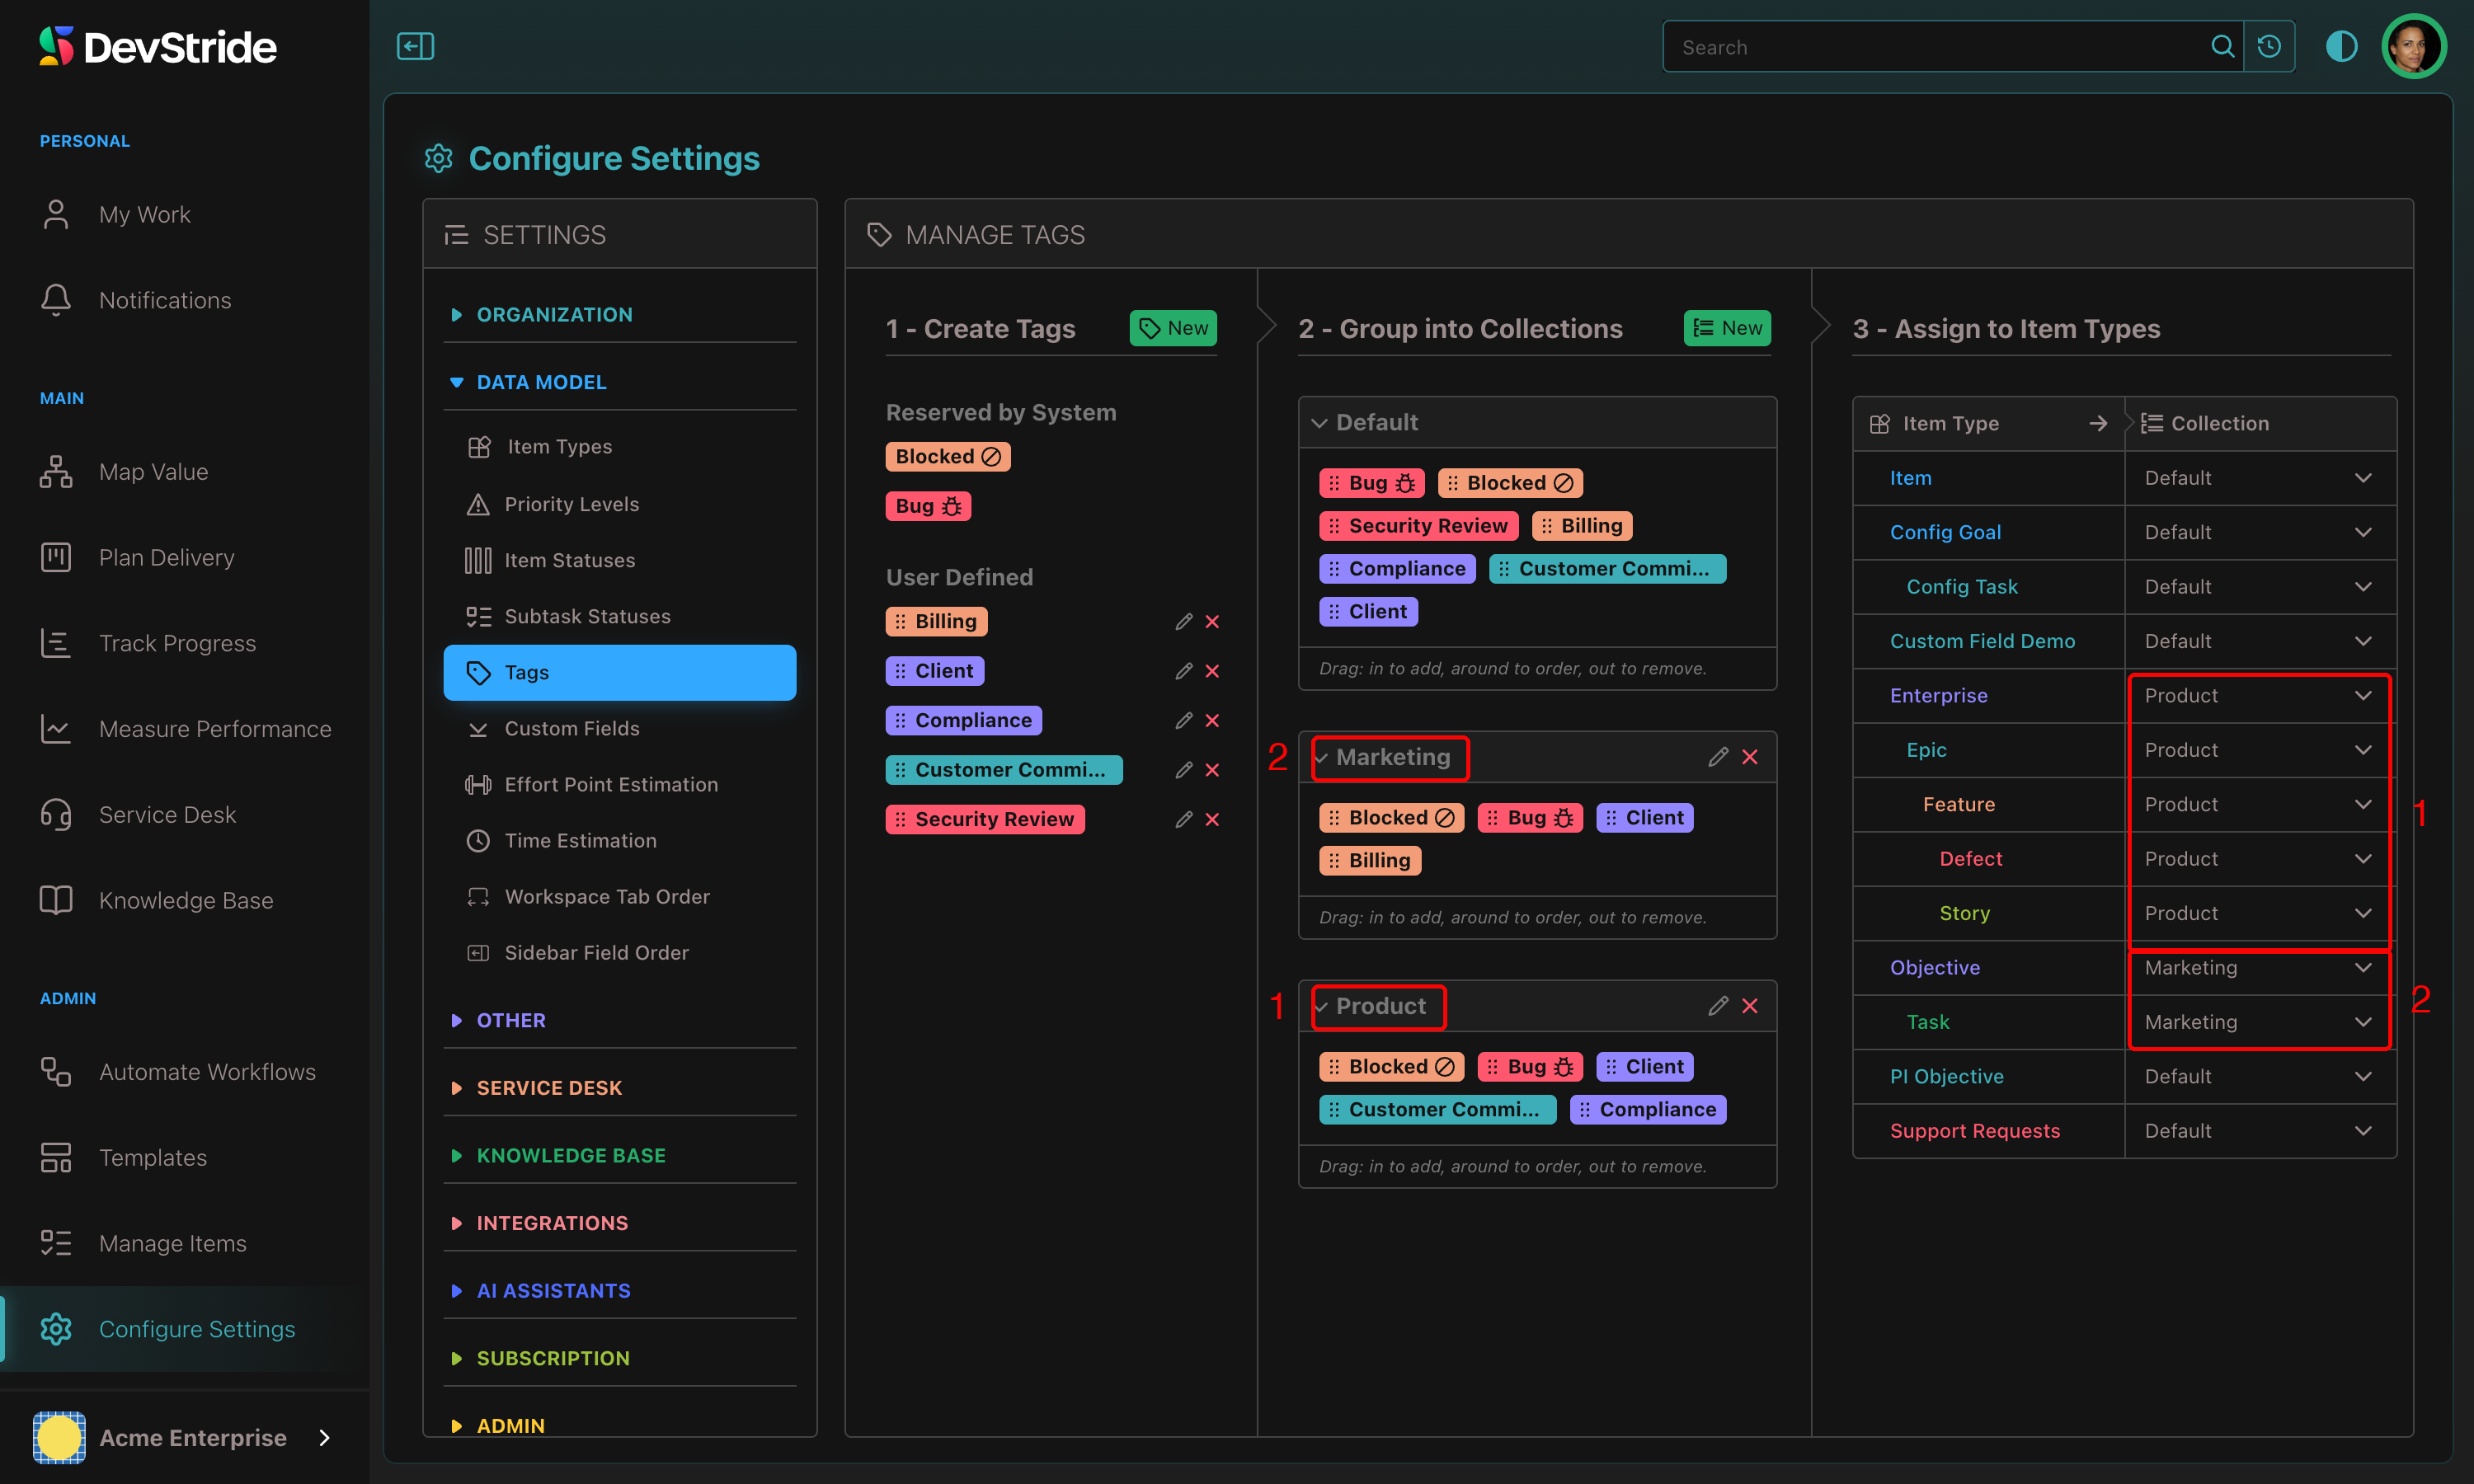
In 3 - Assign to Item Types, choose a collection for each type. Here the Product collection is assigned to the product types and a Marketing collection to the marketing types.
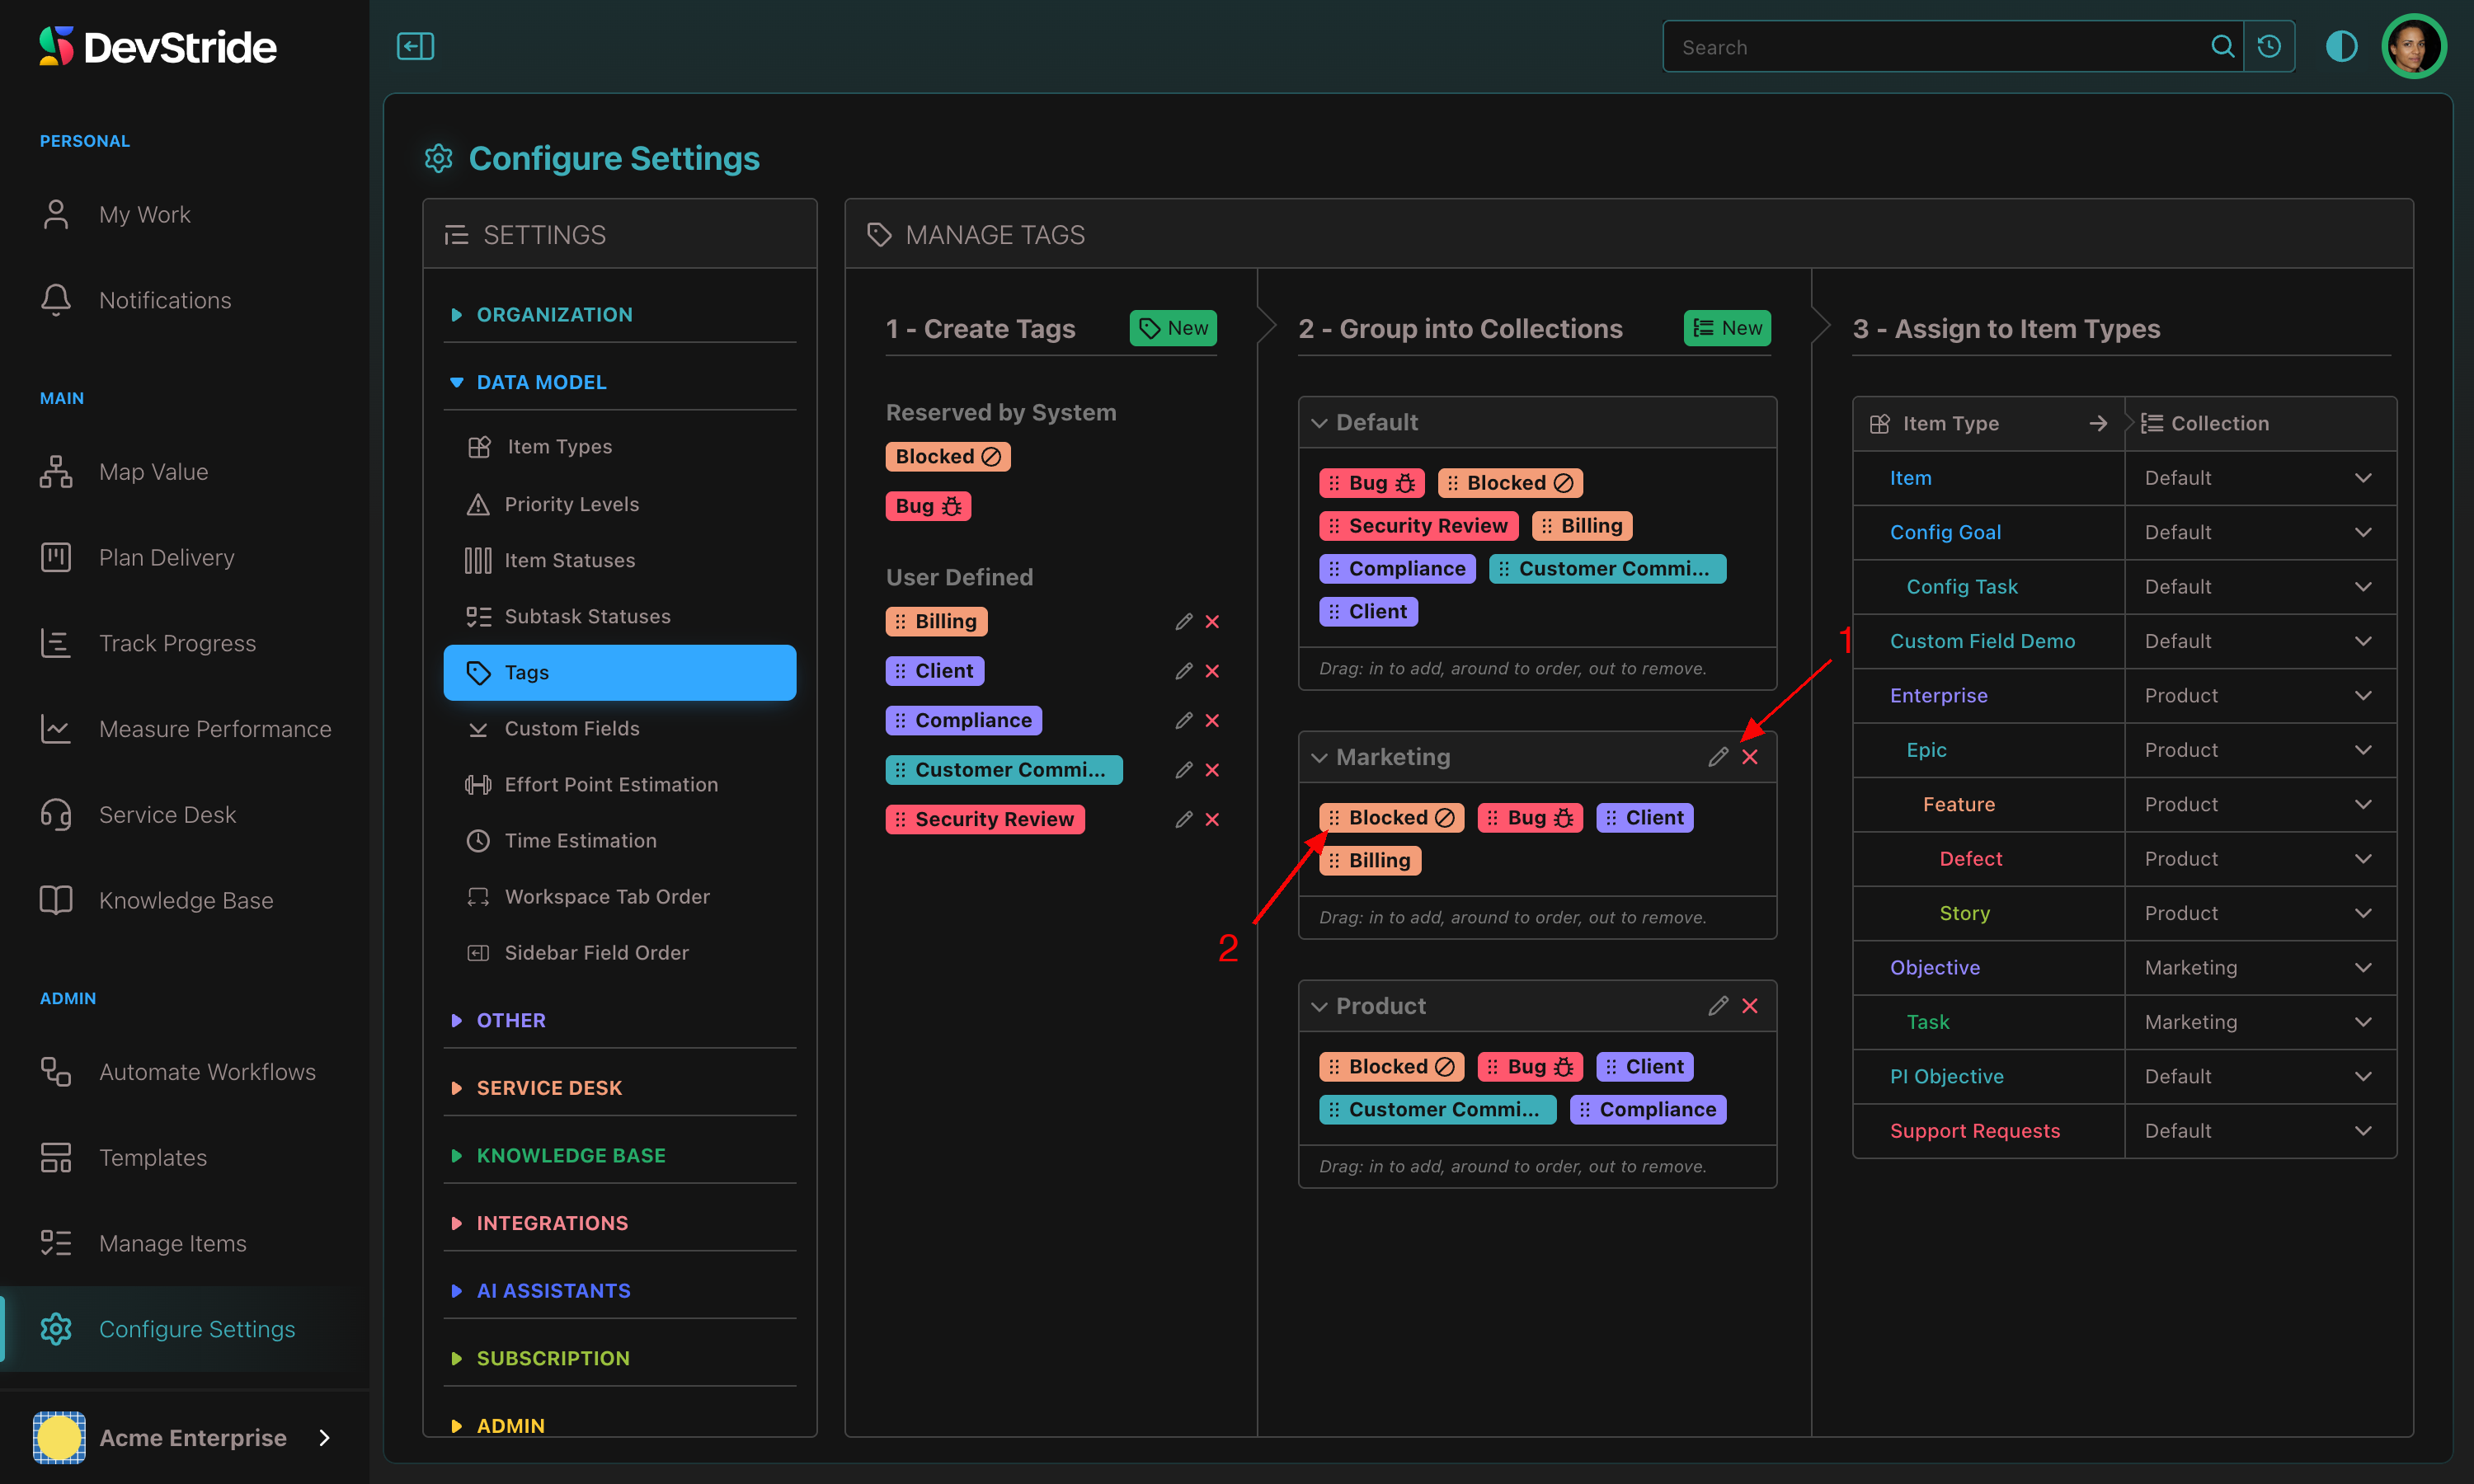
Edit a collection's name with the pencil or remove it with the x; the grab bars reorder tags inside it.
Next: Creating and Managing Forms, or skip ahead to Statuses if you do not need intake forms yet.