
Admin Onboarding - Item Workspace - Right Bar: Priority
Step 7i of admin onboarding — define priority levels, group them into collections with a default level, assign a collection per item type, and use priority in boards, filters, and automations.
On this page
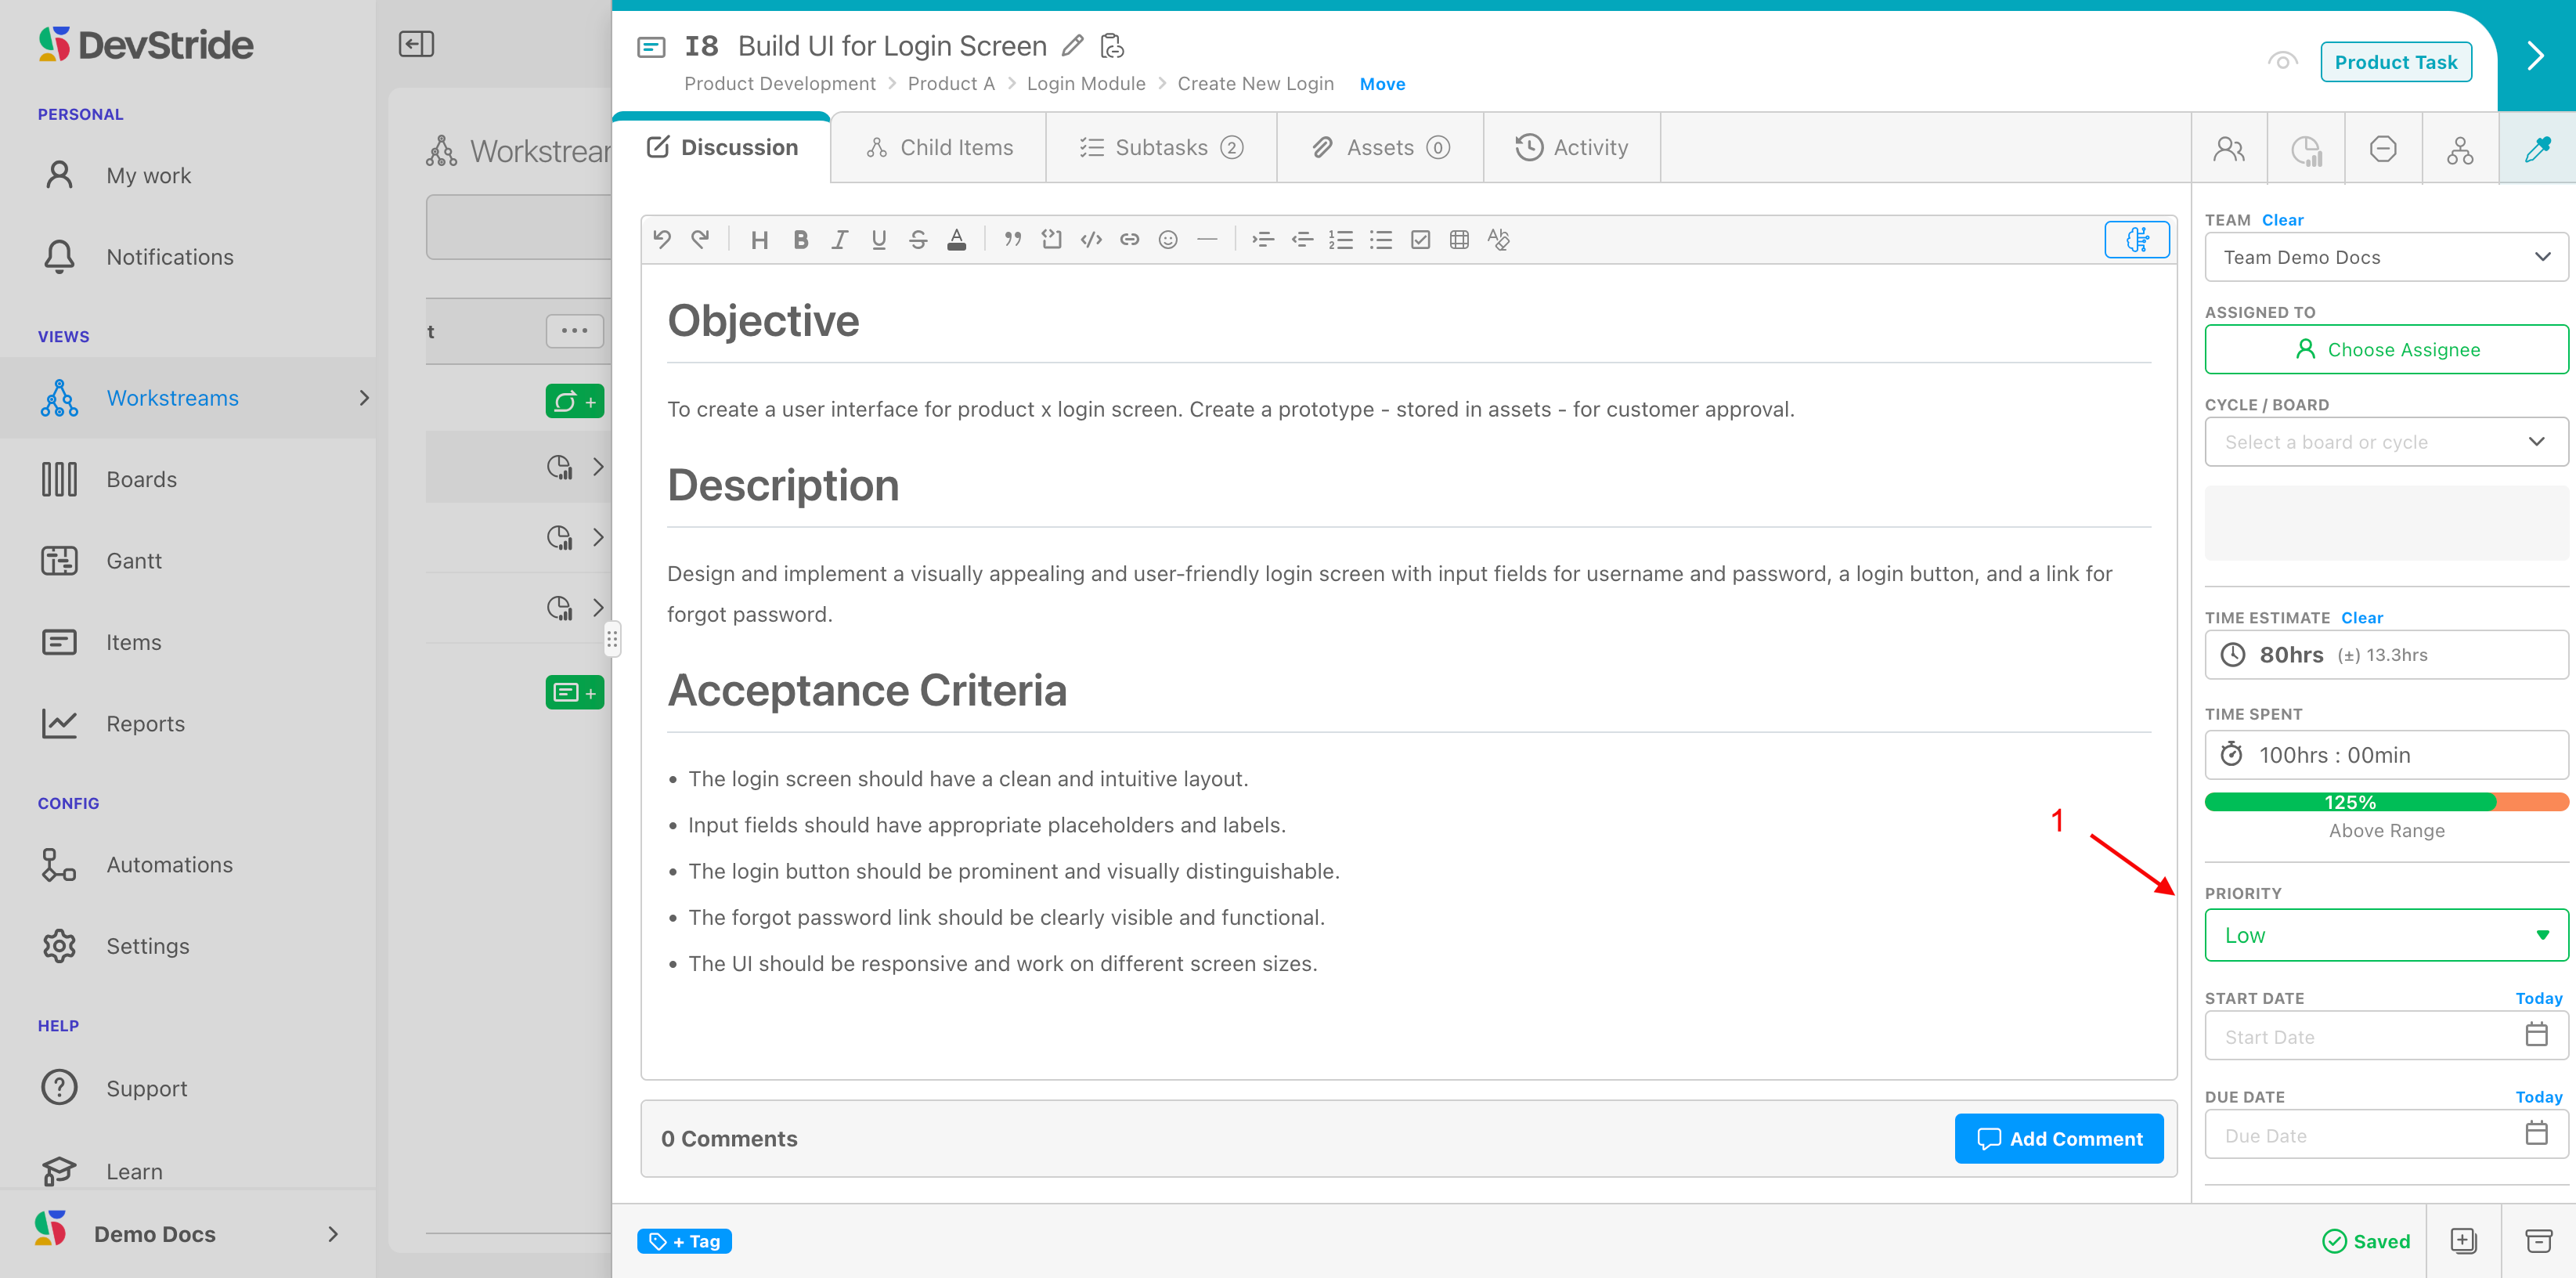
Priority is a ranked label on every item. DevStride starts you with Low, Normal, High, and Critical, with Normal as the default. Keep those for most types and add a specialised collection only where a type needs different language, such as SLA response tiers for support tickets.
Step 1: Create levels#
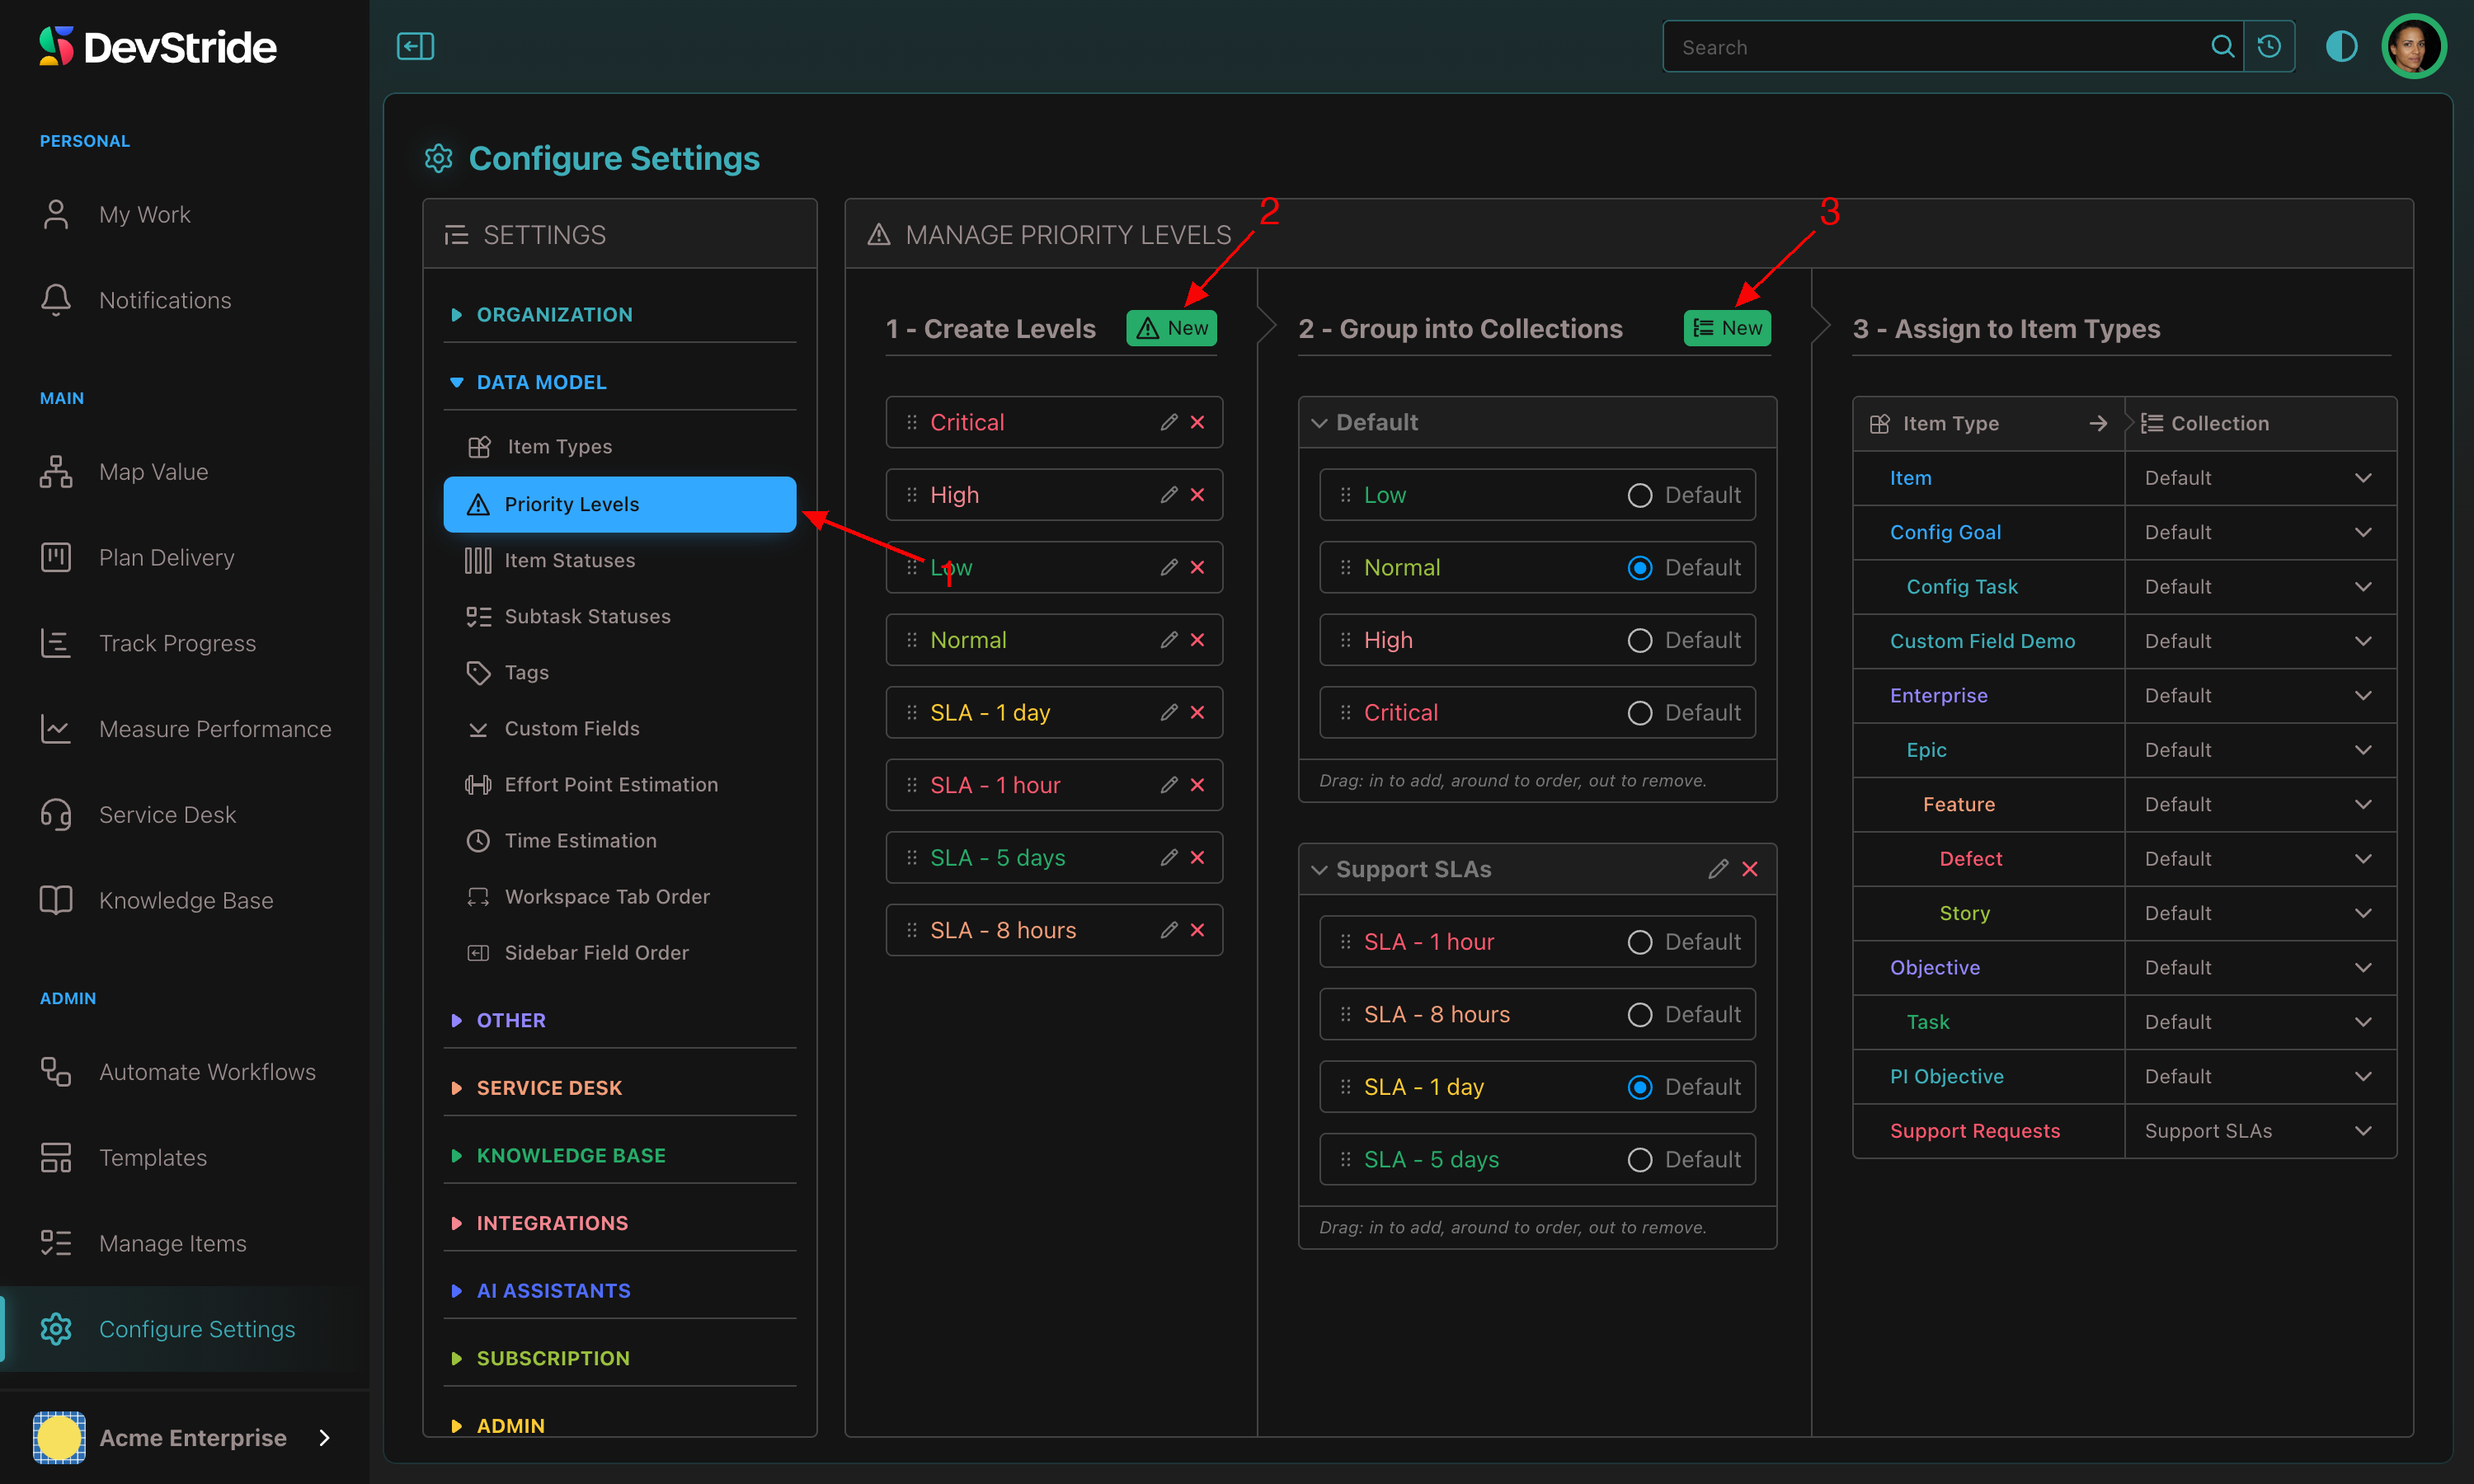
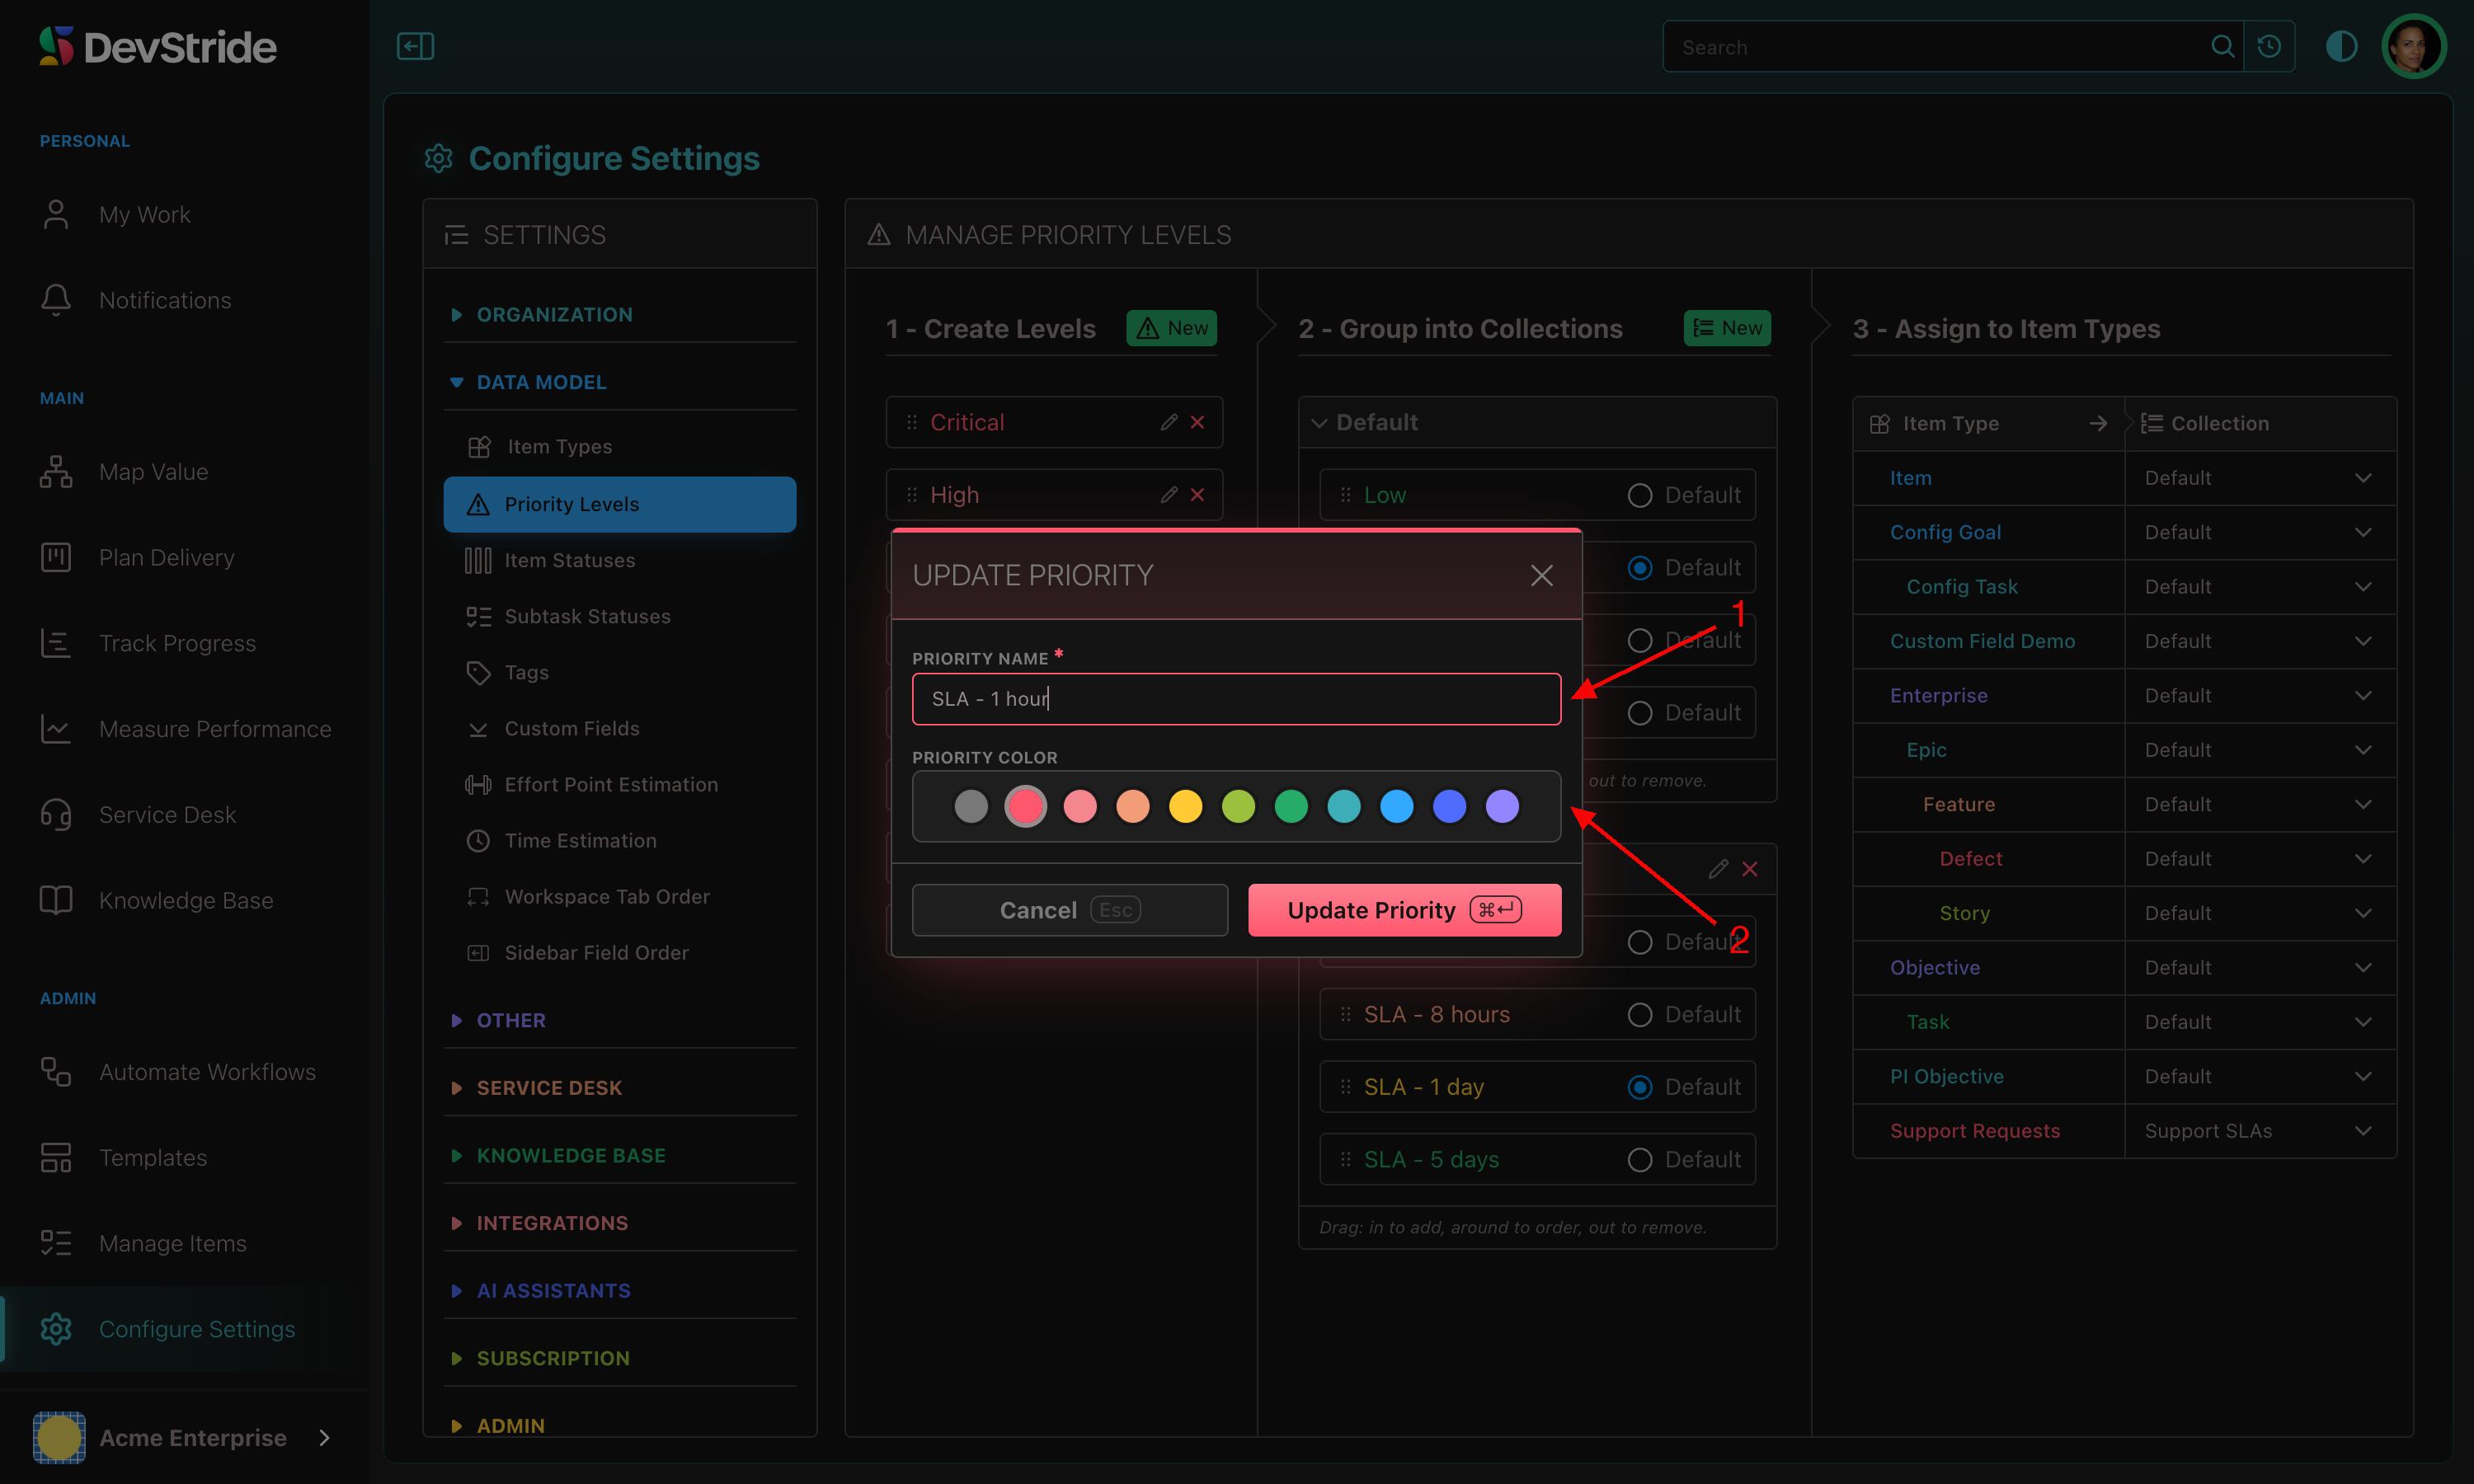
Open Configure Settings → Data Model → Priority Levels. Next to 1 - Create Levels, click New and enter a Priority Name and Priority Color. The left pane is the pool of all levels available to any collection.
Step 2: Group into collections#
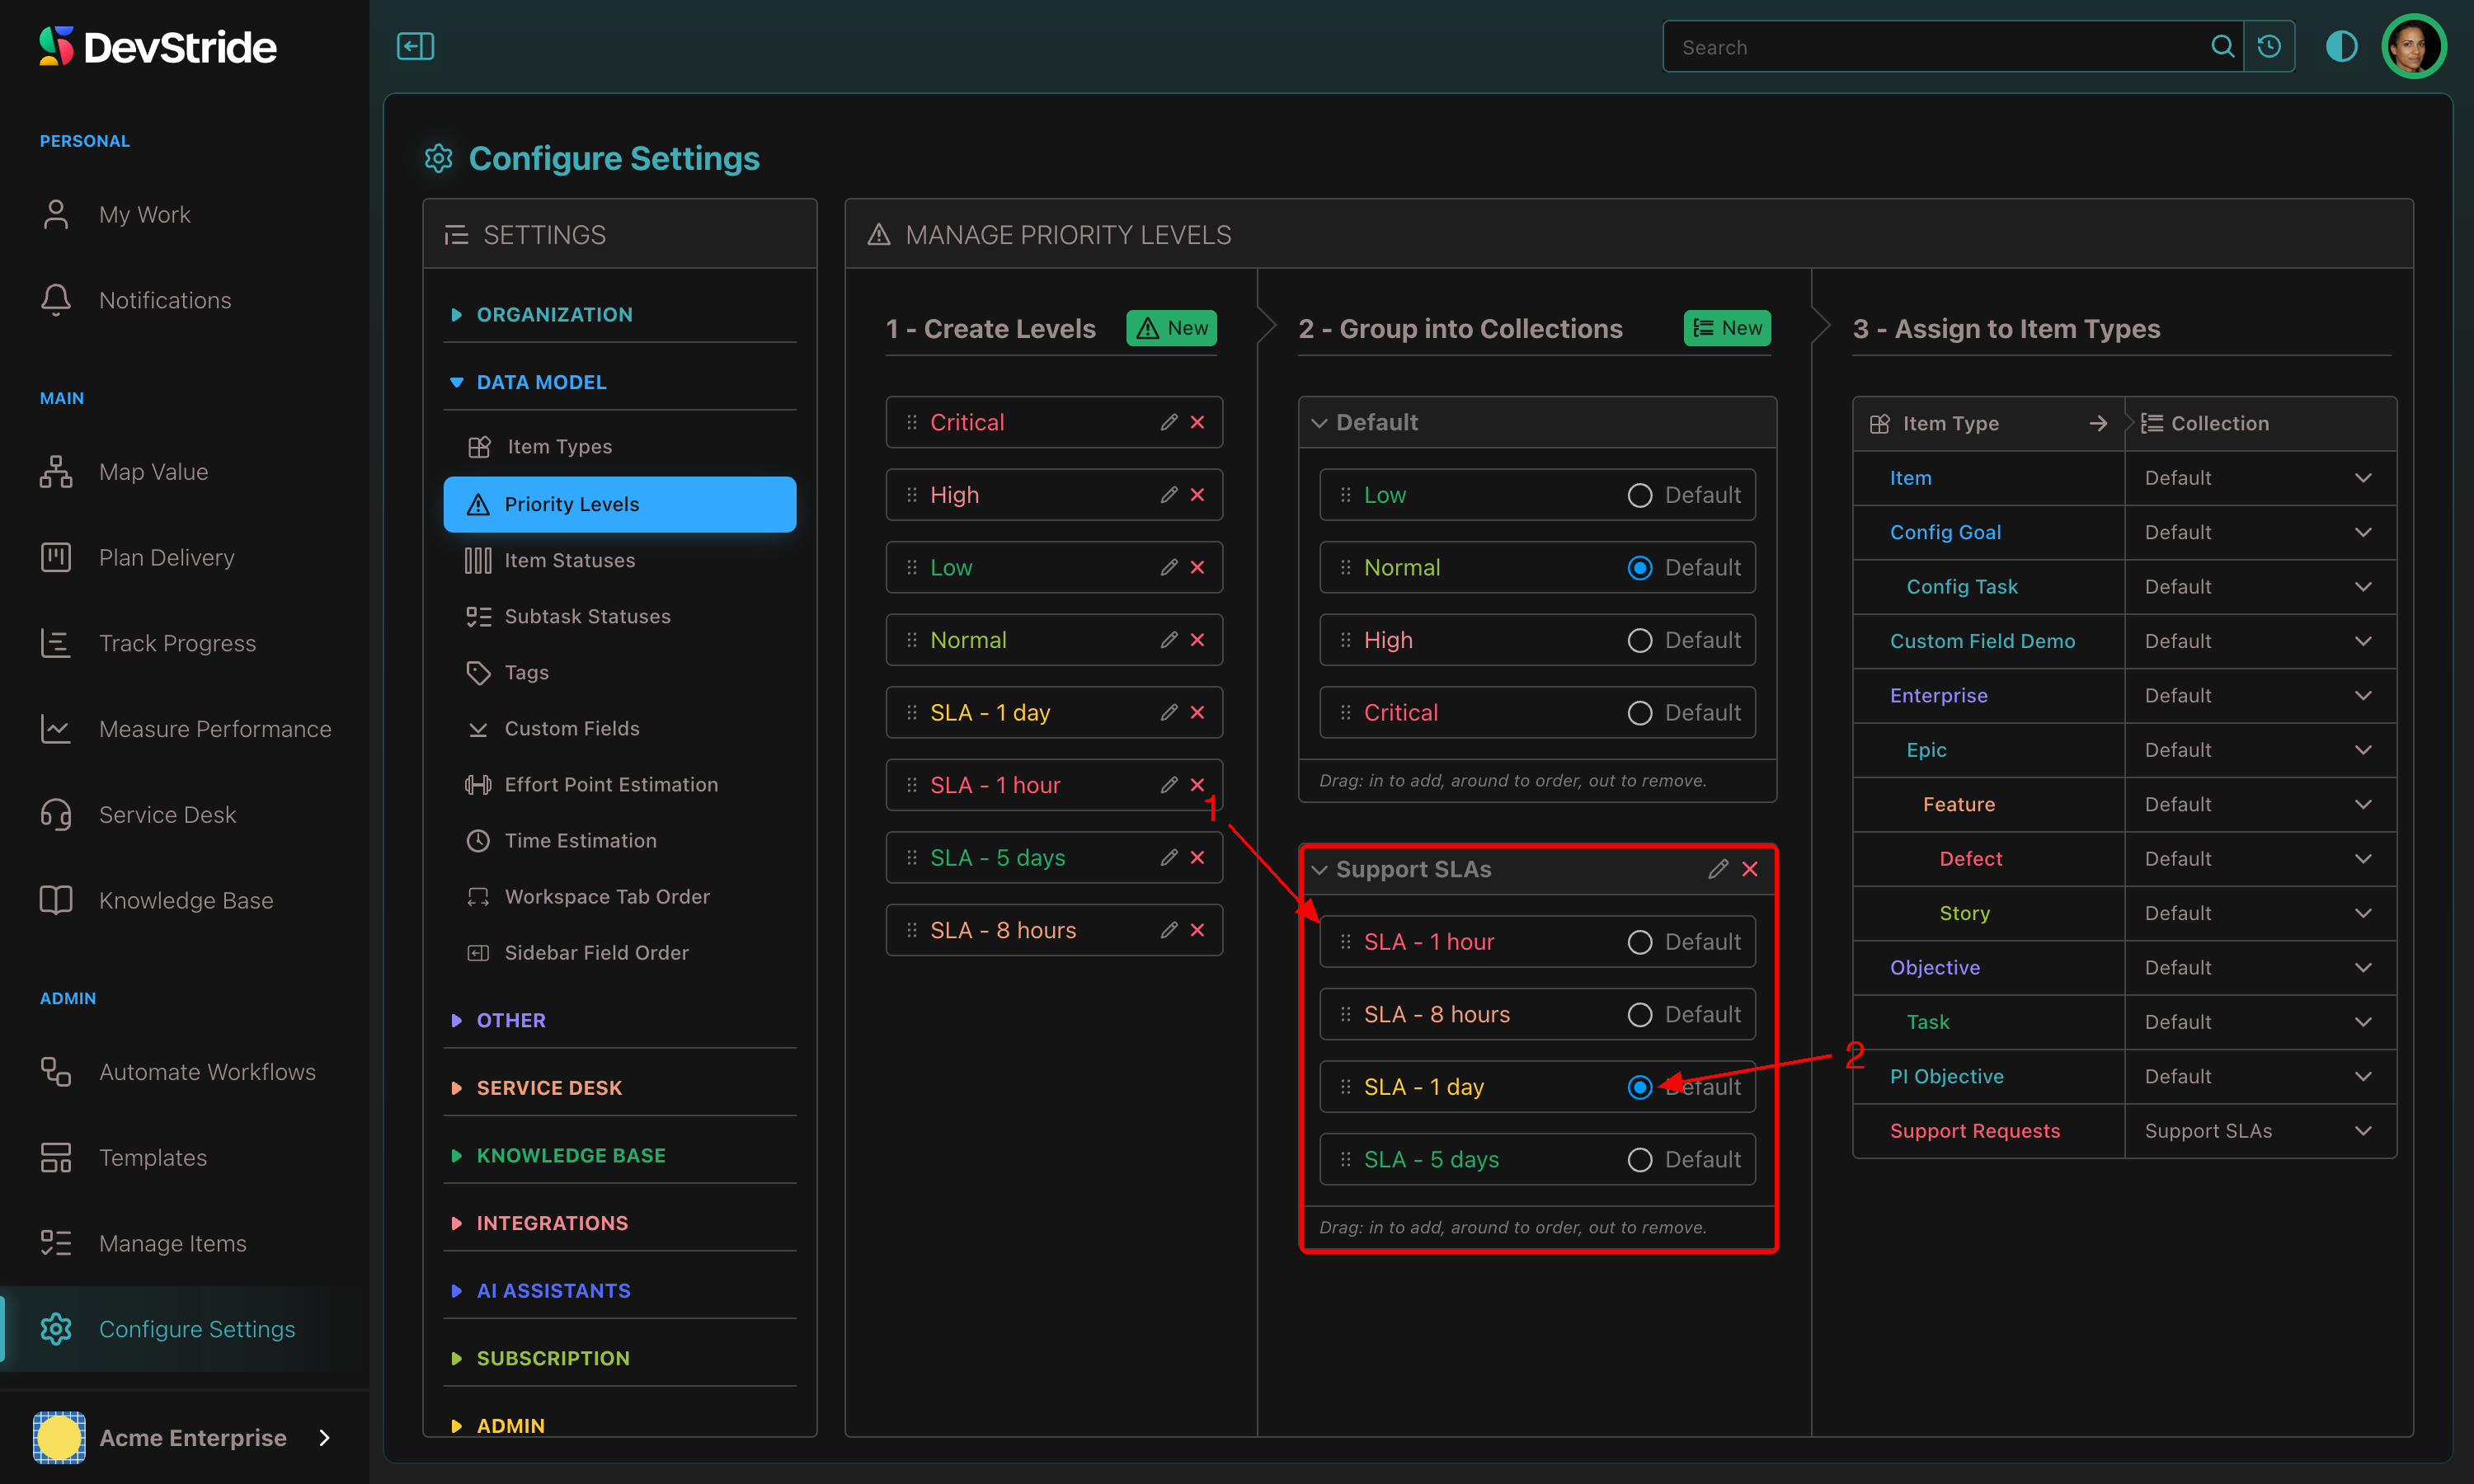
Click New next to the collections pane (New Priority Collection), name it, and drag levels in from the pool. Mark one level as the collection's Default; every new item of a type using this collection starts at that level. Drag to reorder.
Step 3: Assign to item types#
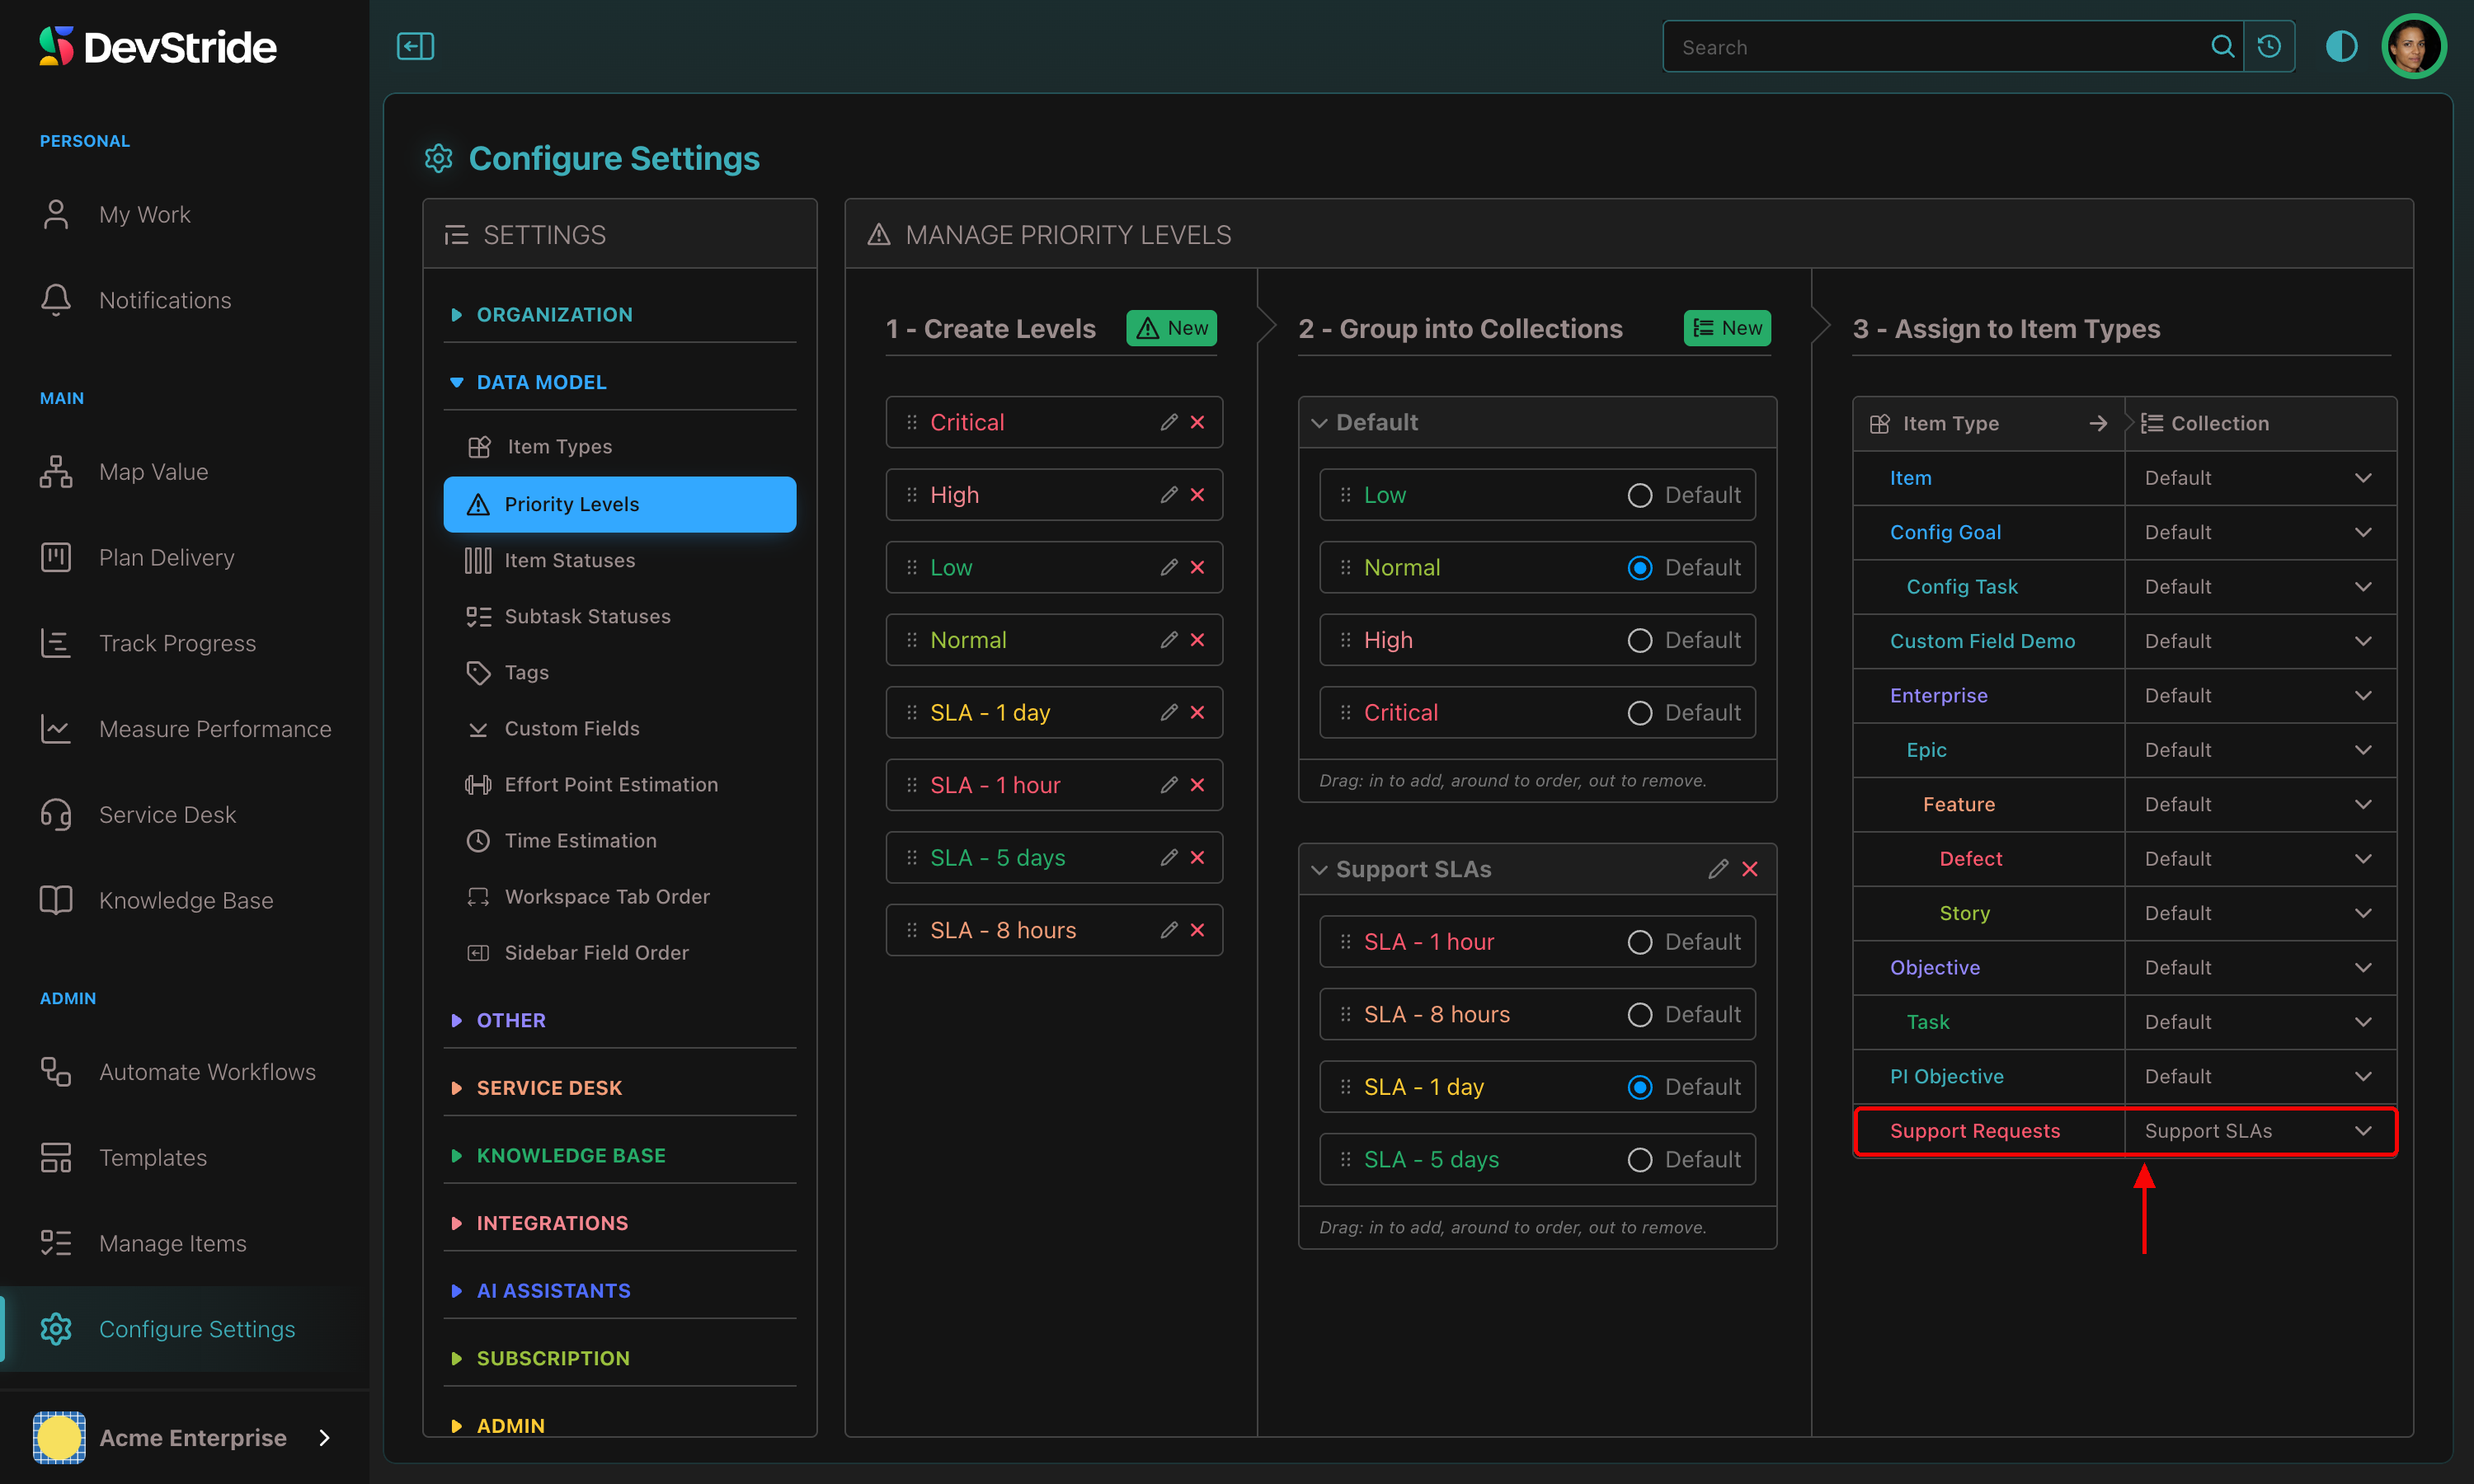
Choose a collection for each item type. Items of that type now offer those levels everywhere.
Edit a level with the pencil; the change applies to every item using it. Removing a level from a collection resets items at that level to the collection's first level, after a confirmation.
Where priority shows up#
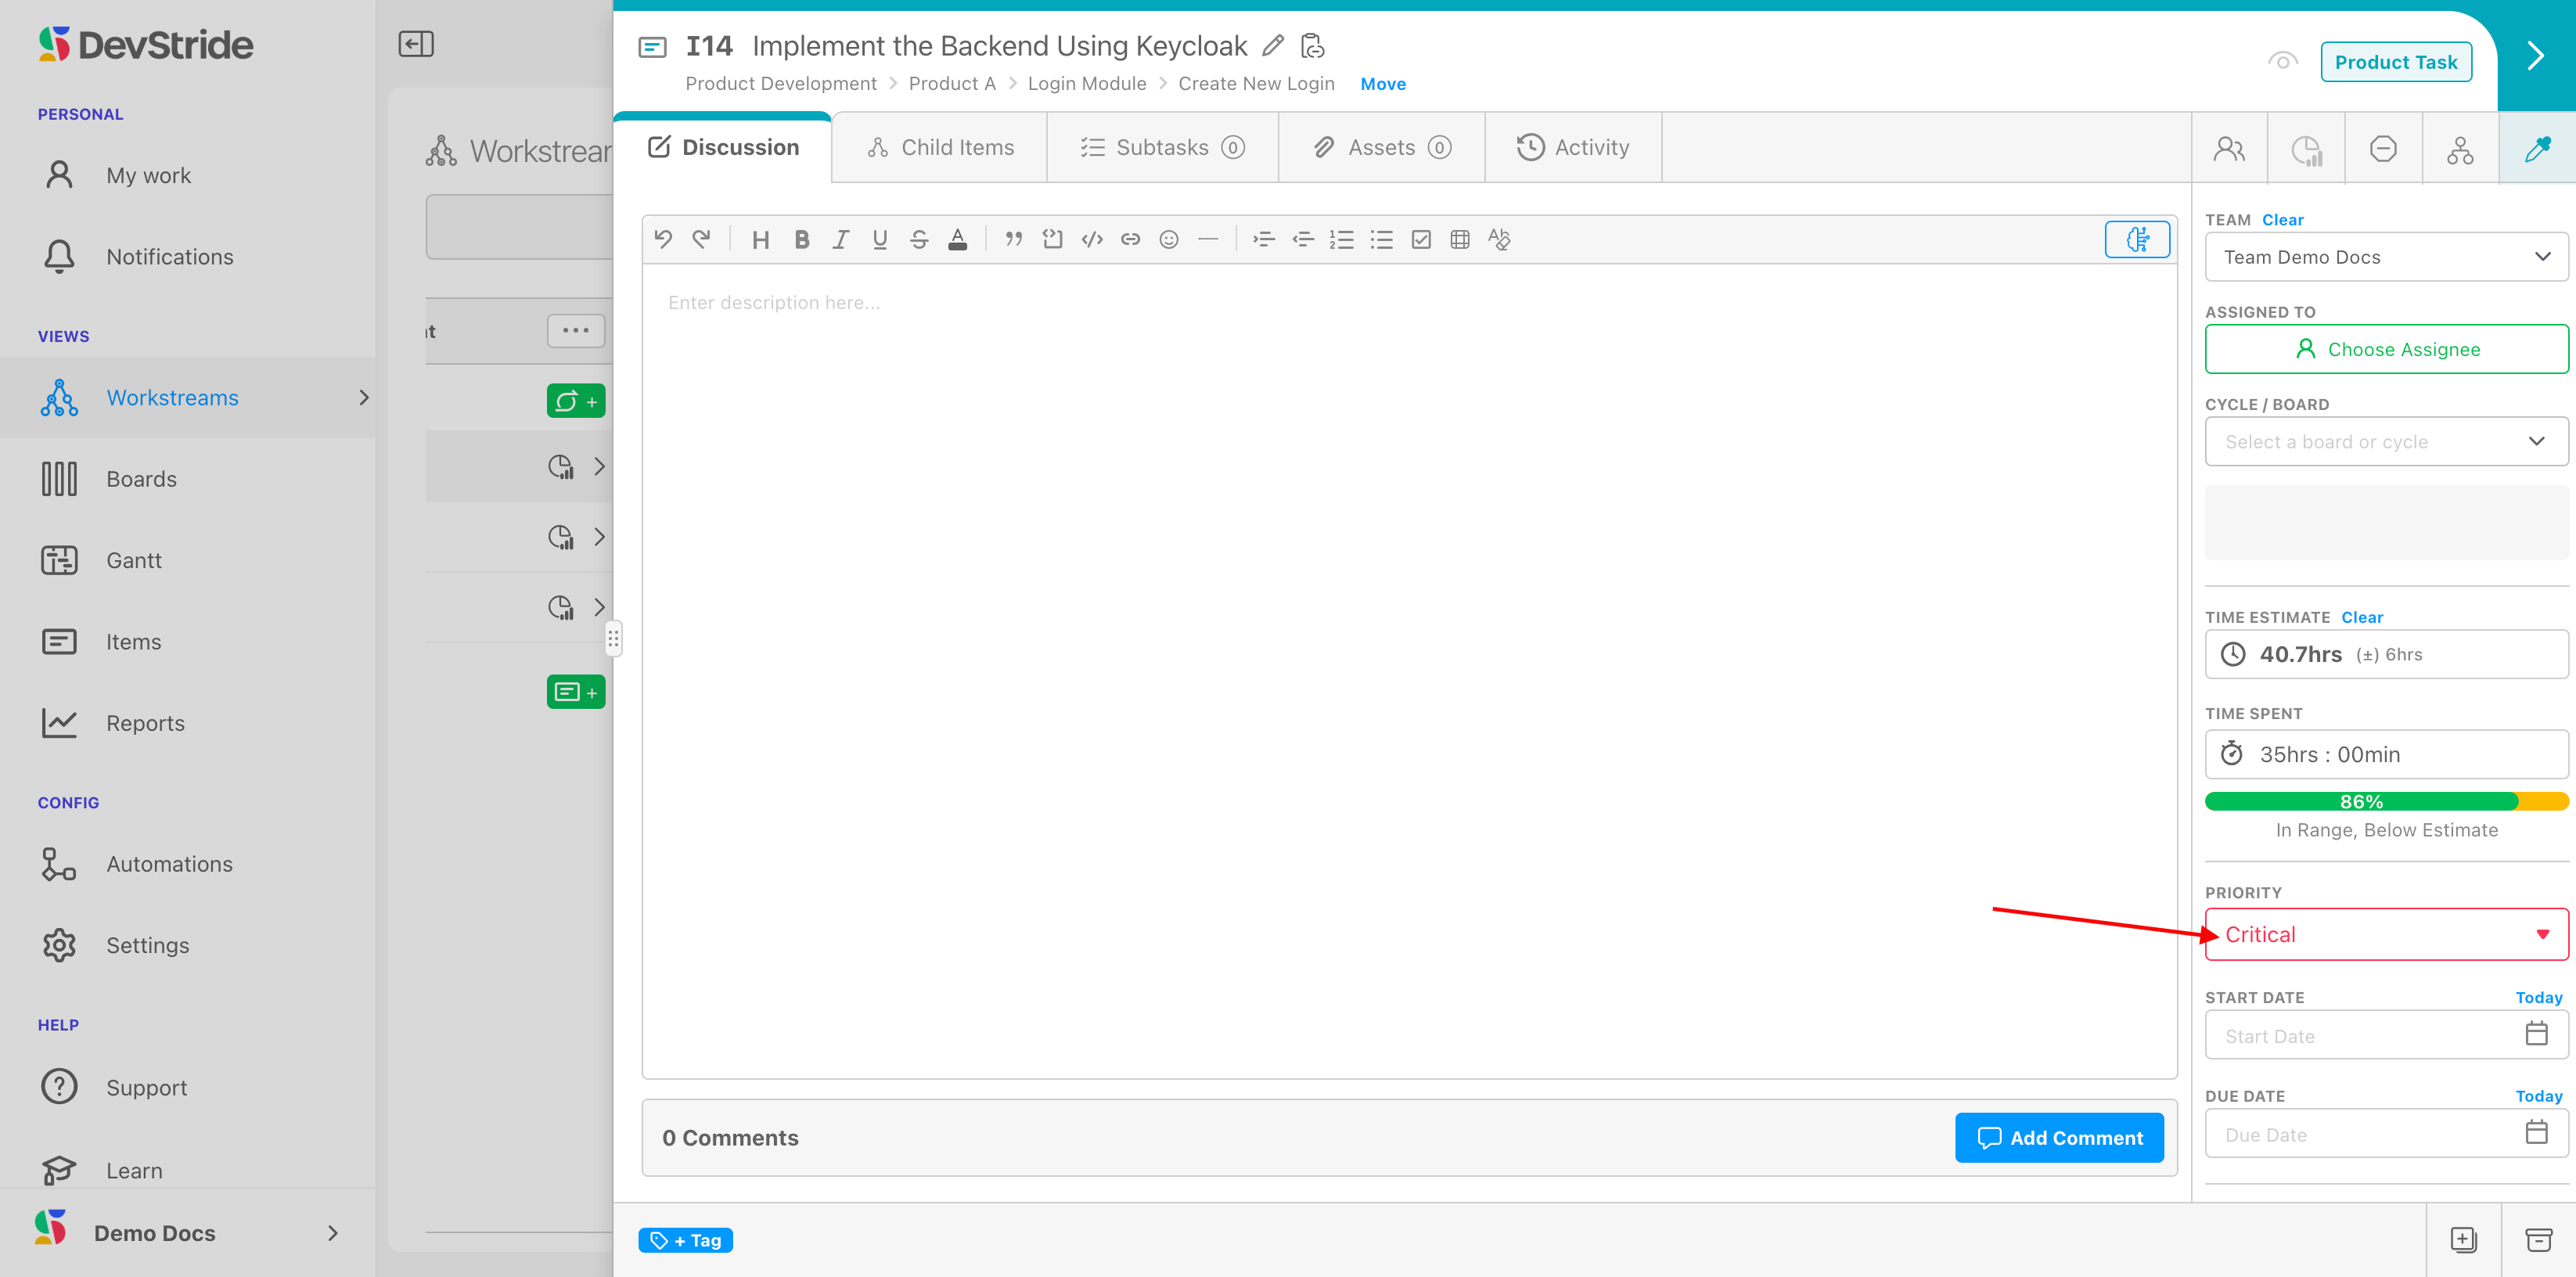
On the item (Select Priority), as a column and filter in tables and boards, in reports, and as a trigger or condition in automations: a change to Critical can notify a channel or reassign the item.
Example: SLA tiers
An organization with support SLAs created a collection of levels named for response times, SLA - 1 hour in red through SLA - 5 days, and assigned it to the Ticket type only. Engineering types kept the standard four. The Service Desk module has its own SLA policies if you need clocks rather than labels.
Next: Start Dates and Due Dates.