Admin Onboarding - Setting Up Cadences and Timeboxes
Step 10b of admin onboarding — create a planning cadence (label, frequency, label template, parent, colour), nest a child cadence, and generate timeboxes with their dates, including child timeboxes in one go.
On this page
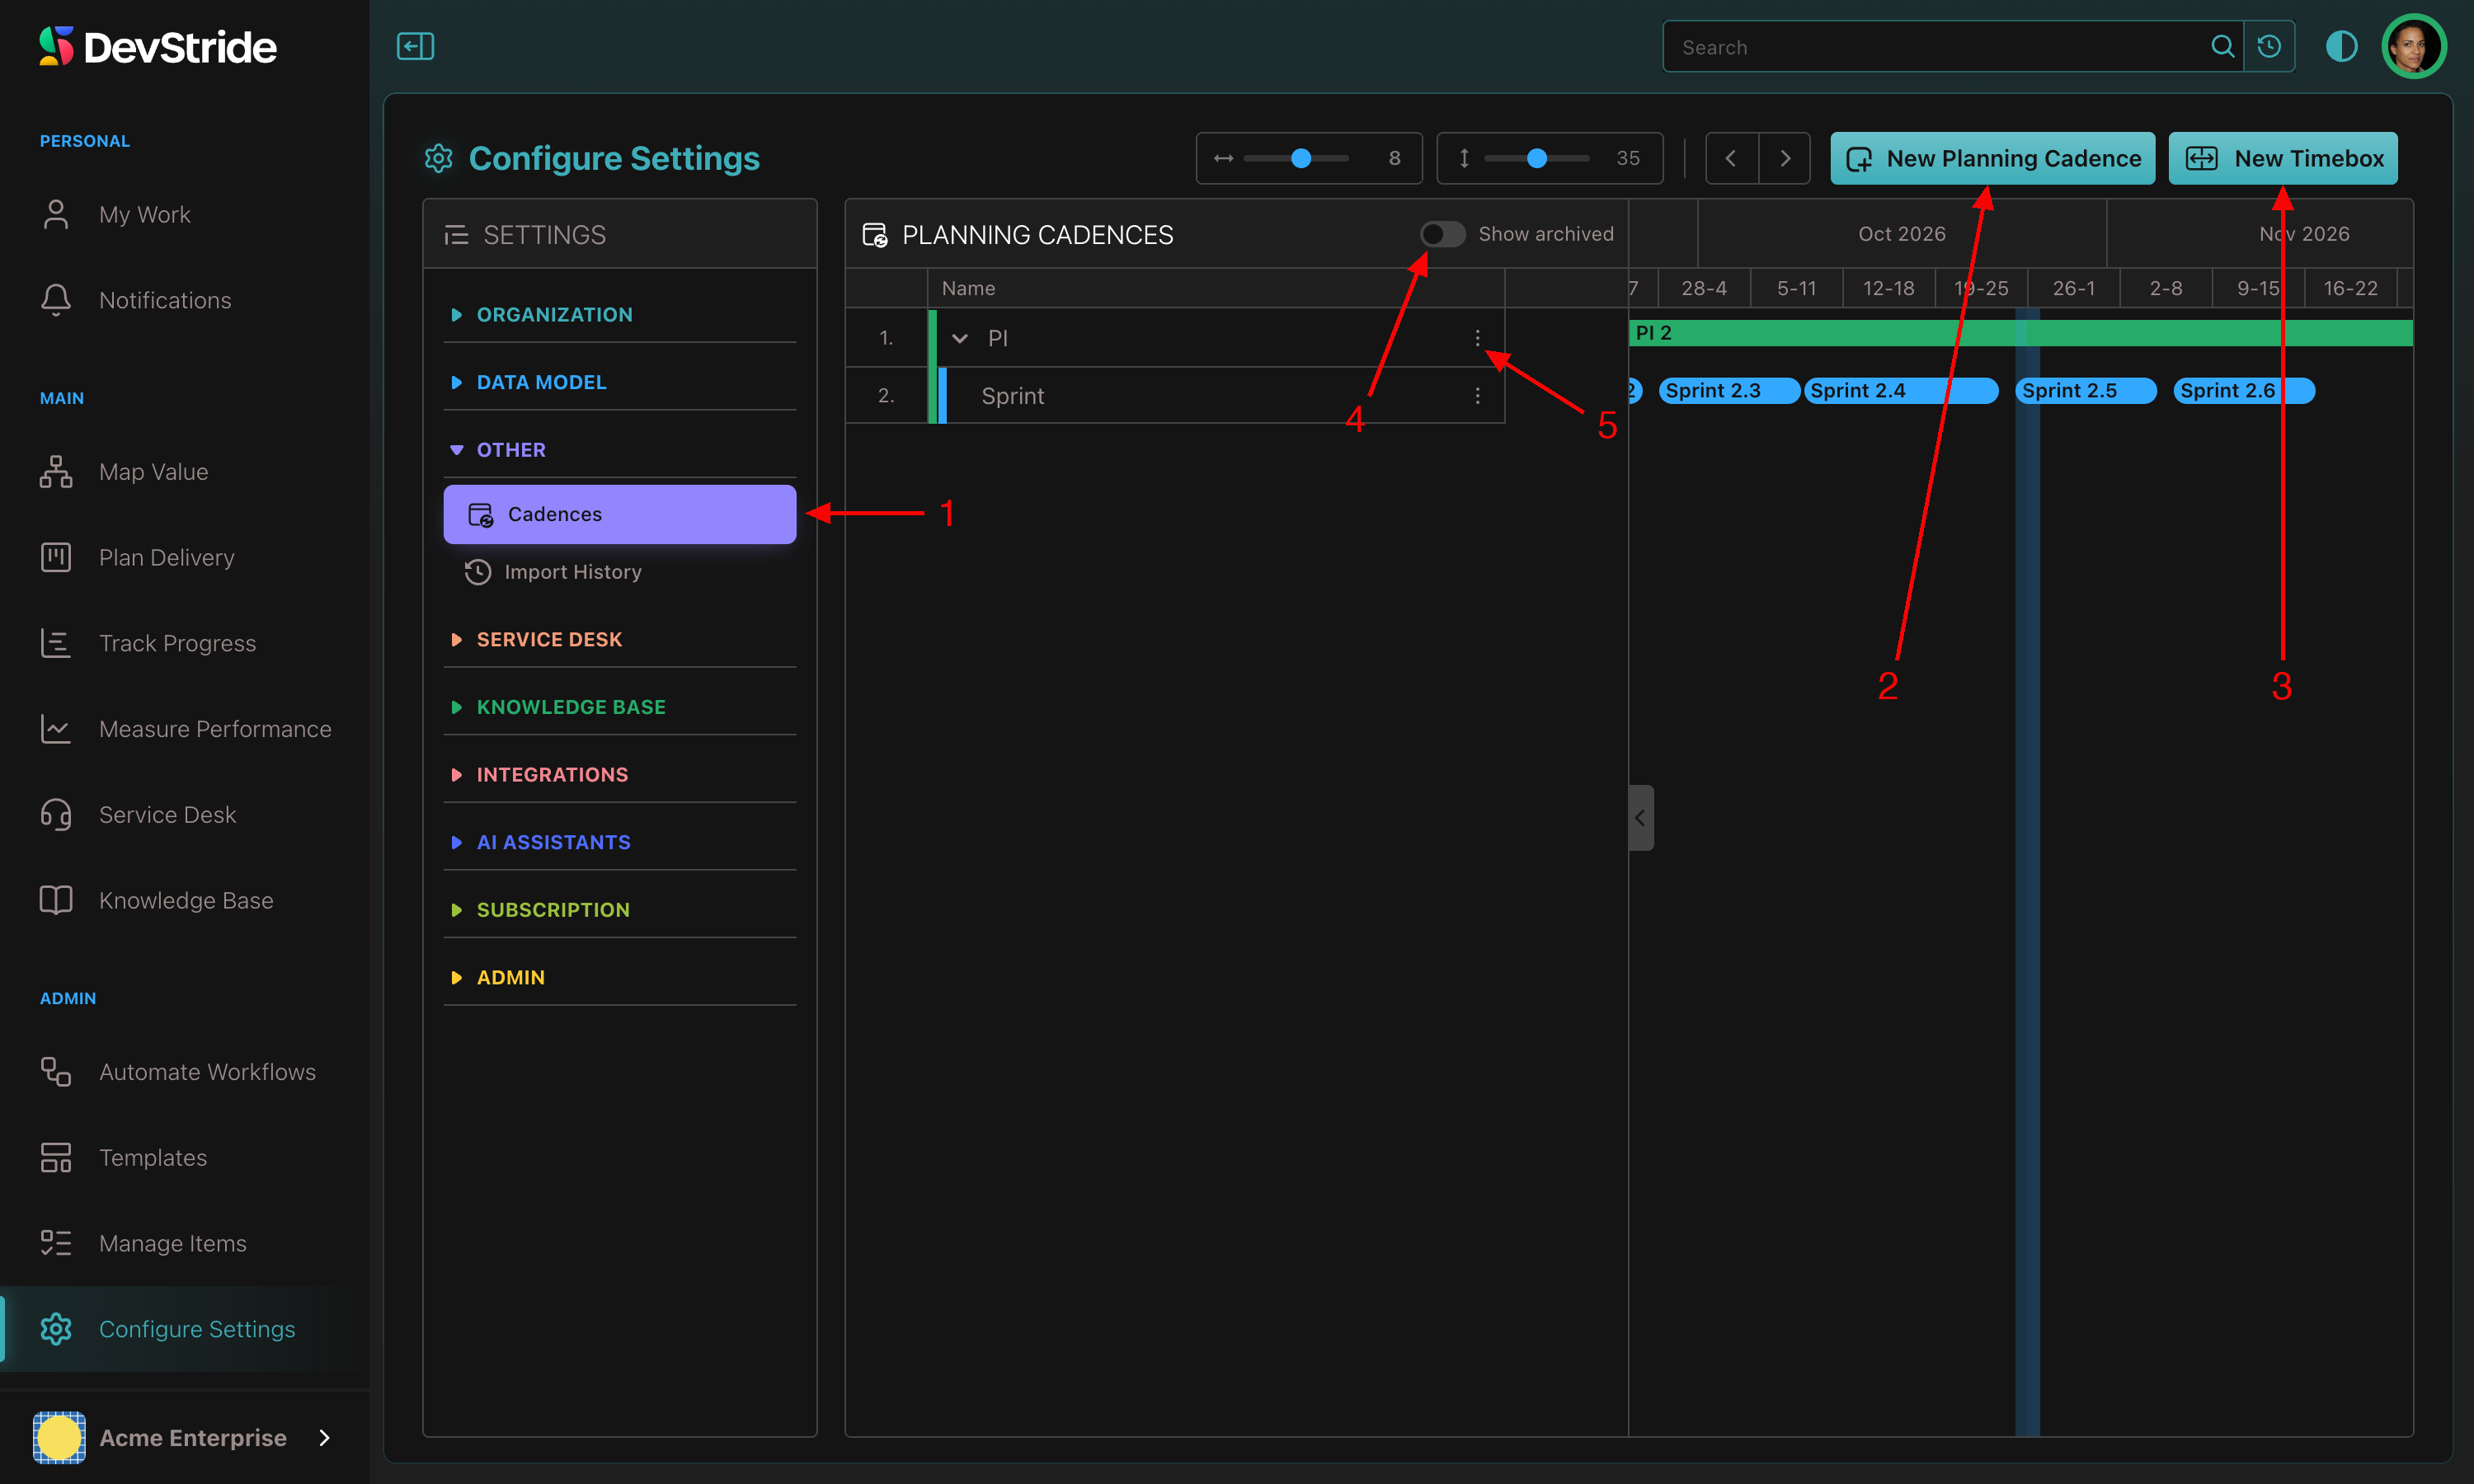
Open Configure Settings → Other → Cadences. The page has two buttons, New Planning Cadence and New Timebox, a Show archived toggle, and a per-cadence menu (Add timebox, Edit cadence, Delete cadence or Archive cadence).
Step 1: Create a planning cadence#
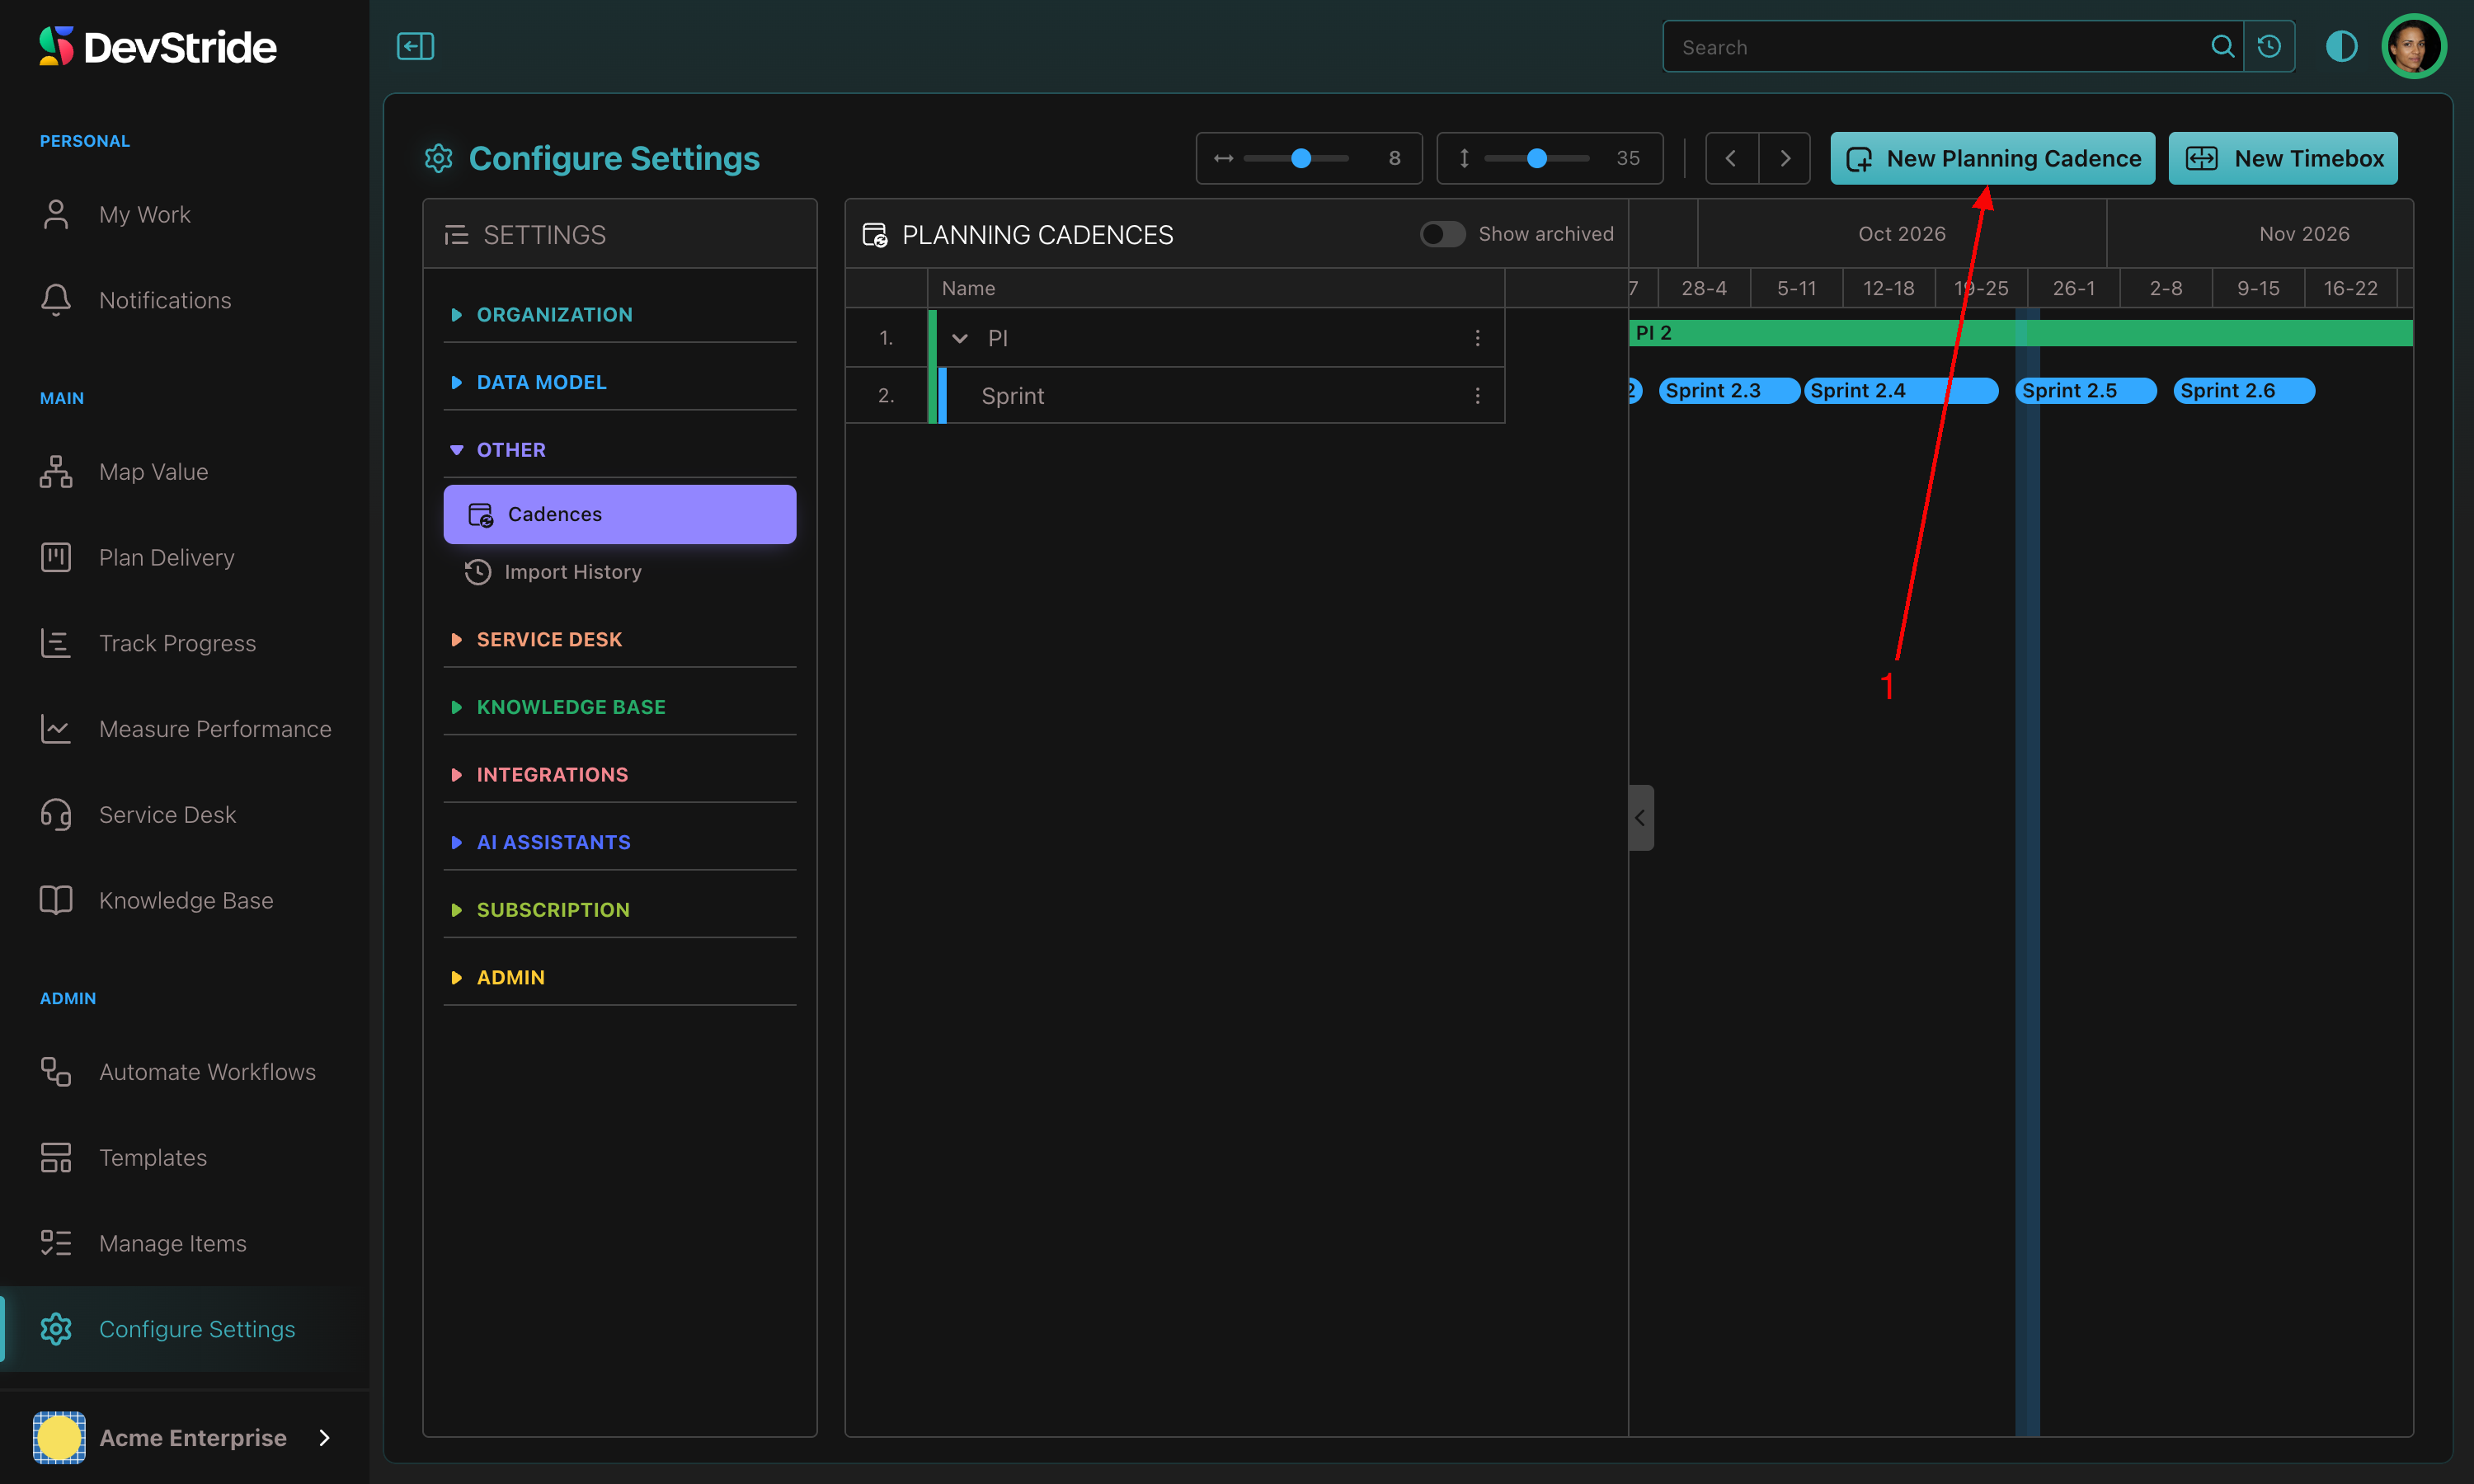
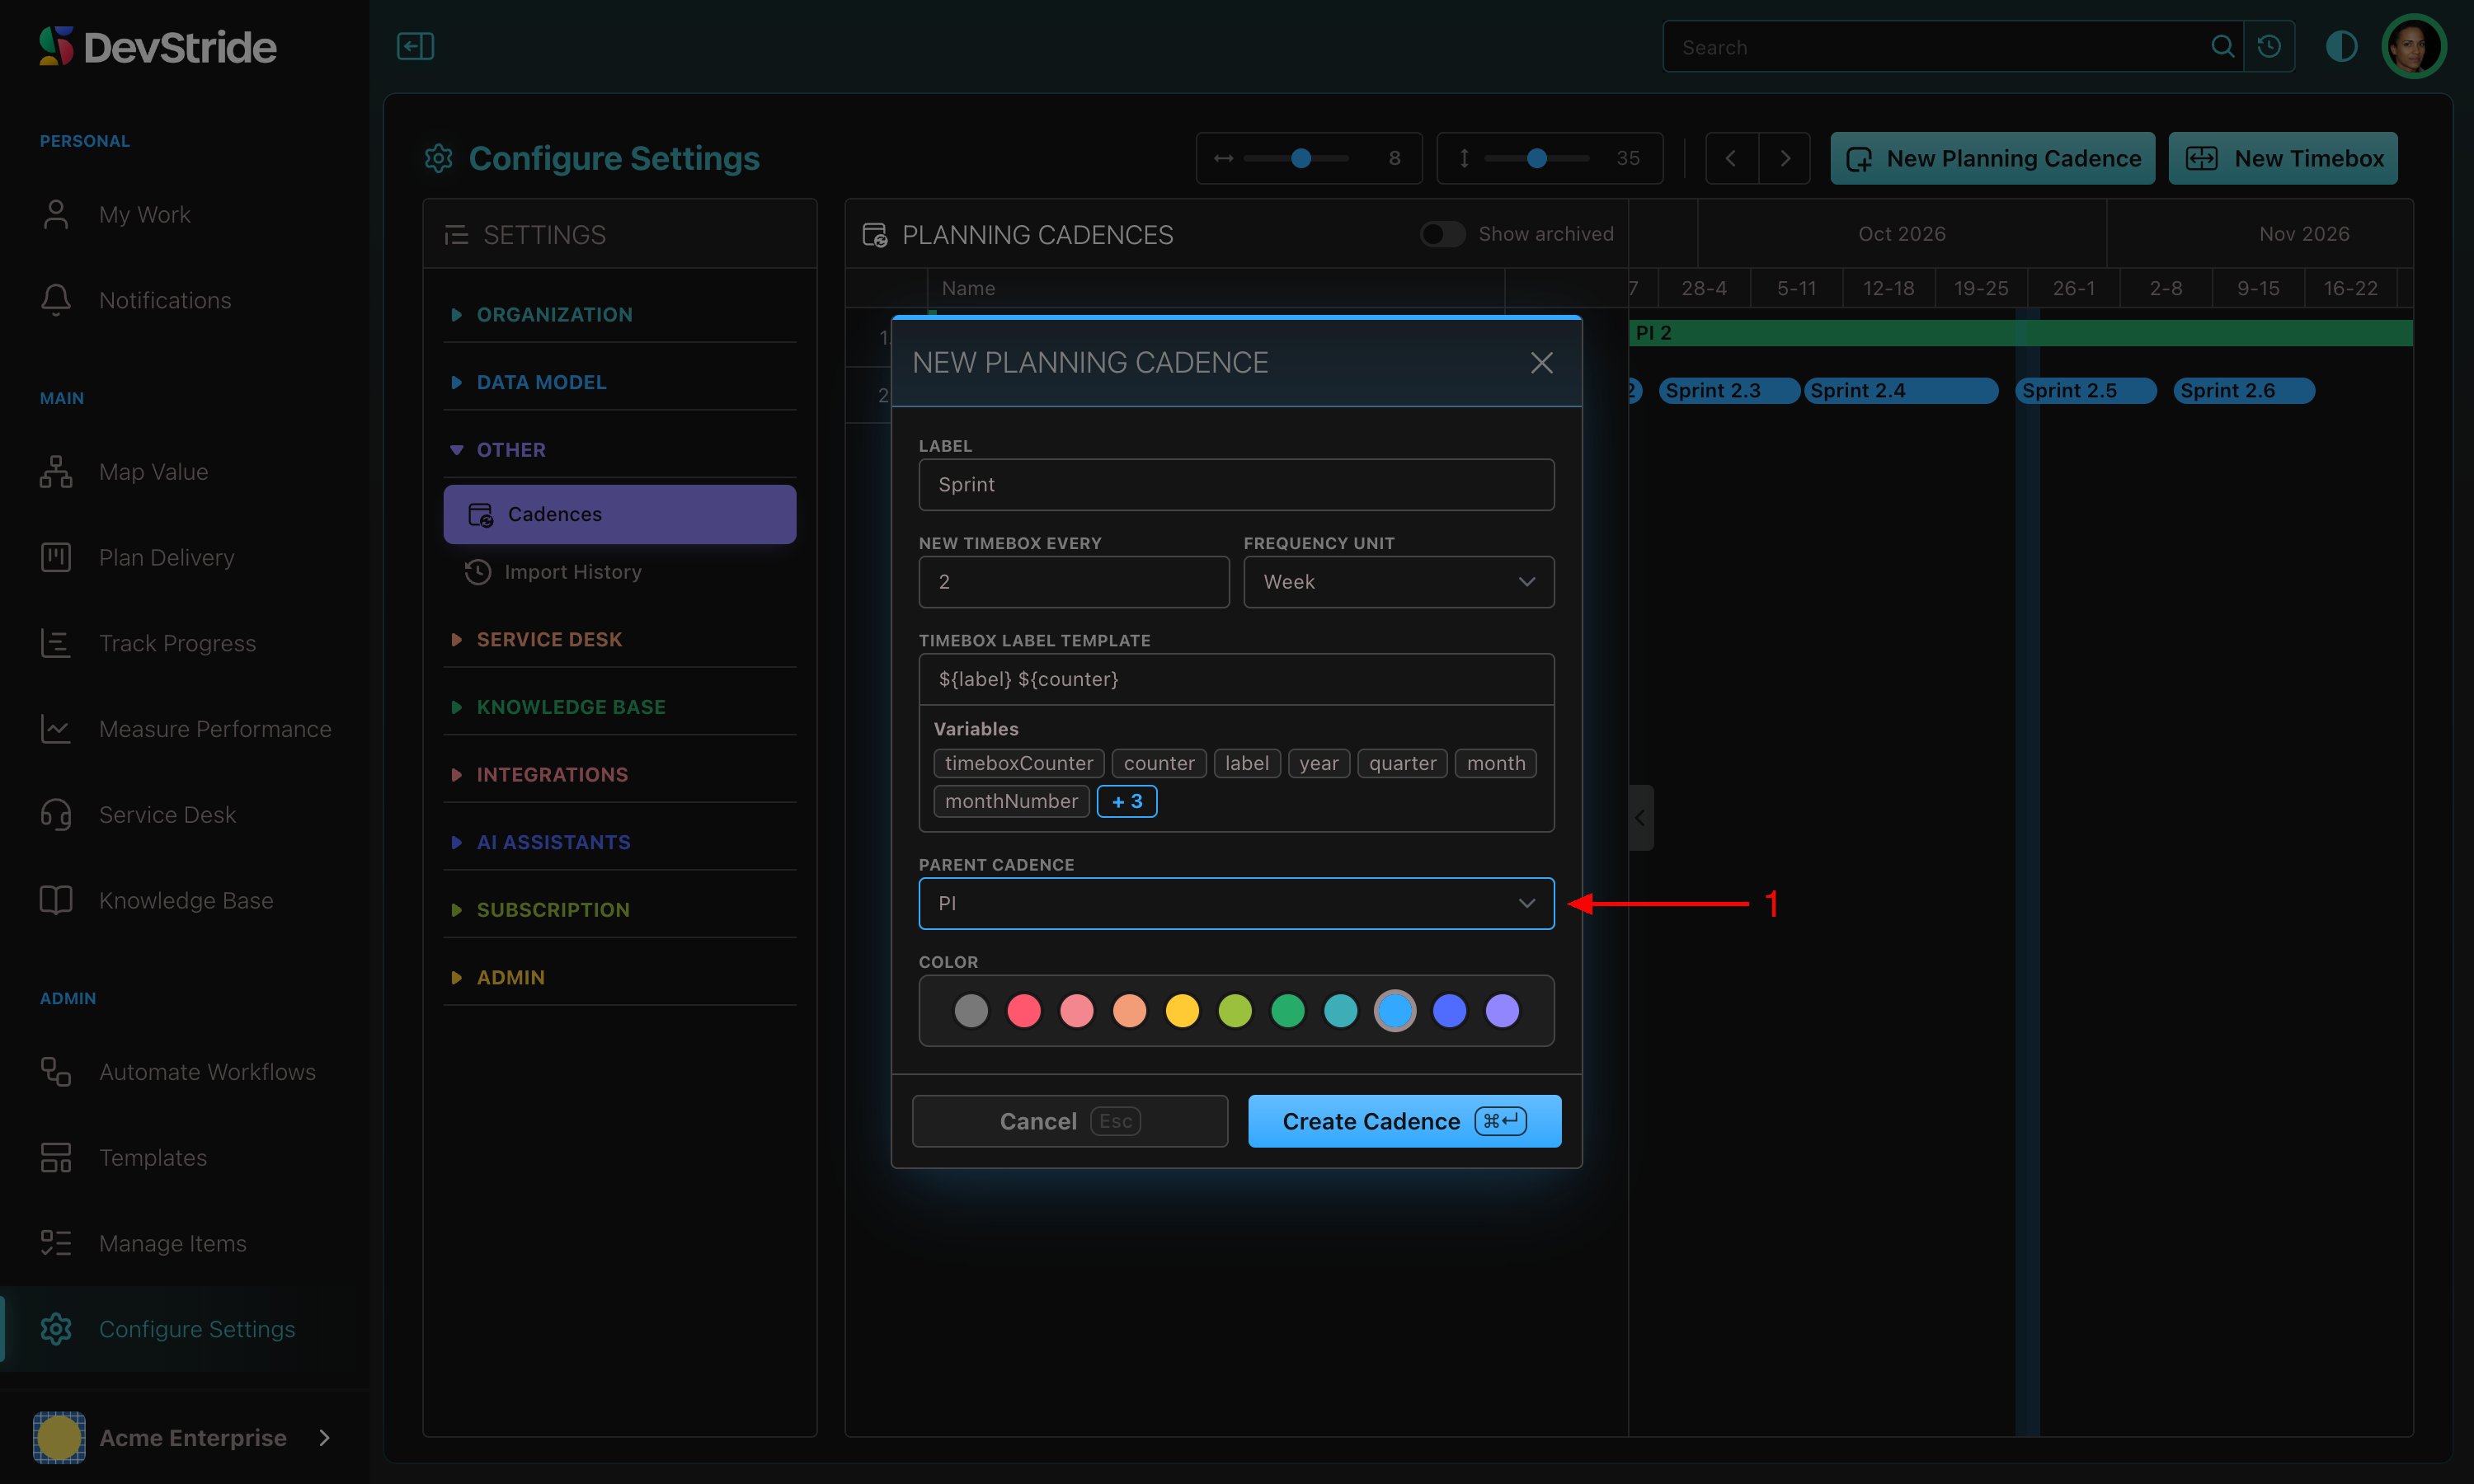
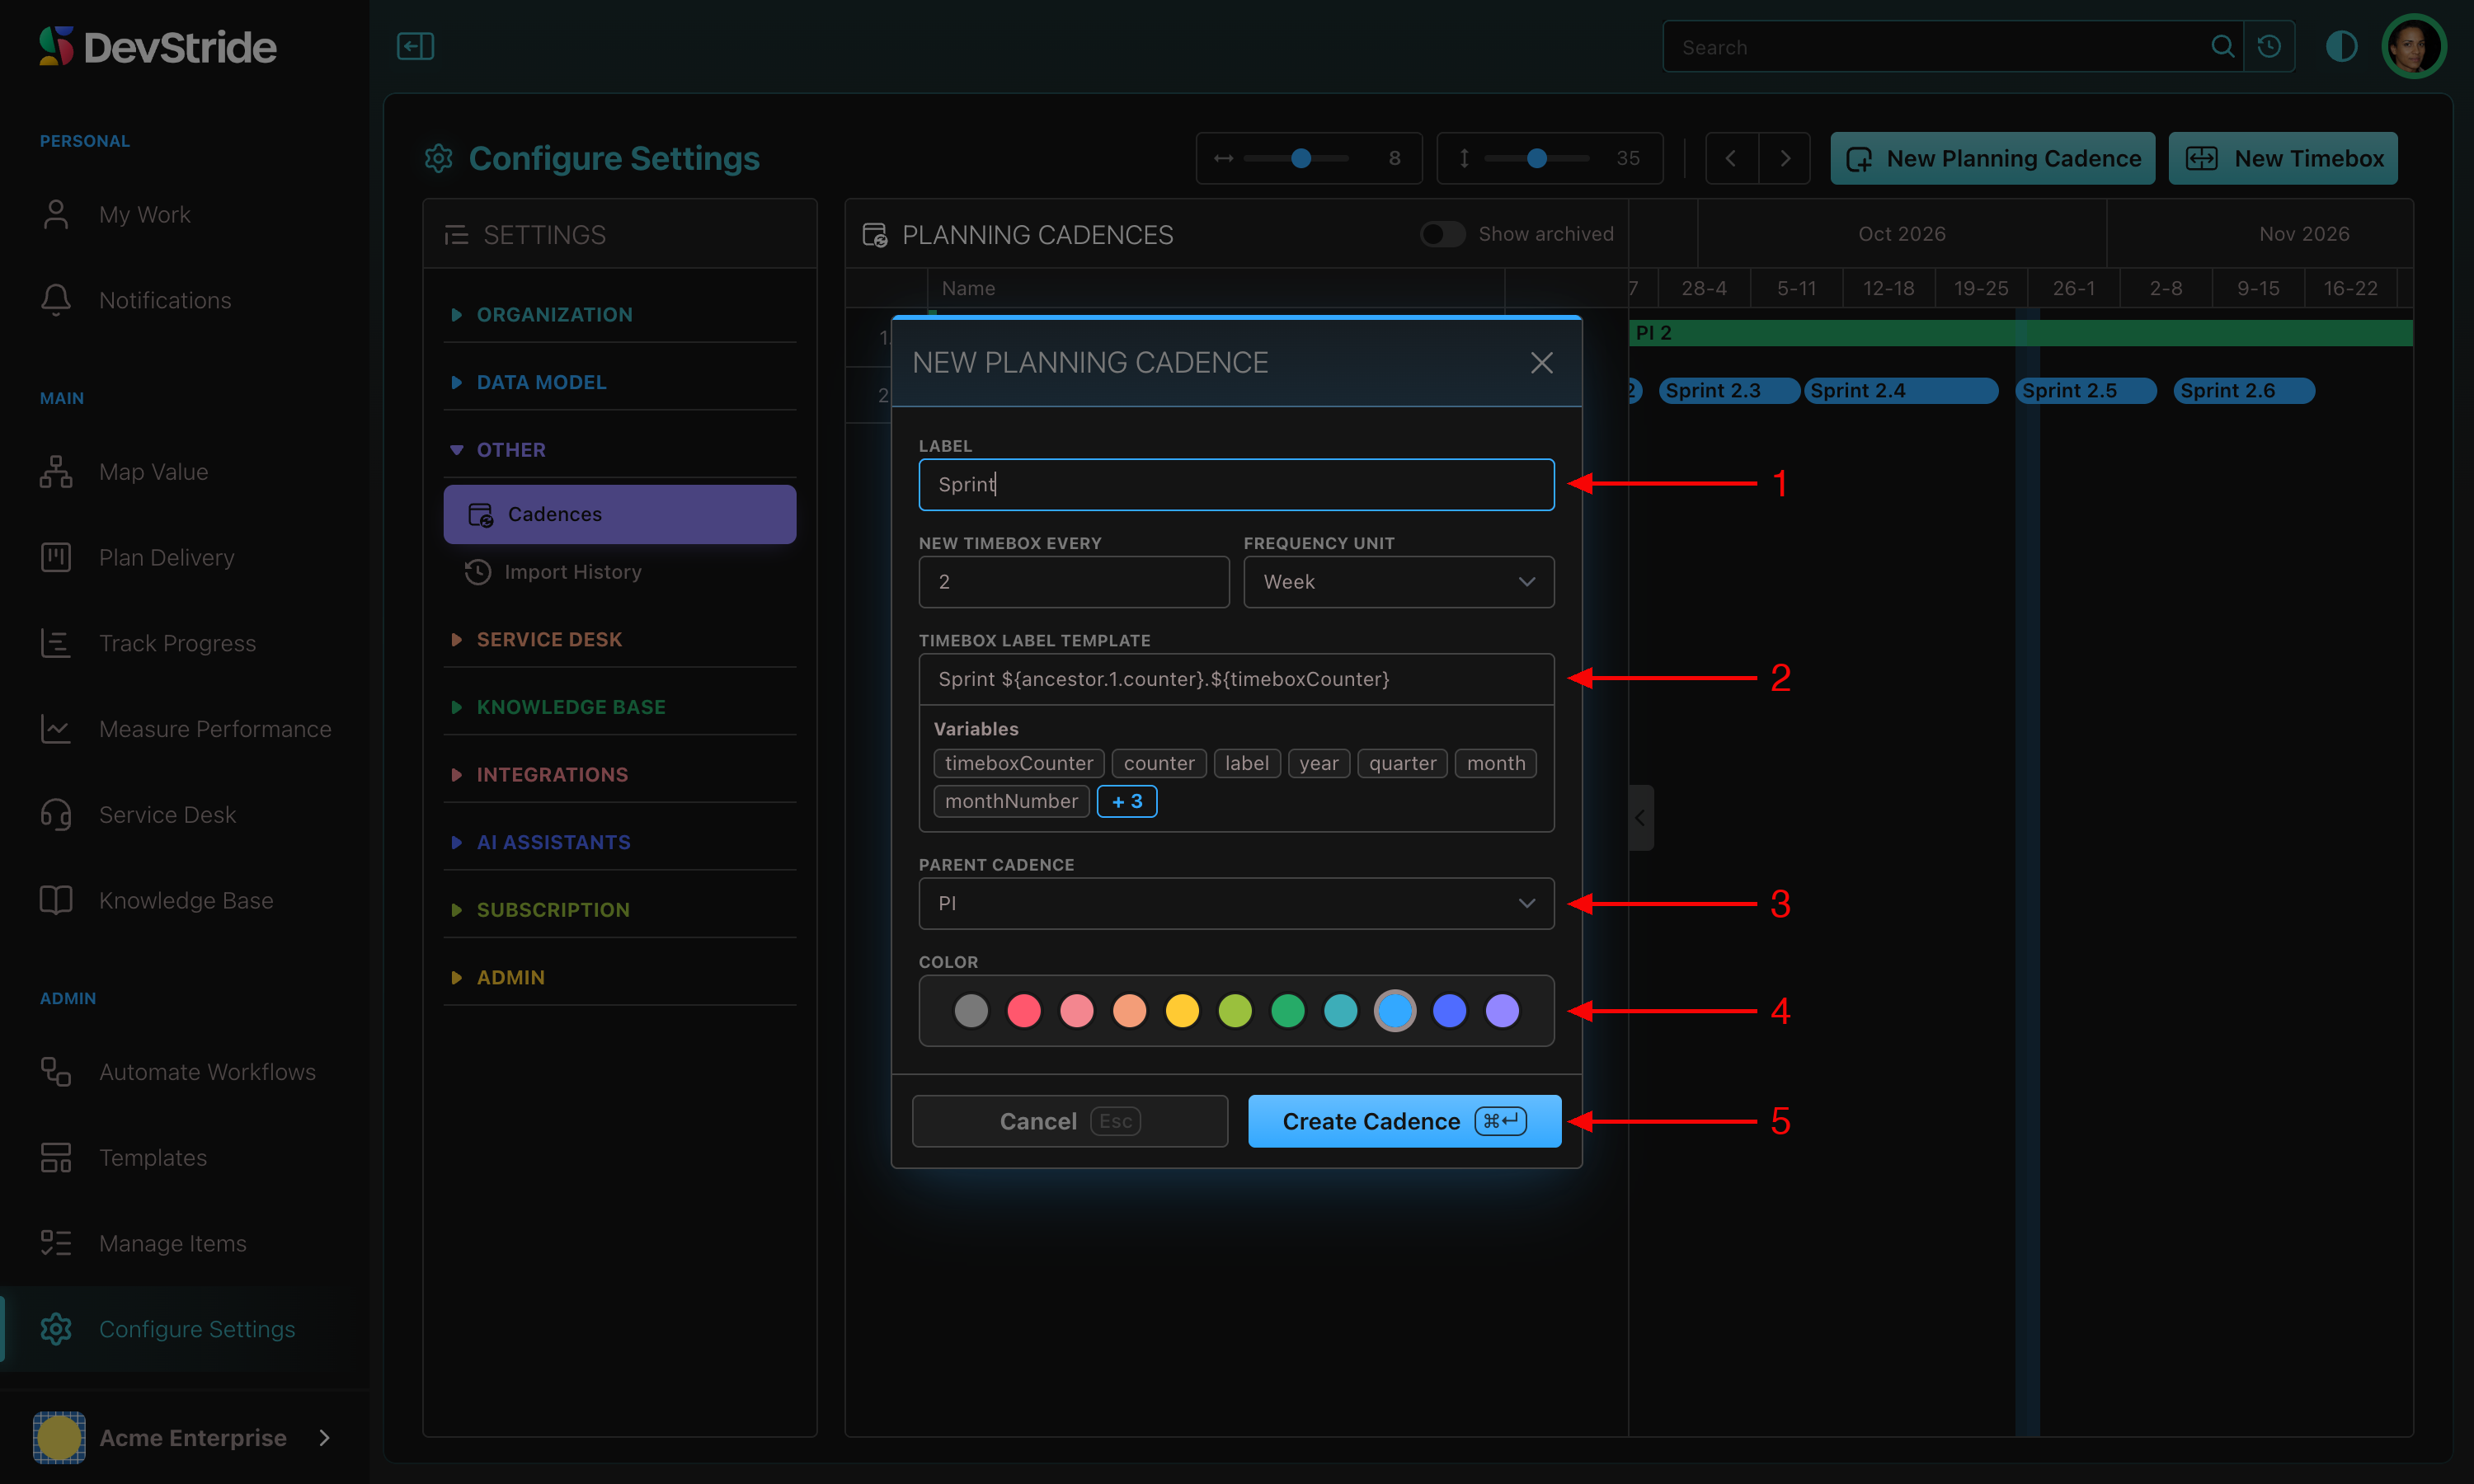
Click New Planning Cadence and fill in the dialog.
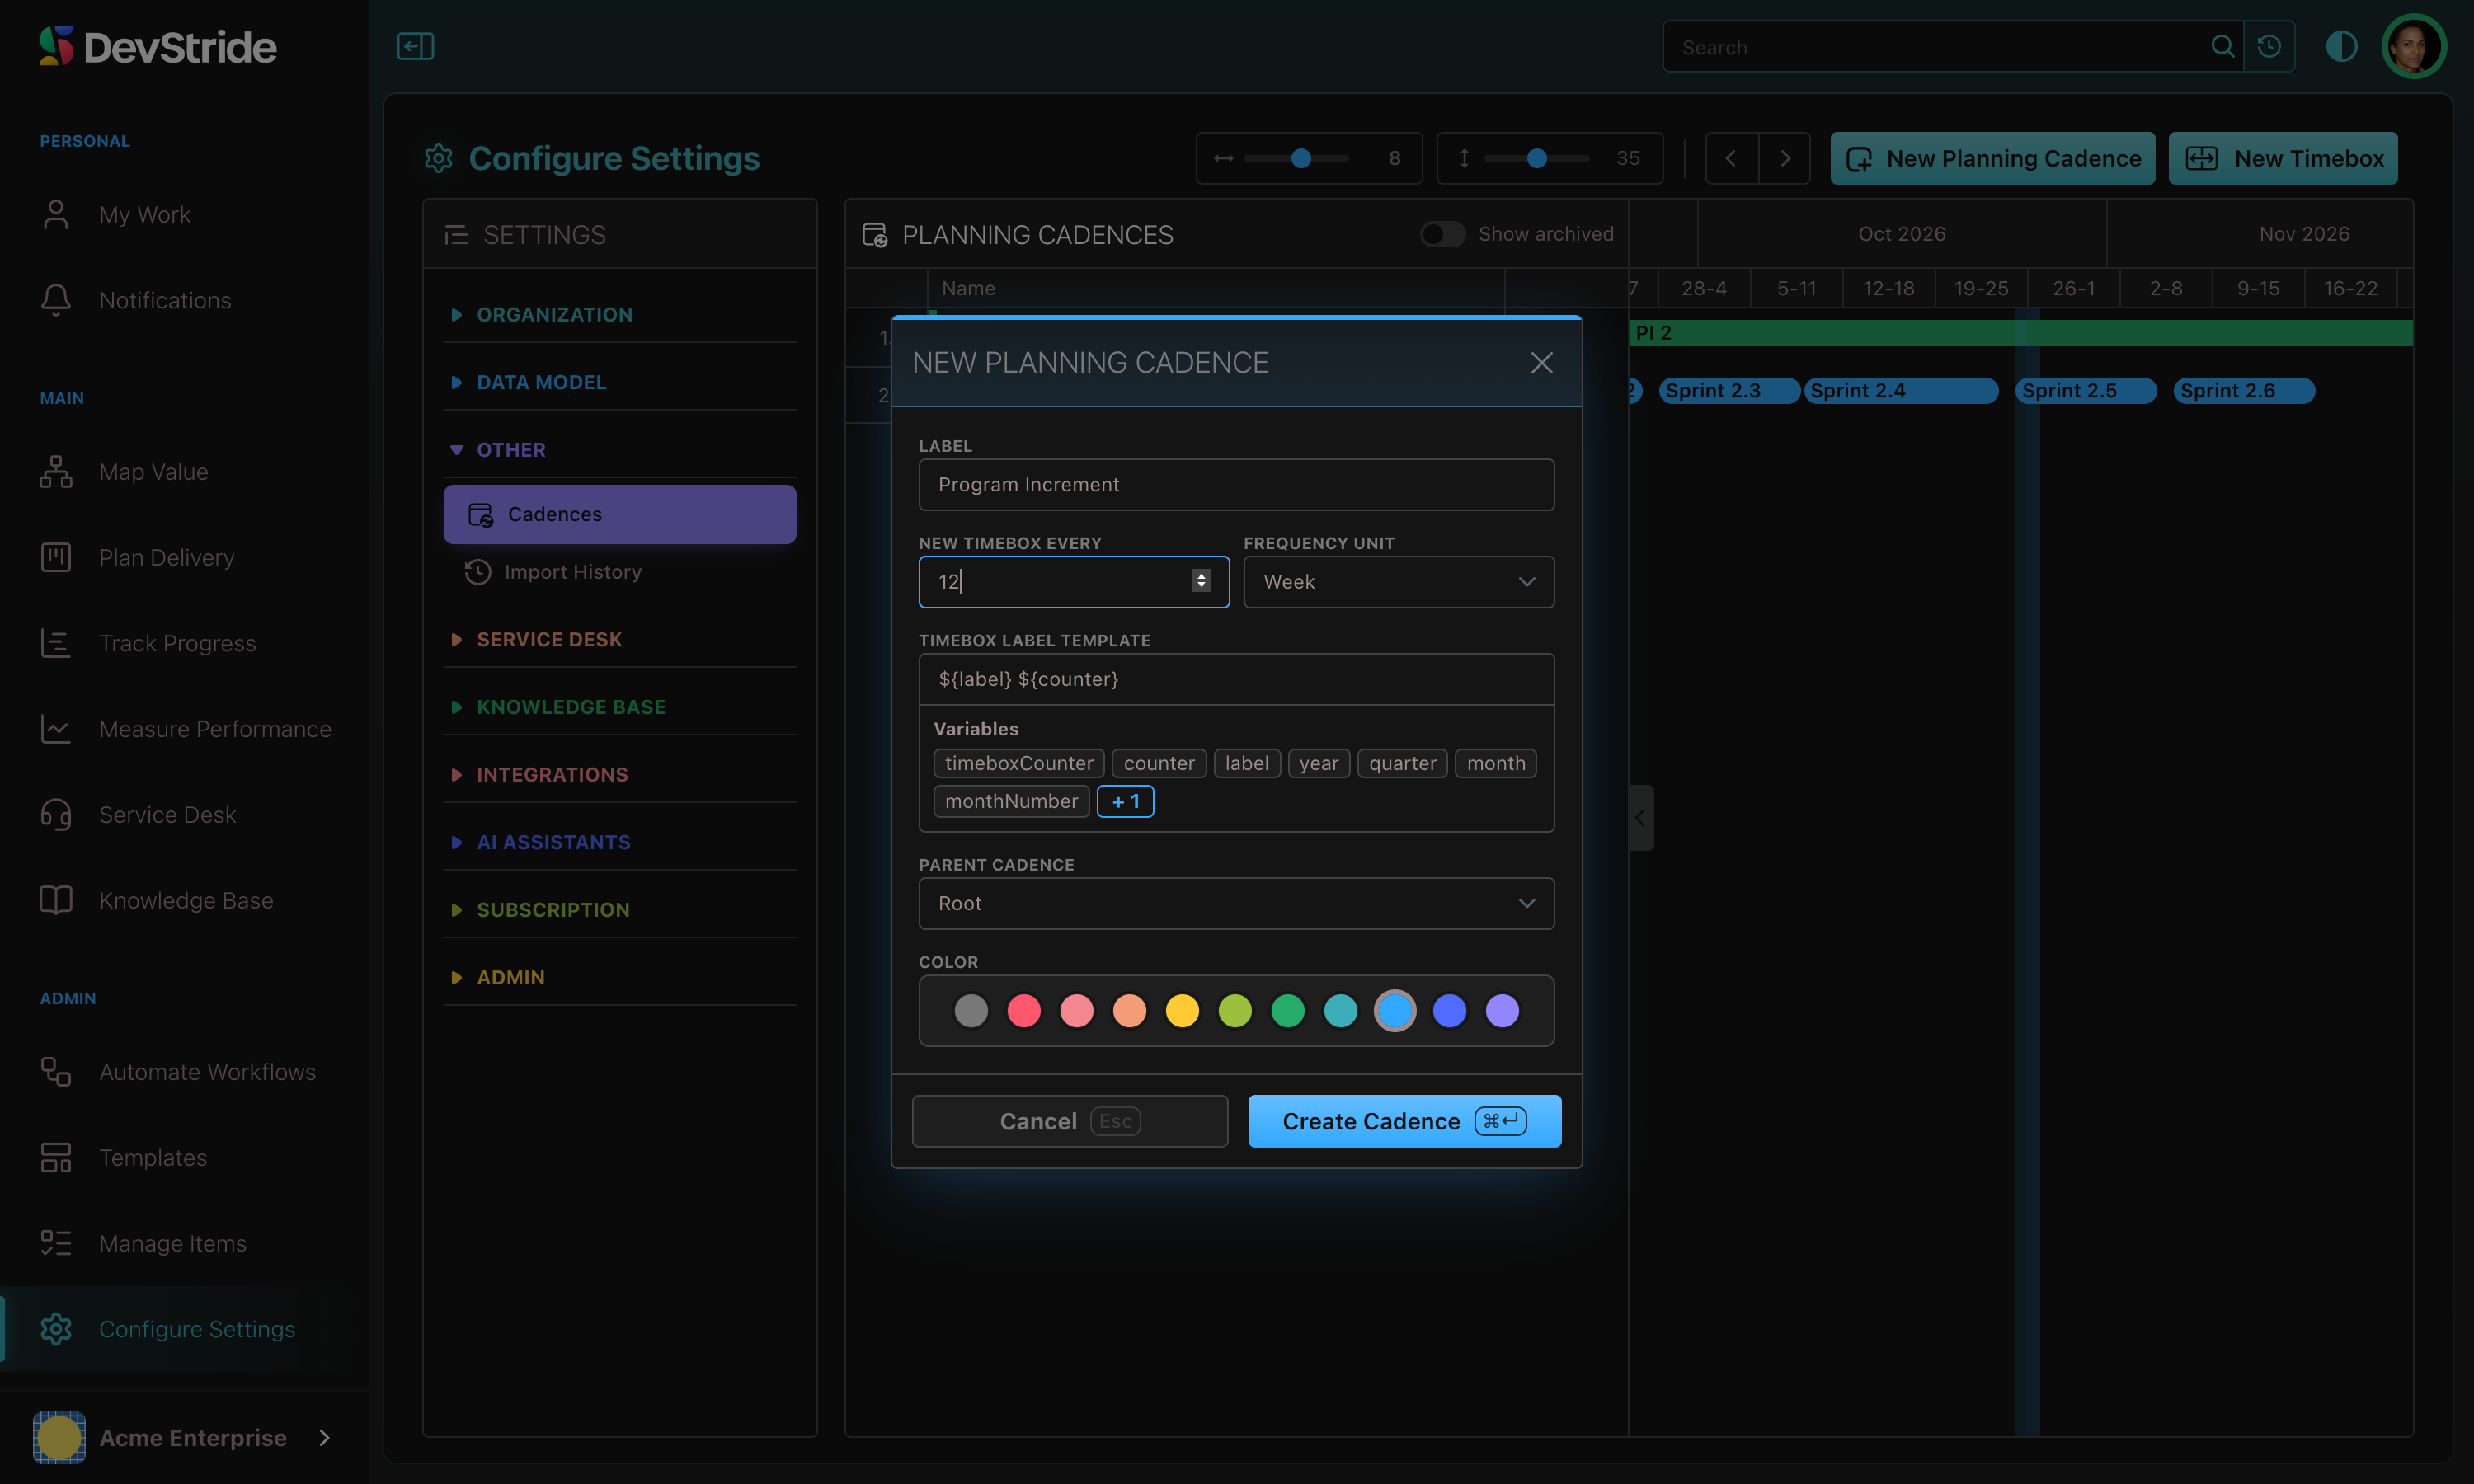
| Field | What to enter | Example (12-week PI) |
|---|---|---|
| Label | The cadence's name | Program Increment |
| New Timebox Every + Frequency Unit | How often a new period starts: a number and Day, Week, Month, Quarter, or Year | 12, Week |
| Timebox Label Template | How each timebox is named; variables are filled in automatically. Default ${label} ${counter} |
PI ${counter} → PI 1, PI 2 |
| Parent Cadence | Root for a top-level cadence, or the cadence this one nests inside | Root |
| Color | Shown on boards and Gantts |
Click Create Cadence.
Add a child cadence#
Click New Planning Cadence again for the 2-week Sprint and choose the Program Increment as Parent Cadence. Sprints then sit inside each PI.
Label template variables#
| Variable | Produces |
|---|---|
${label} |
The cadence label |
${counter} |
Running number of this timebox across the cadence |
${timeboxCounter} |
Number of this timebox within its parent timebox (resets each parent) |
${ancestor.1.counter}, ${ancestor.1.timeboxCounter} |
The parent timebox's counters (ancestor.2 for the grandparent) |
${year}, ${quarter}, ${month}, ${monthNumber}, ${week} |
Calendar parts of the start date (${month} gives Jan) |
So a parent Program Increment ${counter} with a child Sprint ${ancestor.1.counter}.${timeboxCounter} yields Program Increment 2 containing Sprint 2.1, Sprint 2.2, and so on. A monthly cadence might use ${month} ${year}.
Cadences can be edited any time; archived ones keep only label and colour editable.
Step 2: Generate timeboxes#
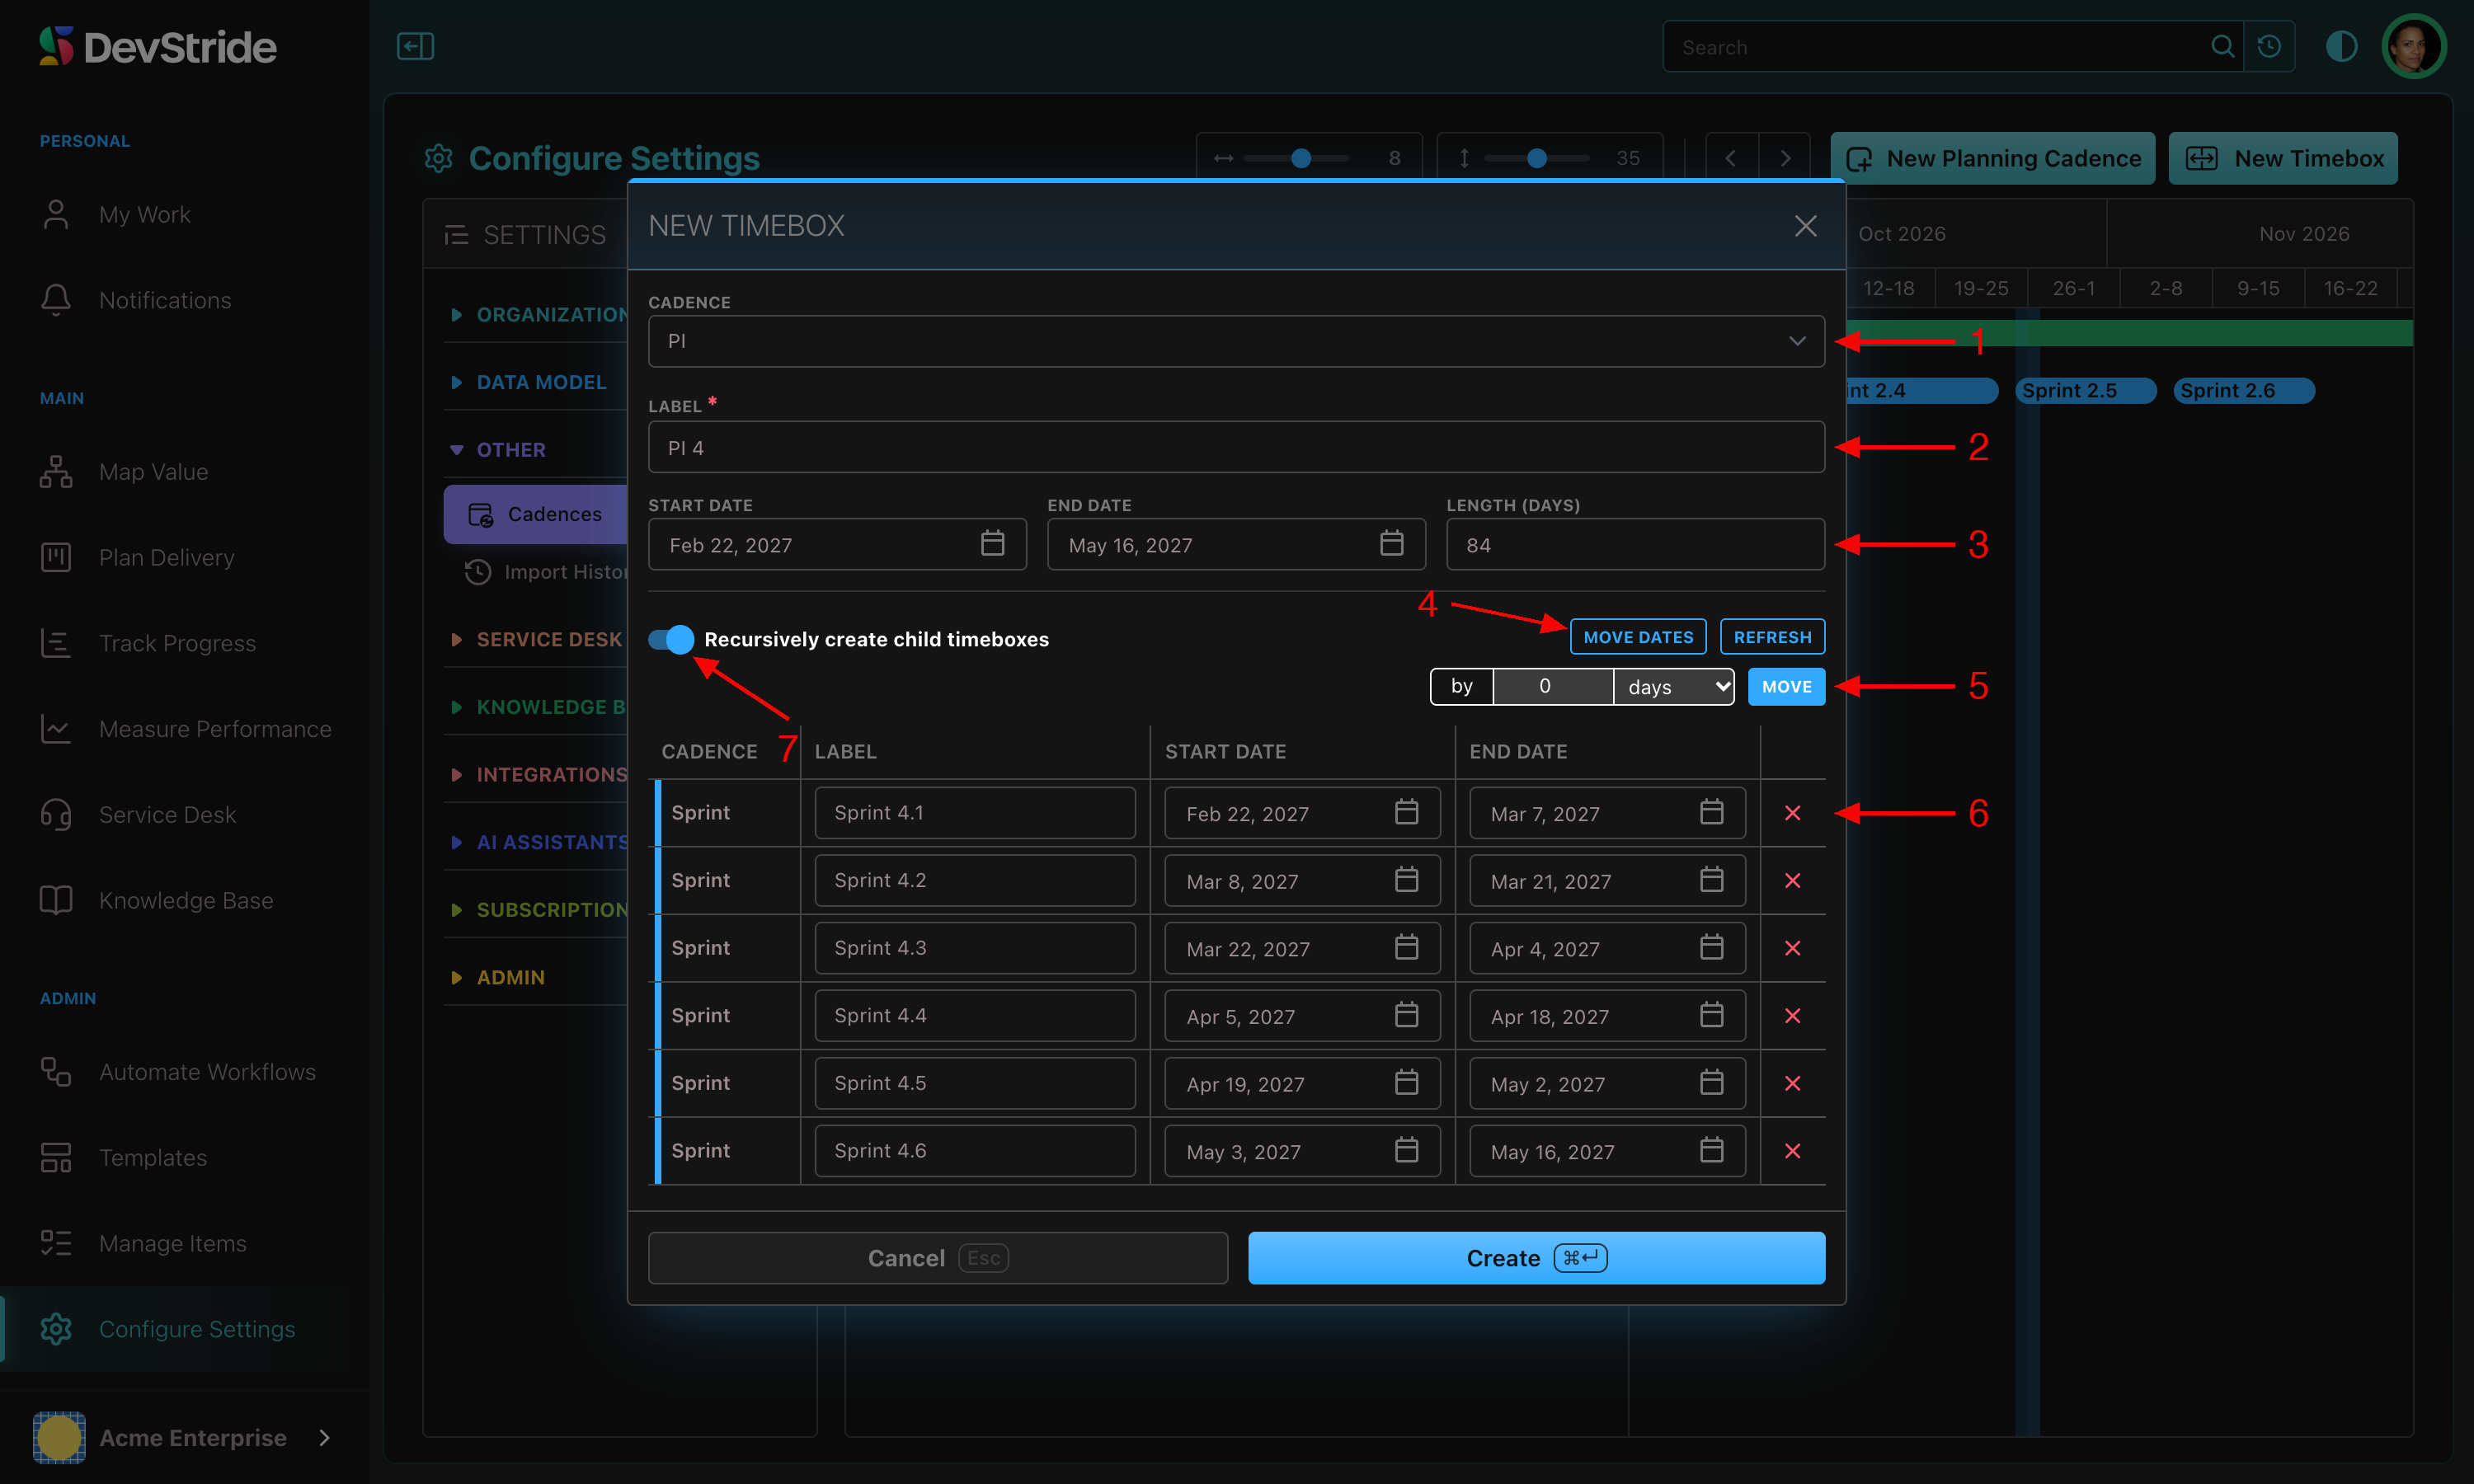
A cadence has no dates until you create timeboxes. Click New Timebox (or Add timebox on a cadence):
- Choose the Cadence (1).
- Edit the Label if the template's result is not what you want (2).
- Set Start date, End date, or Length (days) (3). This is how you anchor the series to a real calendar date.
- For a parent cadence, turn on Recursively create child timeboxes (7). A table of the child timeboxes appears with editable labels and dates; remove any you do not want (6).
- Use Move dates (4) to shift all children by a number of days, weeks, months, quarters, or years (5), handy for a holiday break. Refresh regenerates the children from the cadence rule.
- Save.
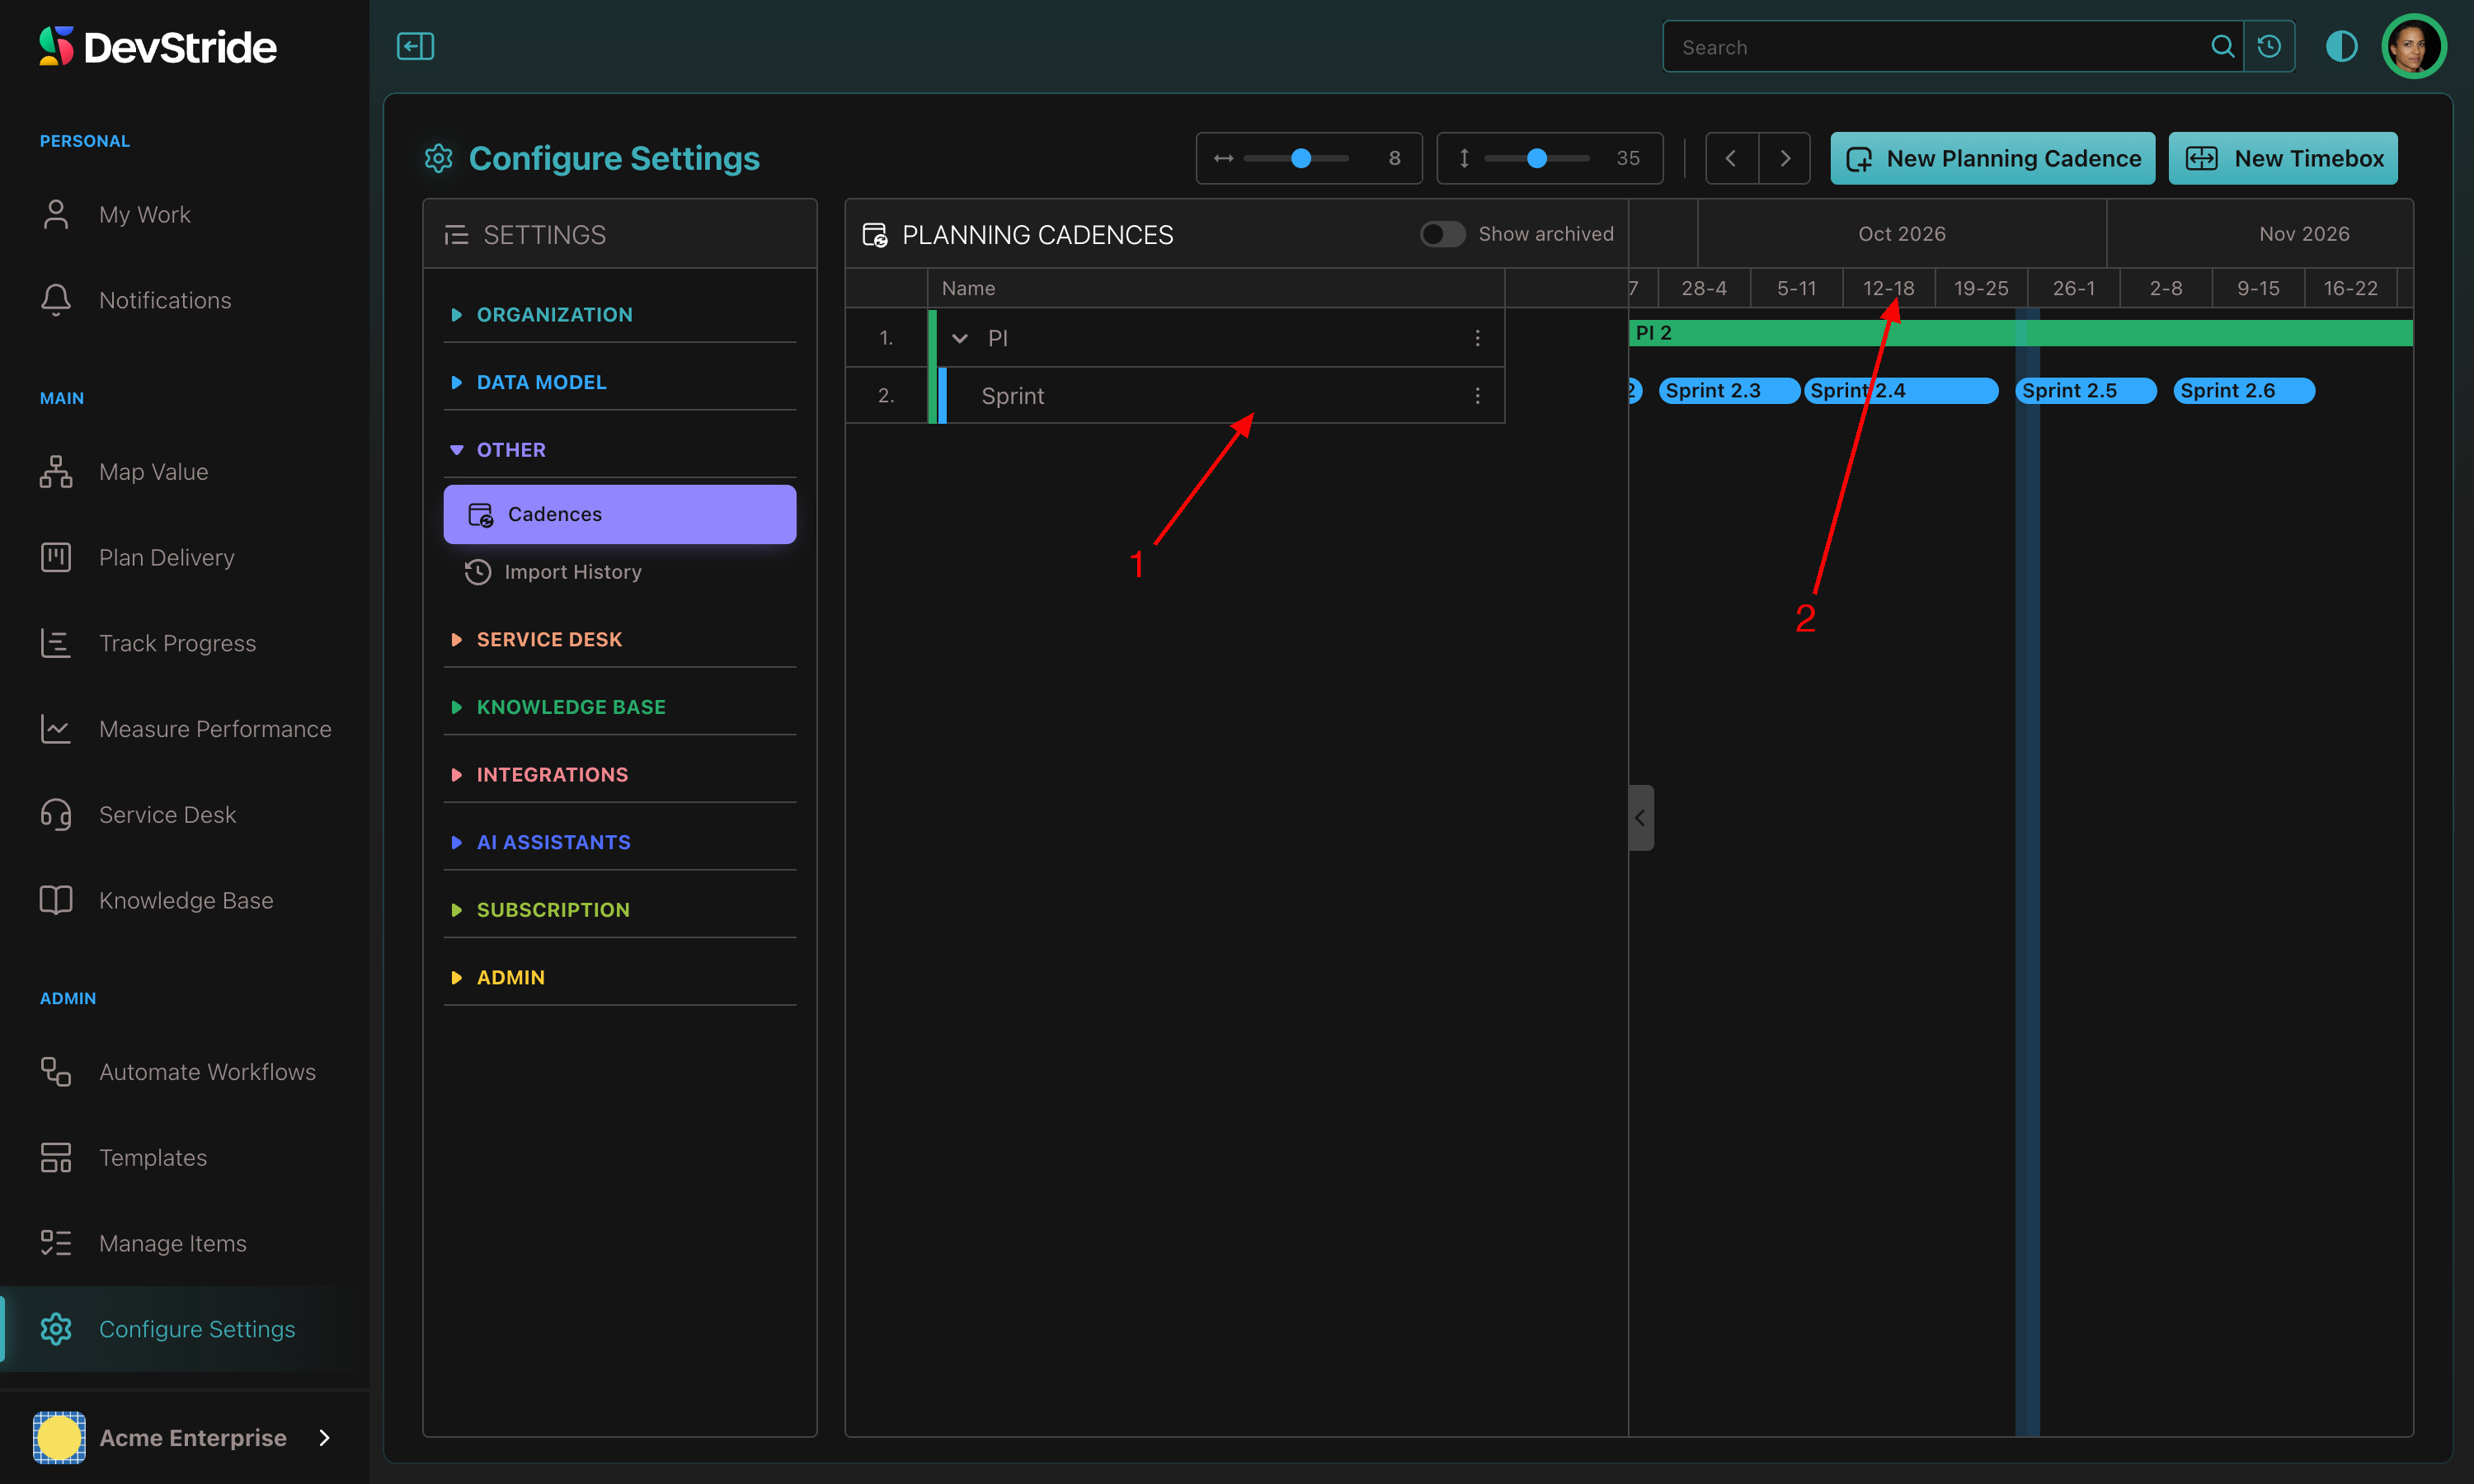
The cadence page then shows the tree of timeboxes (1) with their dates (2). Timeboxes with children cannot be deleted until the children are removed.
How far ahead to generate
Generate one planning horizon at a time, a PI's worth of sprints or a year of months. It is easy to add the next batch, and you avoid renaming a year of timeboxes if the rhythm changes.
Using cadences on boards#
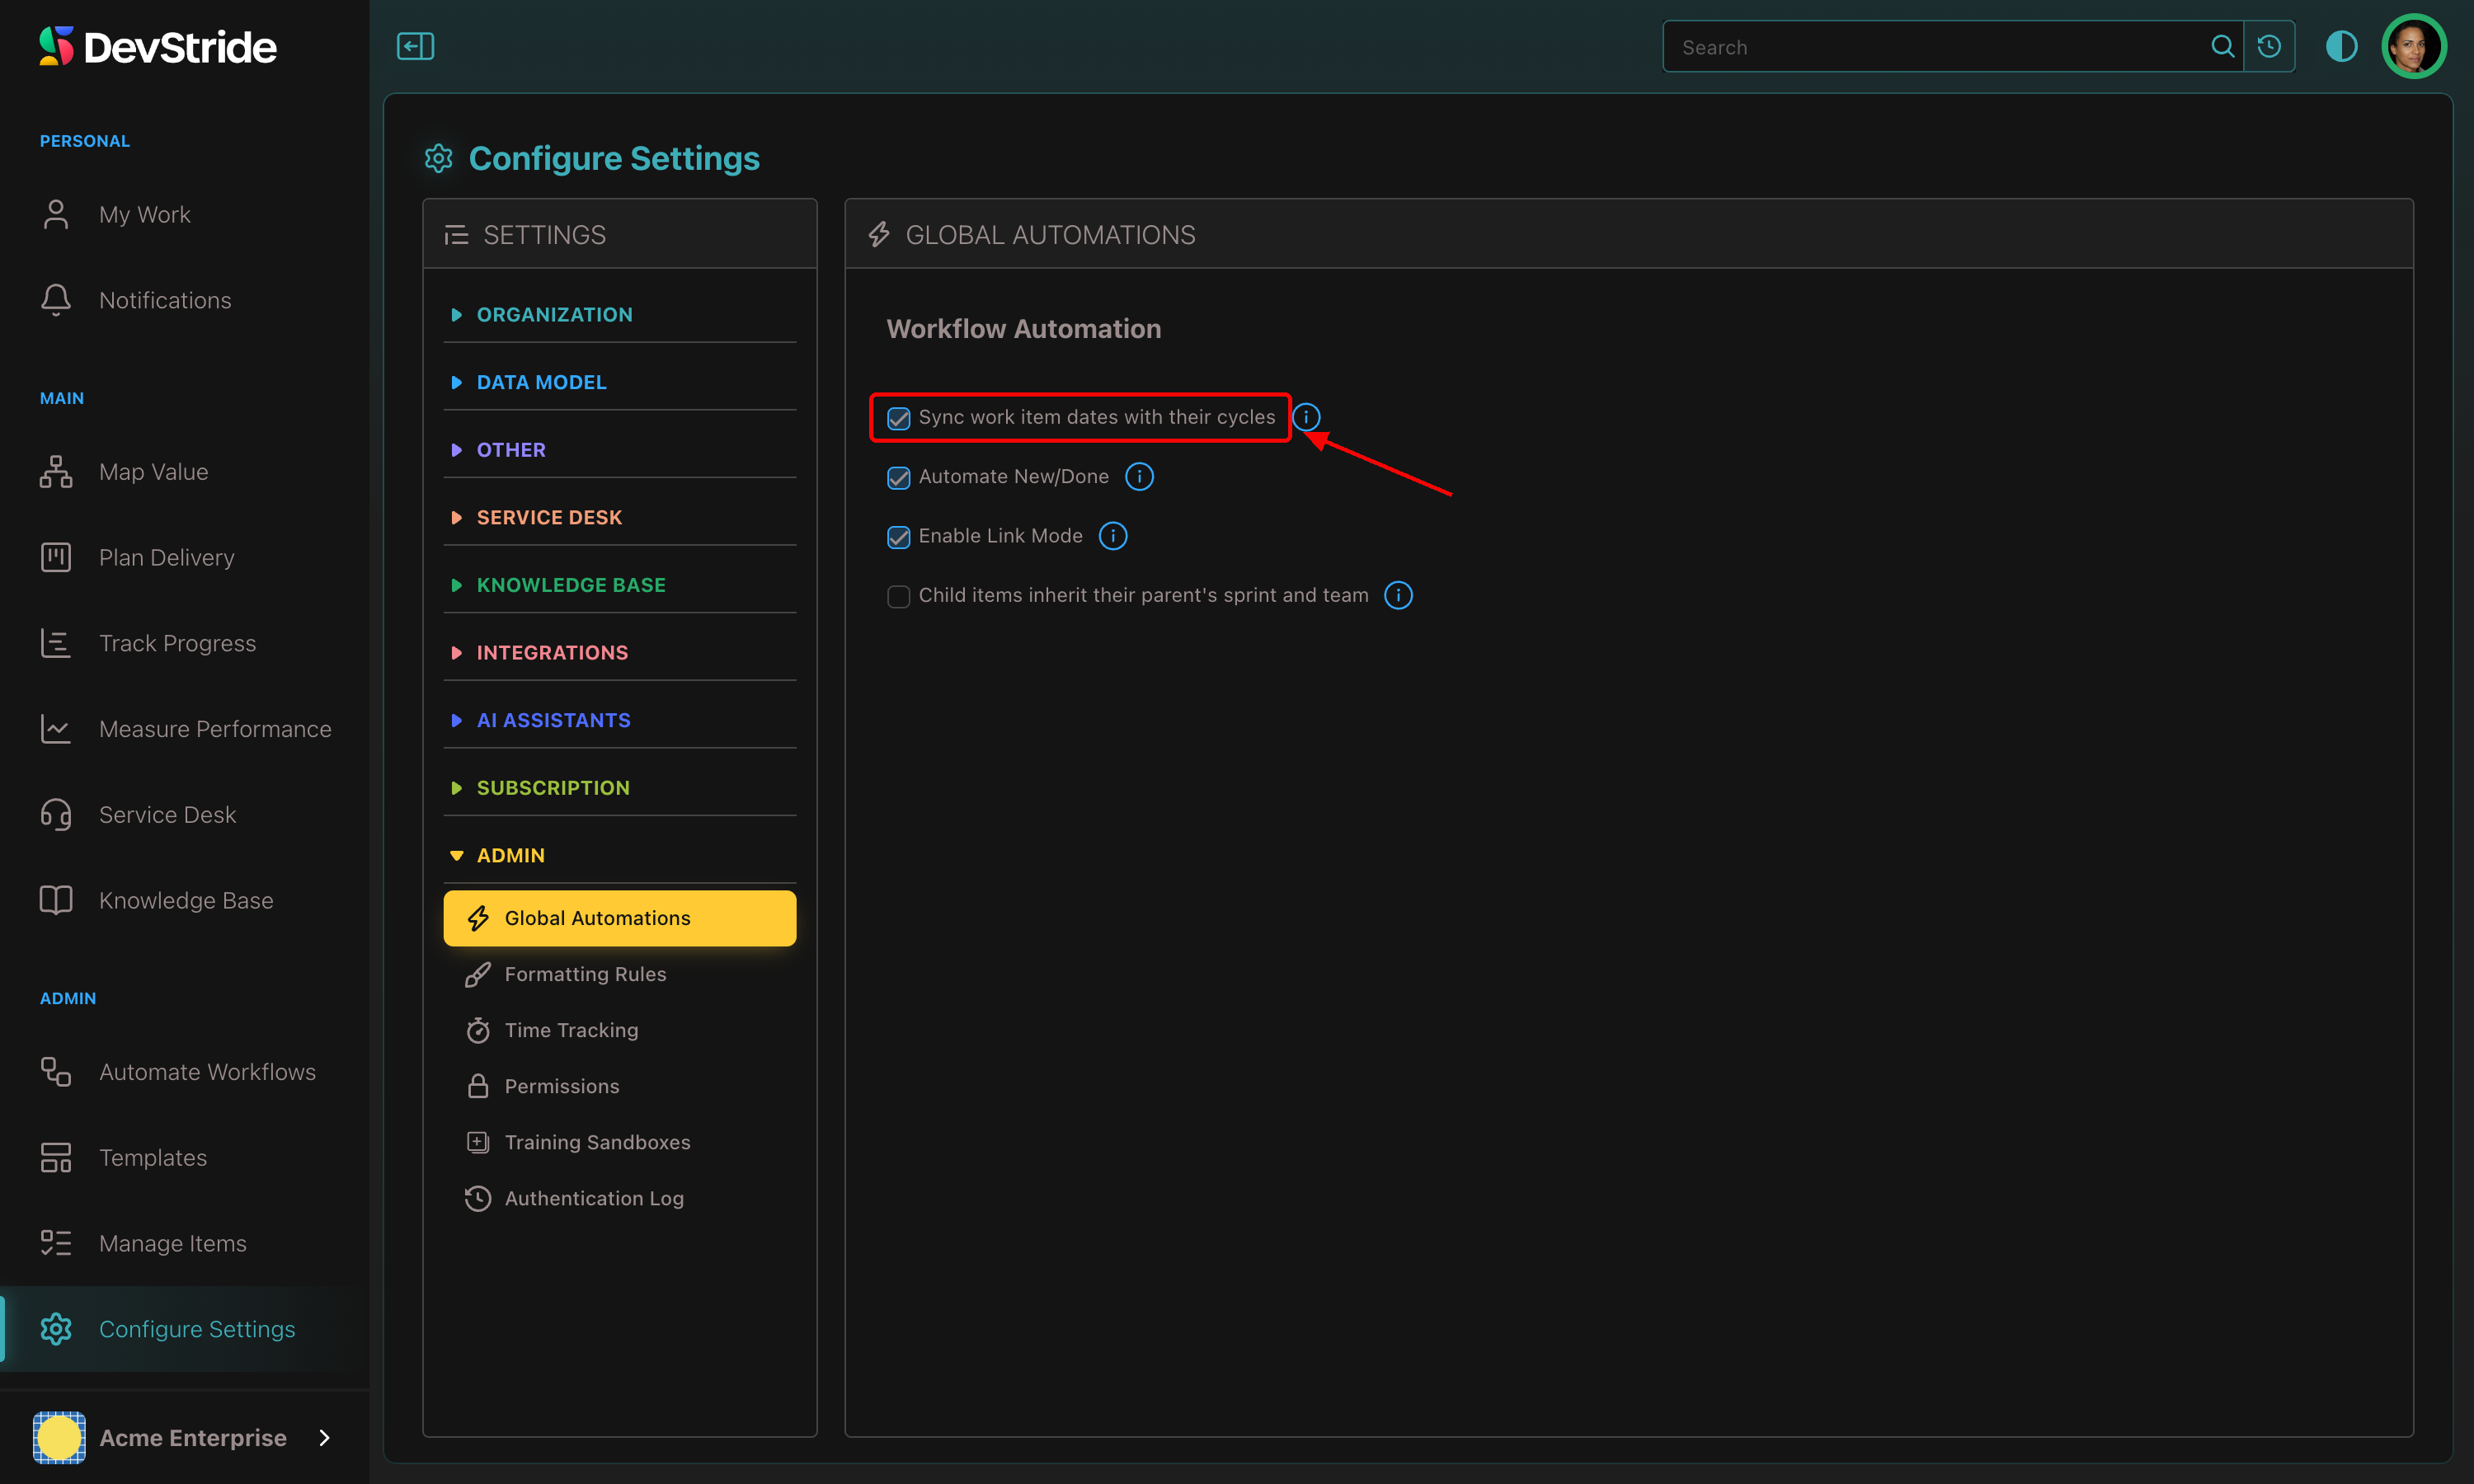
When you create a board in Plan Delivery, choosing a cadence makes it a cycle board; its cycles are the cadence's timeboxes, and items placed on a cycle inherit its dates when Sync work item dates with their cycles is on in Global Automations. See Using Cycle Boards.