
Admin Onboarding - Setting up Custom Fields
Step 6a of admin onboarding — add the data each item type must carry (customer, cost centre, RICE score) as custom fields, group them into collections, and decide what shows in the sidebar versus the Forms tab.
On this page
Custom fields add your own data to items: a customer name, a cost centre, a risk rating, a RICE score. They appear in the item's right sidebar or on its Forms tab, in tables, filters, request forms, automations, and reports.
They come after item types because fields are assigned per item type, through a collection. Decide which types need which data and you are most of the way there.
How it fits together#
| Piece | What it is |
|---|---|
| Field | One piece of data with a type (text, number, date, user, and so on). Created once, reusable in many collections. |
| Collection | A named group of fields assigned to one or more item types. Every organization has a Default collection, which cannot be renamed or deleted. |
| Form group | A sub-group inside a collection. Every collection has a Sidebar group whose fields show in the item sidebar; any other group you add shows as a section on the item's Forms tab. |
Open Configure Settings → Data Model → Custom Fields. The page has three panes, worked left to right.
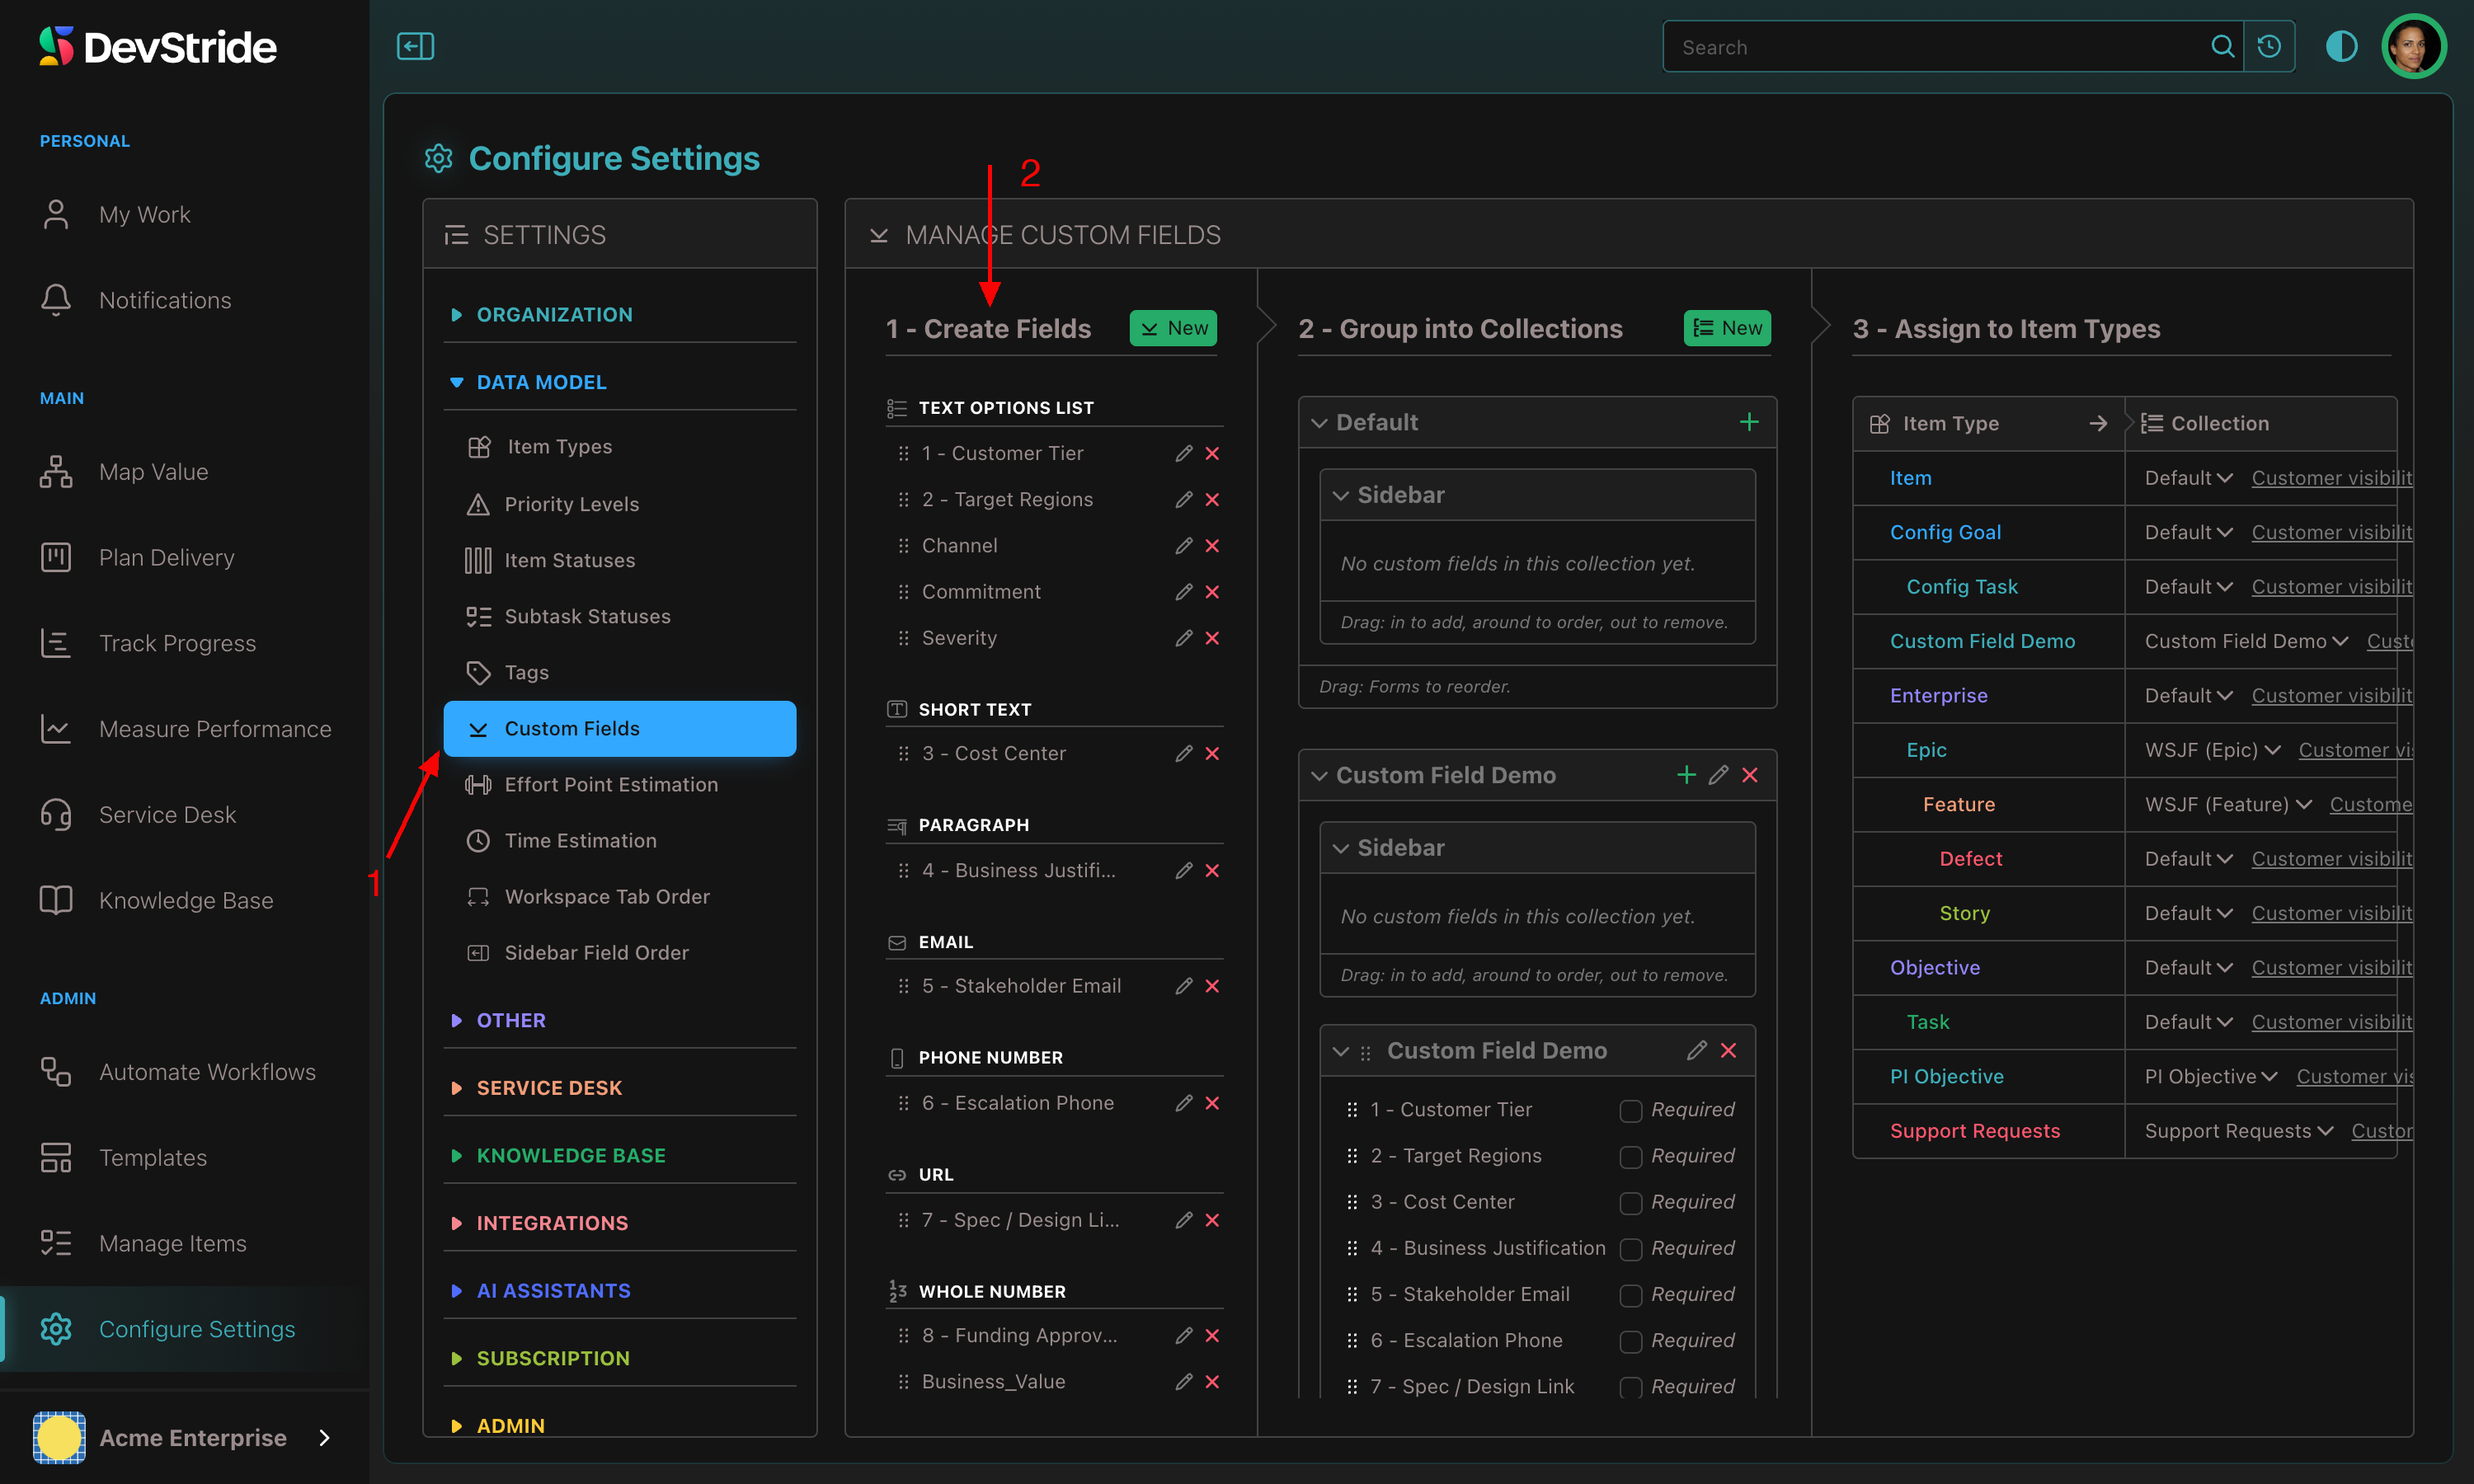
Step 1: Create fields#
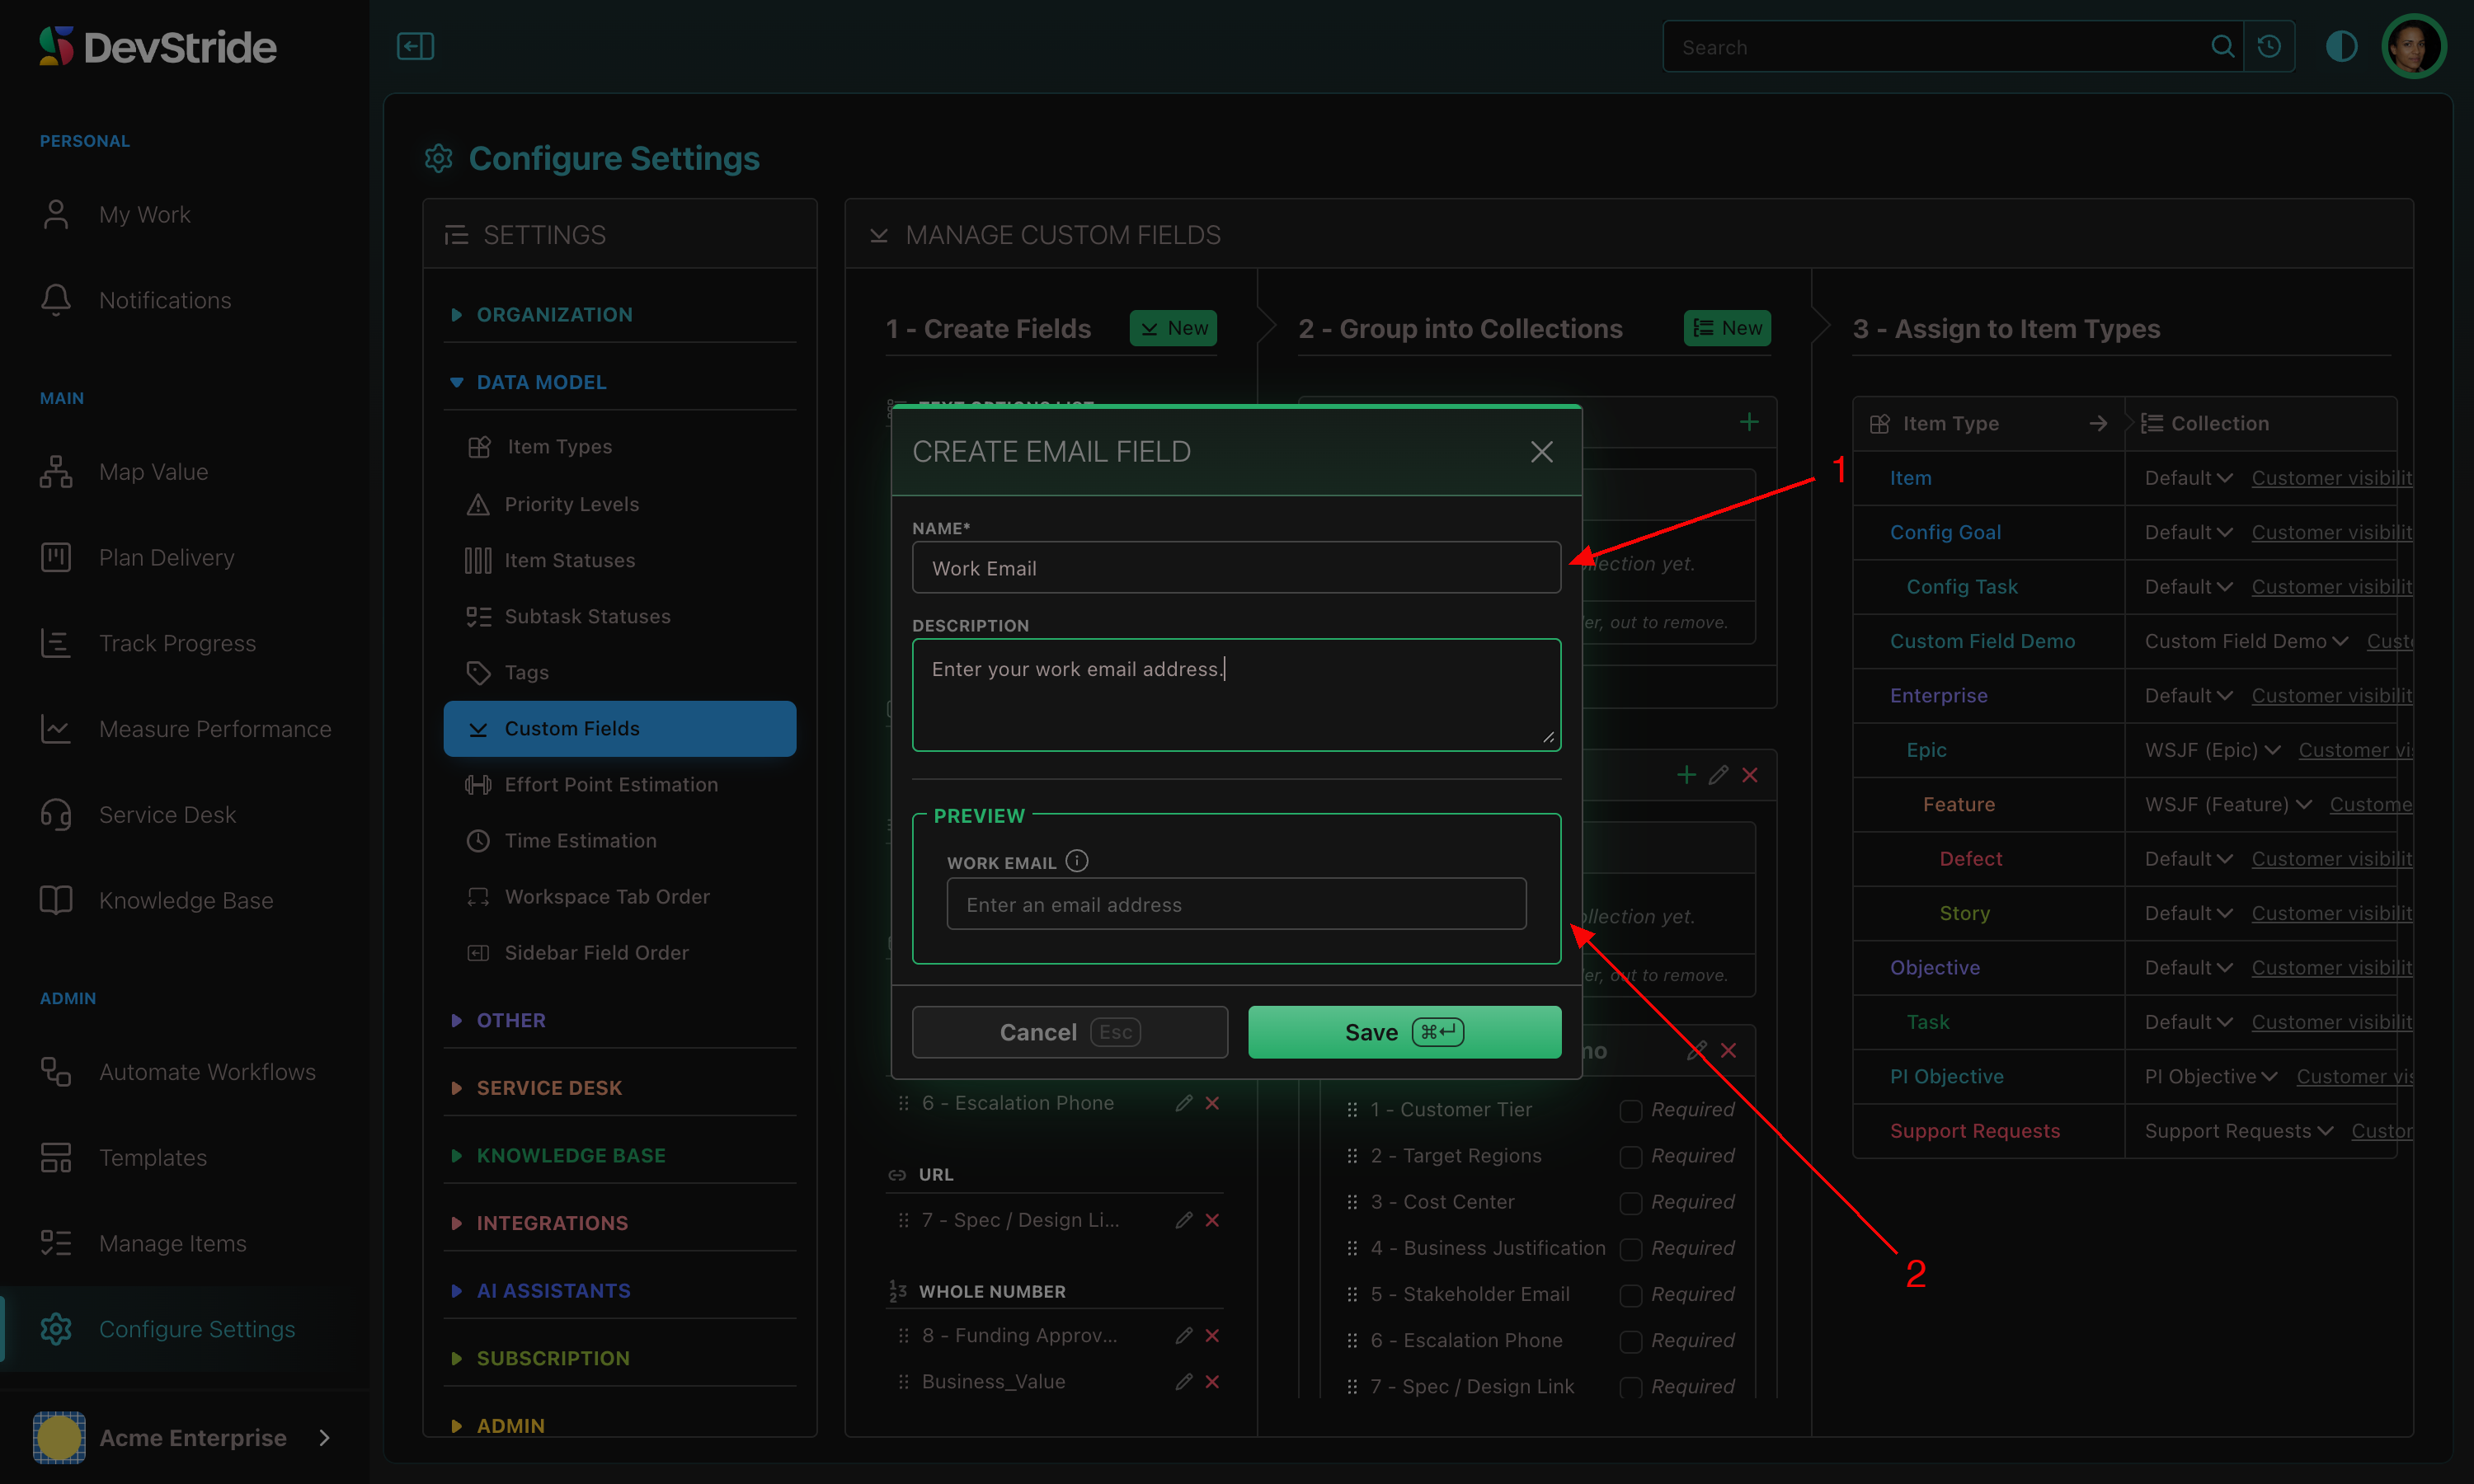
Click New next to 1 - Create Fields, pick a type in Select Field Type, then fill in the Create … Field dialog (label, description, options where relevant) and save.
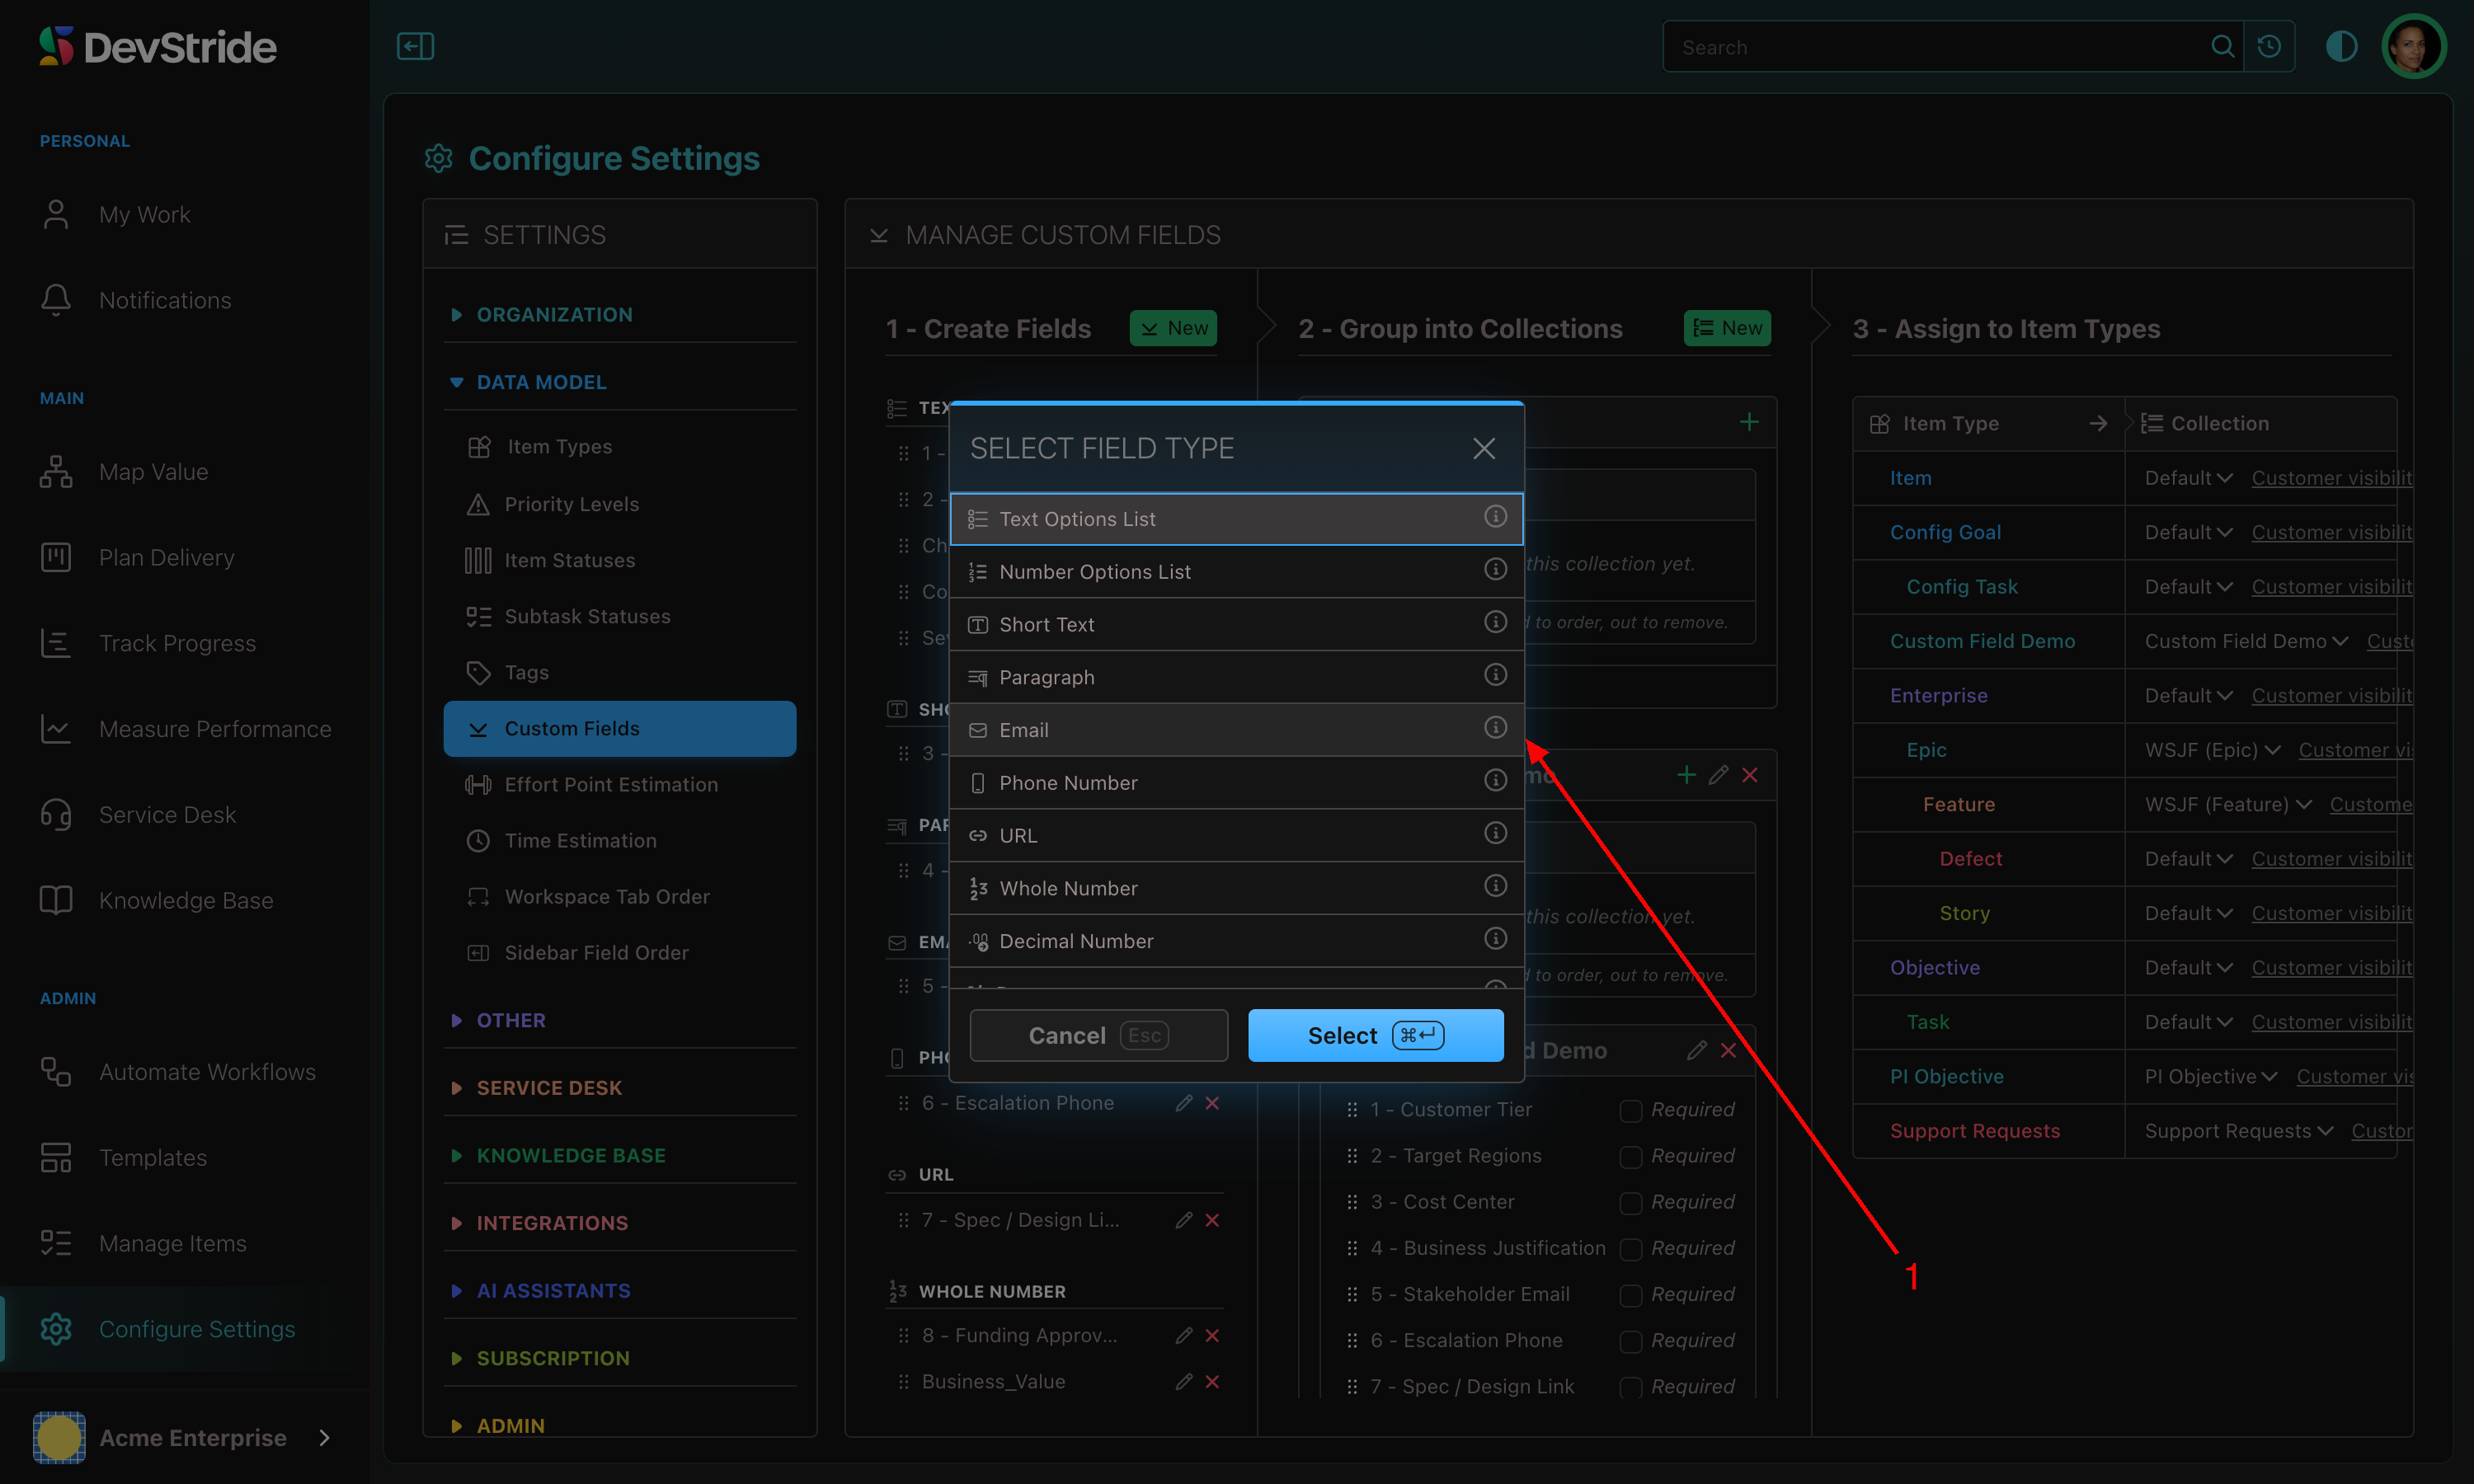
| Field type | Use it for | Notes |
|---|---|---|
| Text Options List | A fixed list of text choices (customers, regions) | The most common type. Toggle Allow multiple selections for multi-select. Long lists can be imported from CSV. |
| Number Options List | A fixed list of numeric choices (RICE factors 1–10) | Use when the value feeds a calculation. |
| Multiple Checkboxes | A checklist where any number can be ticked (laptop, badge, email account) | Same data as a multi-select Text Options List, shown as tick-boxes. |
| Short Text / Paragraph | One line / multi-line free text | |
| Email, Phone Number, URL | Validated contact data; URLs become links | |
| Whole Number, Decimal Number, Percent | Numeric entry | Percent displays the number as a percentage. |
| Single Checkbox, Switch | True/false | Usable in calculations. |
| Date Picker, Date Time Picker | Dates, with or without time | A Track overdue toggle makes past dates show red with (Overdue) in tables. Off by default. |
| User Picker | A member (accountable owner, reviewer) | Can be limited to users carrying a given user label; supports multiple selections. |
| Asset Upload | A file that belongs on every item of this type (campaign artwork) | Supports multiple files. |
| Calculated (Number), (Text), (Date), (Boolean) | A formula over other fields and item values, Excel-style | RICE and WSJF scores are the classic case. Ask Support for help with formulas. |
Step 2: Group into collections#
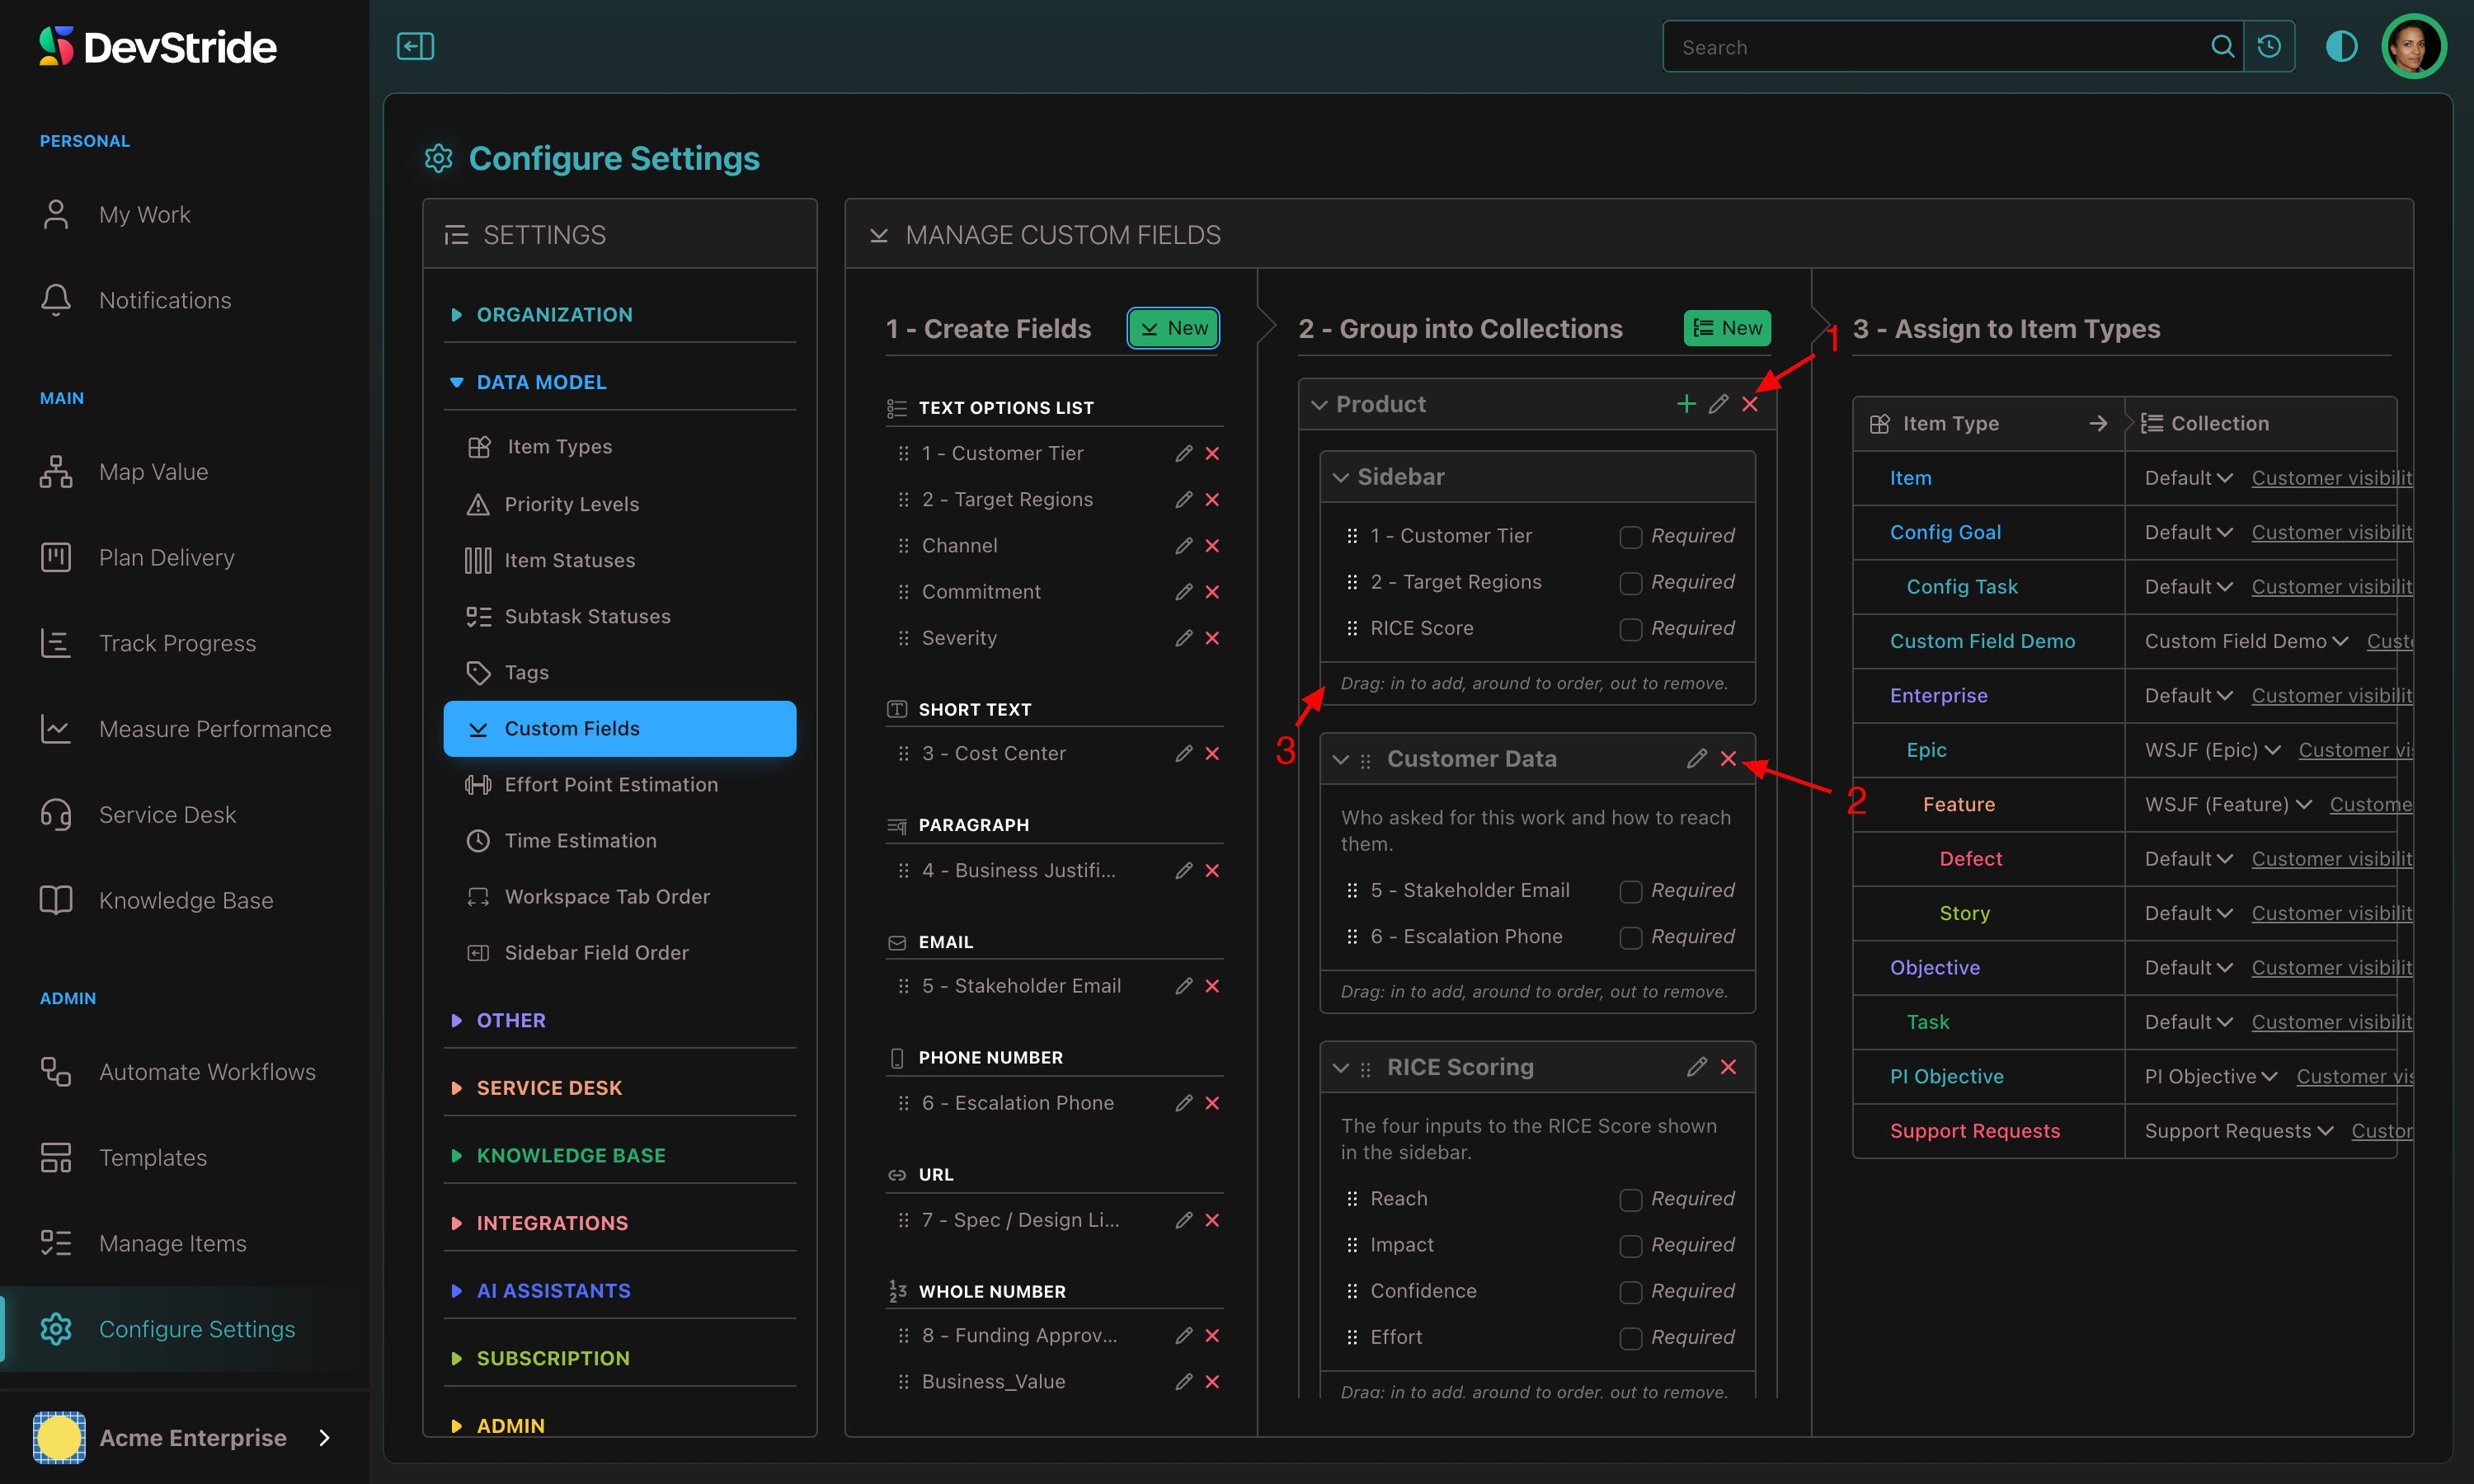
- Click New next to 2 - Group into Collections and name the collection (for example Product).
- Drag fields from the left pane into the collection's Sidebar group. Drag to reorder; drag out to remove.
- Tick Required on any field that must be filled before an item can be saved.
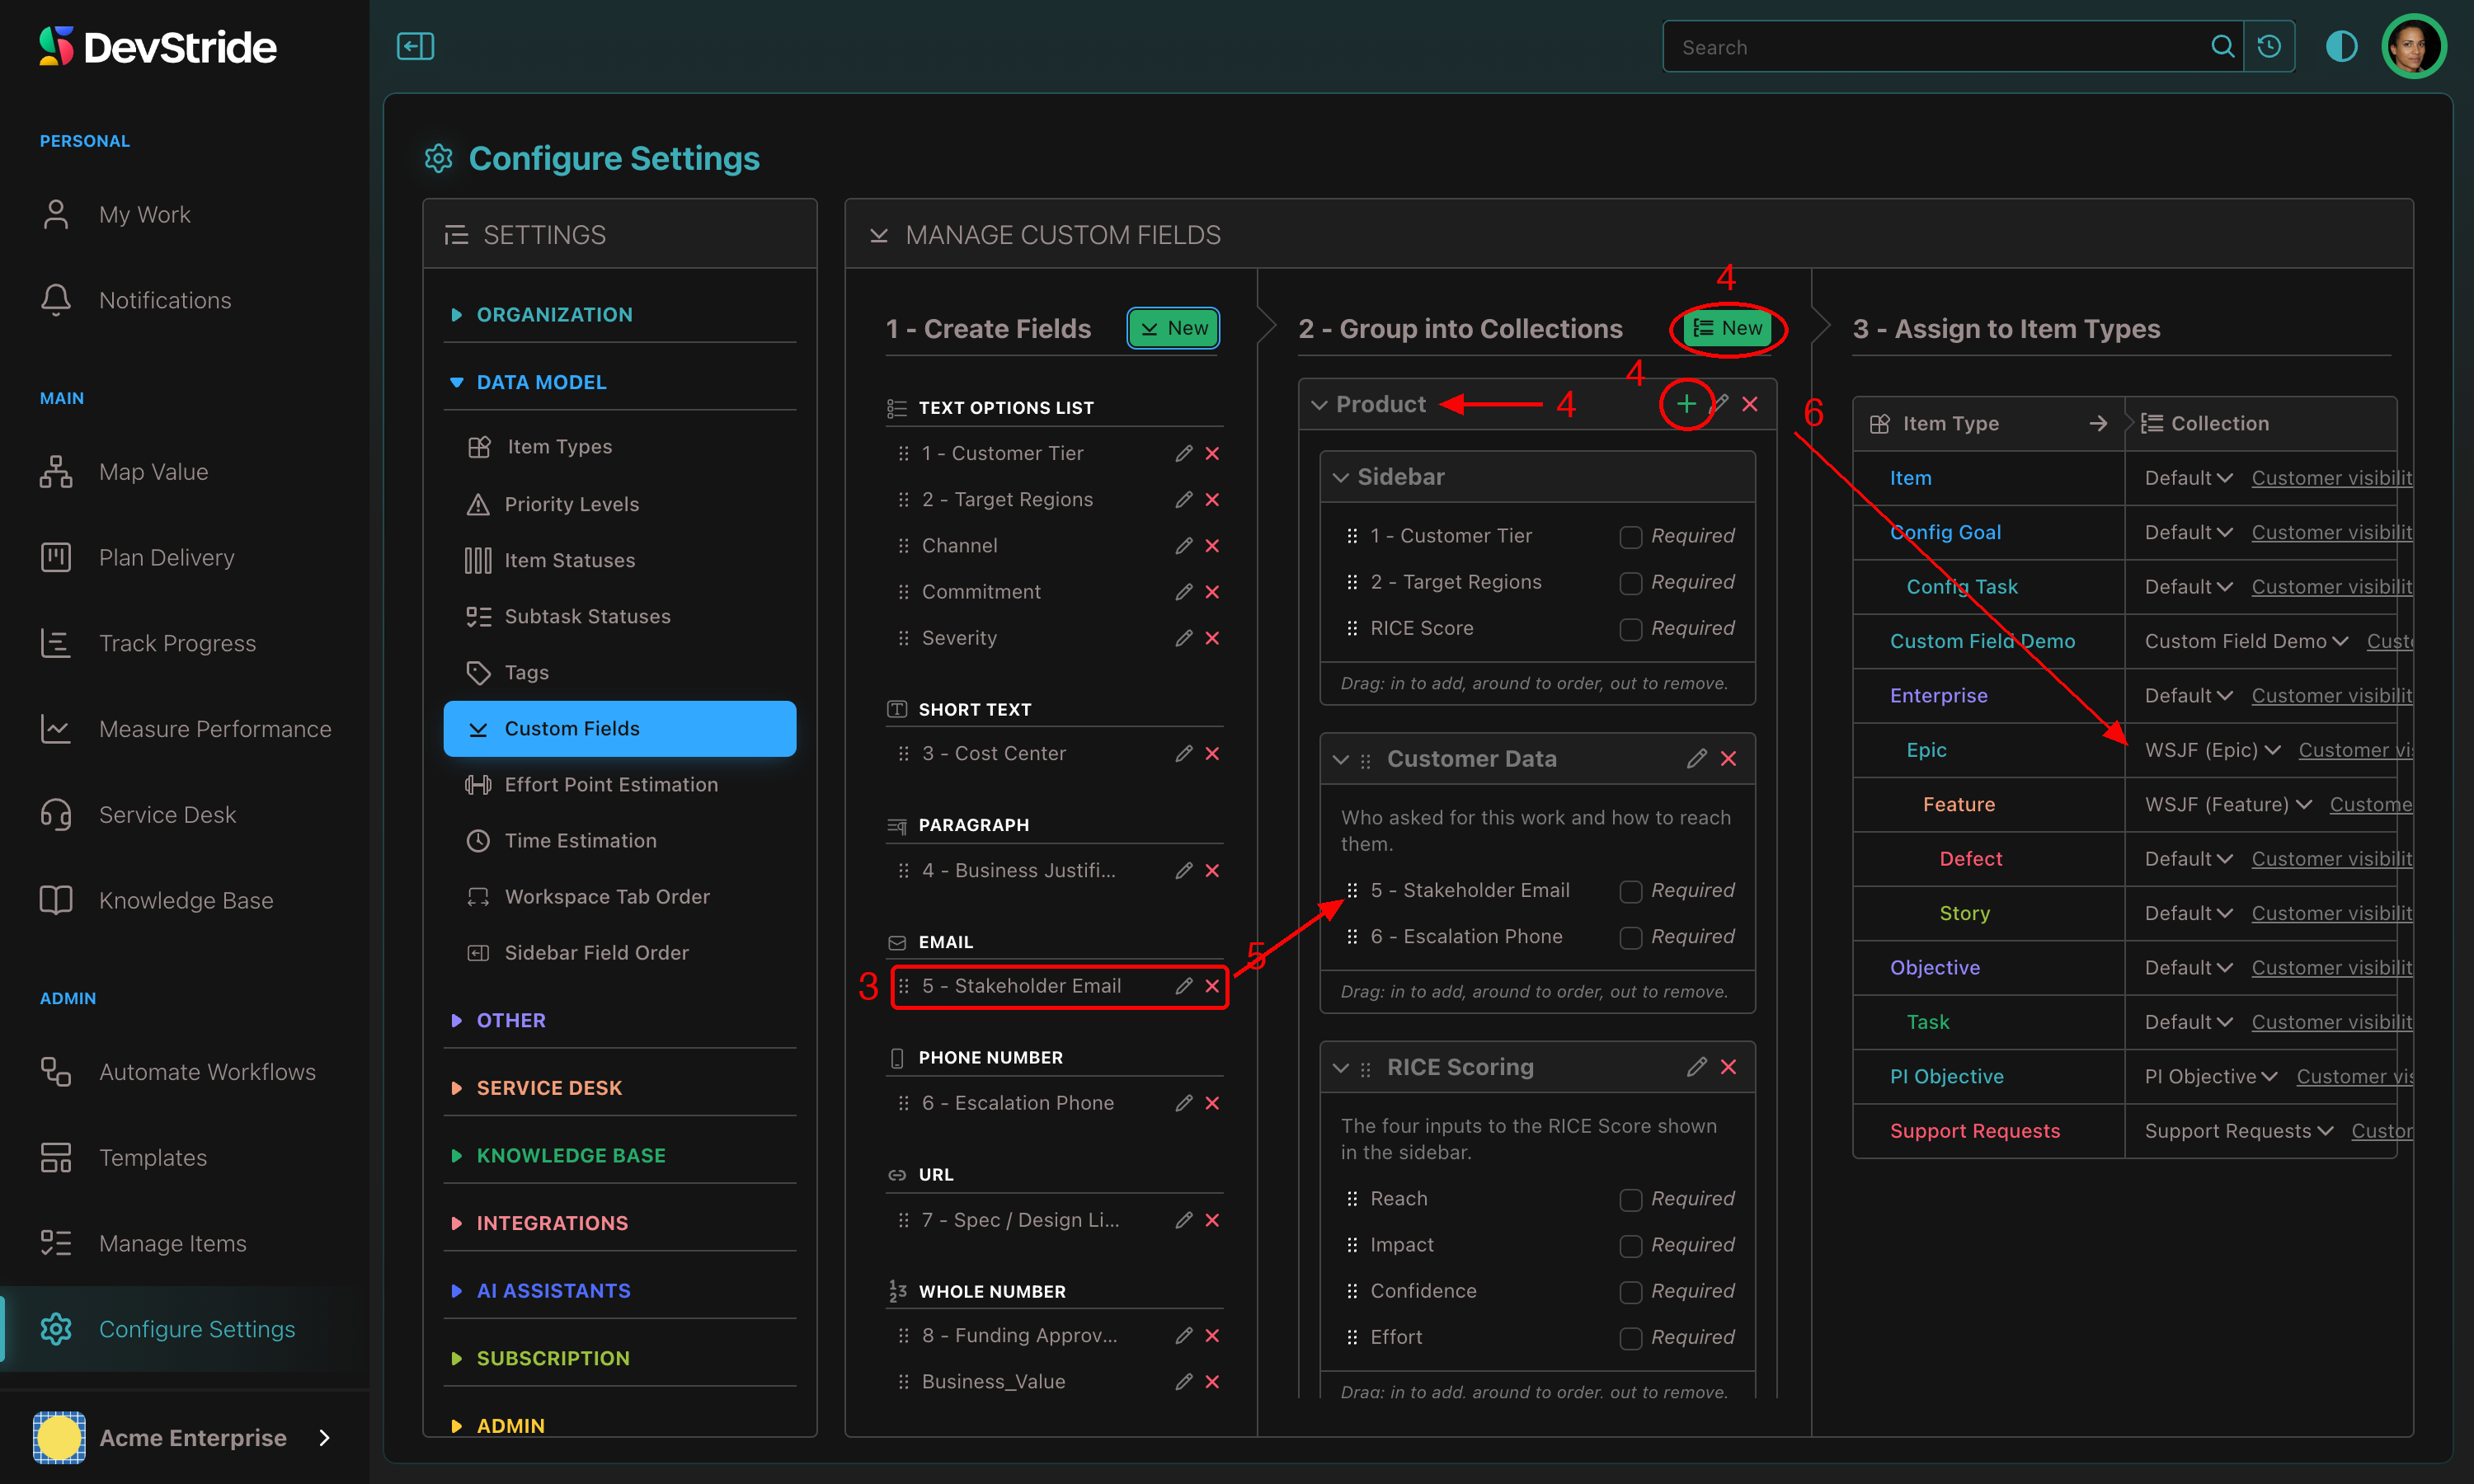
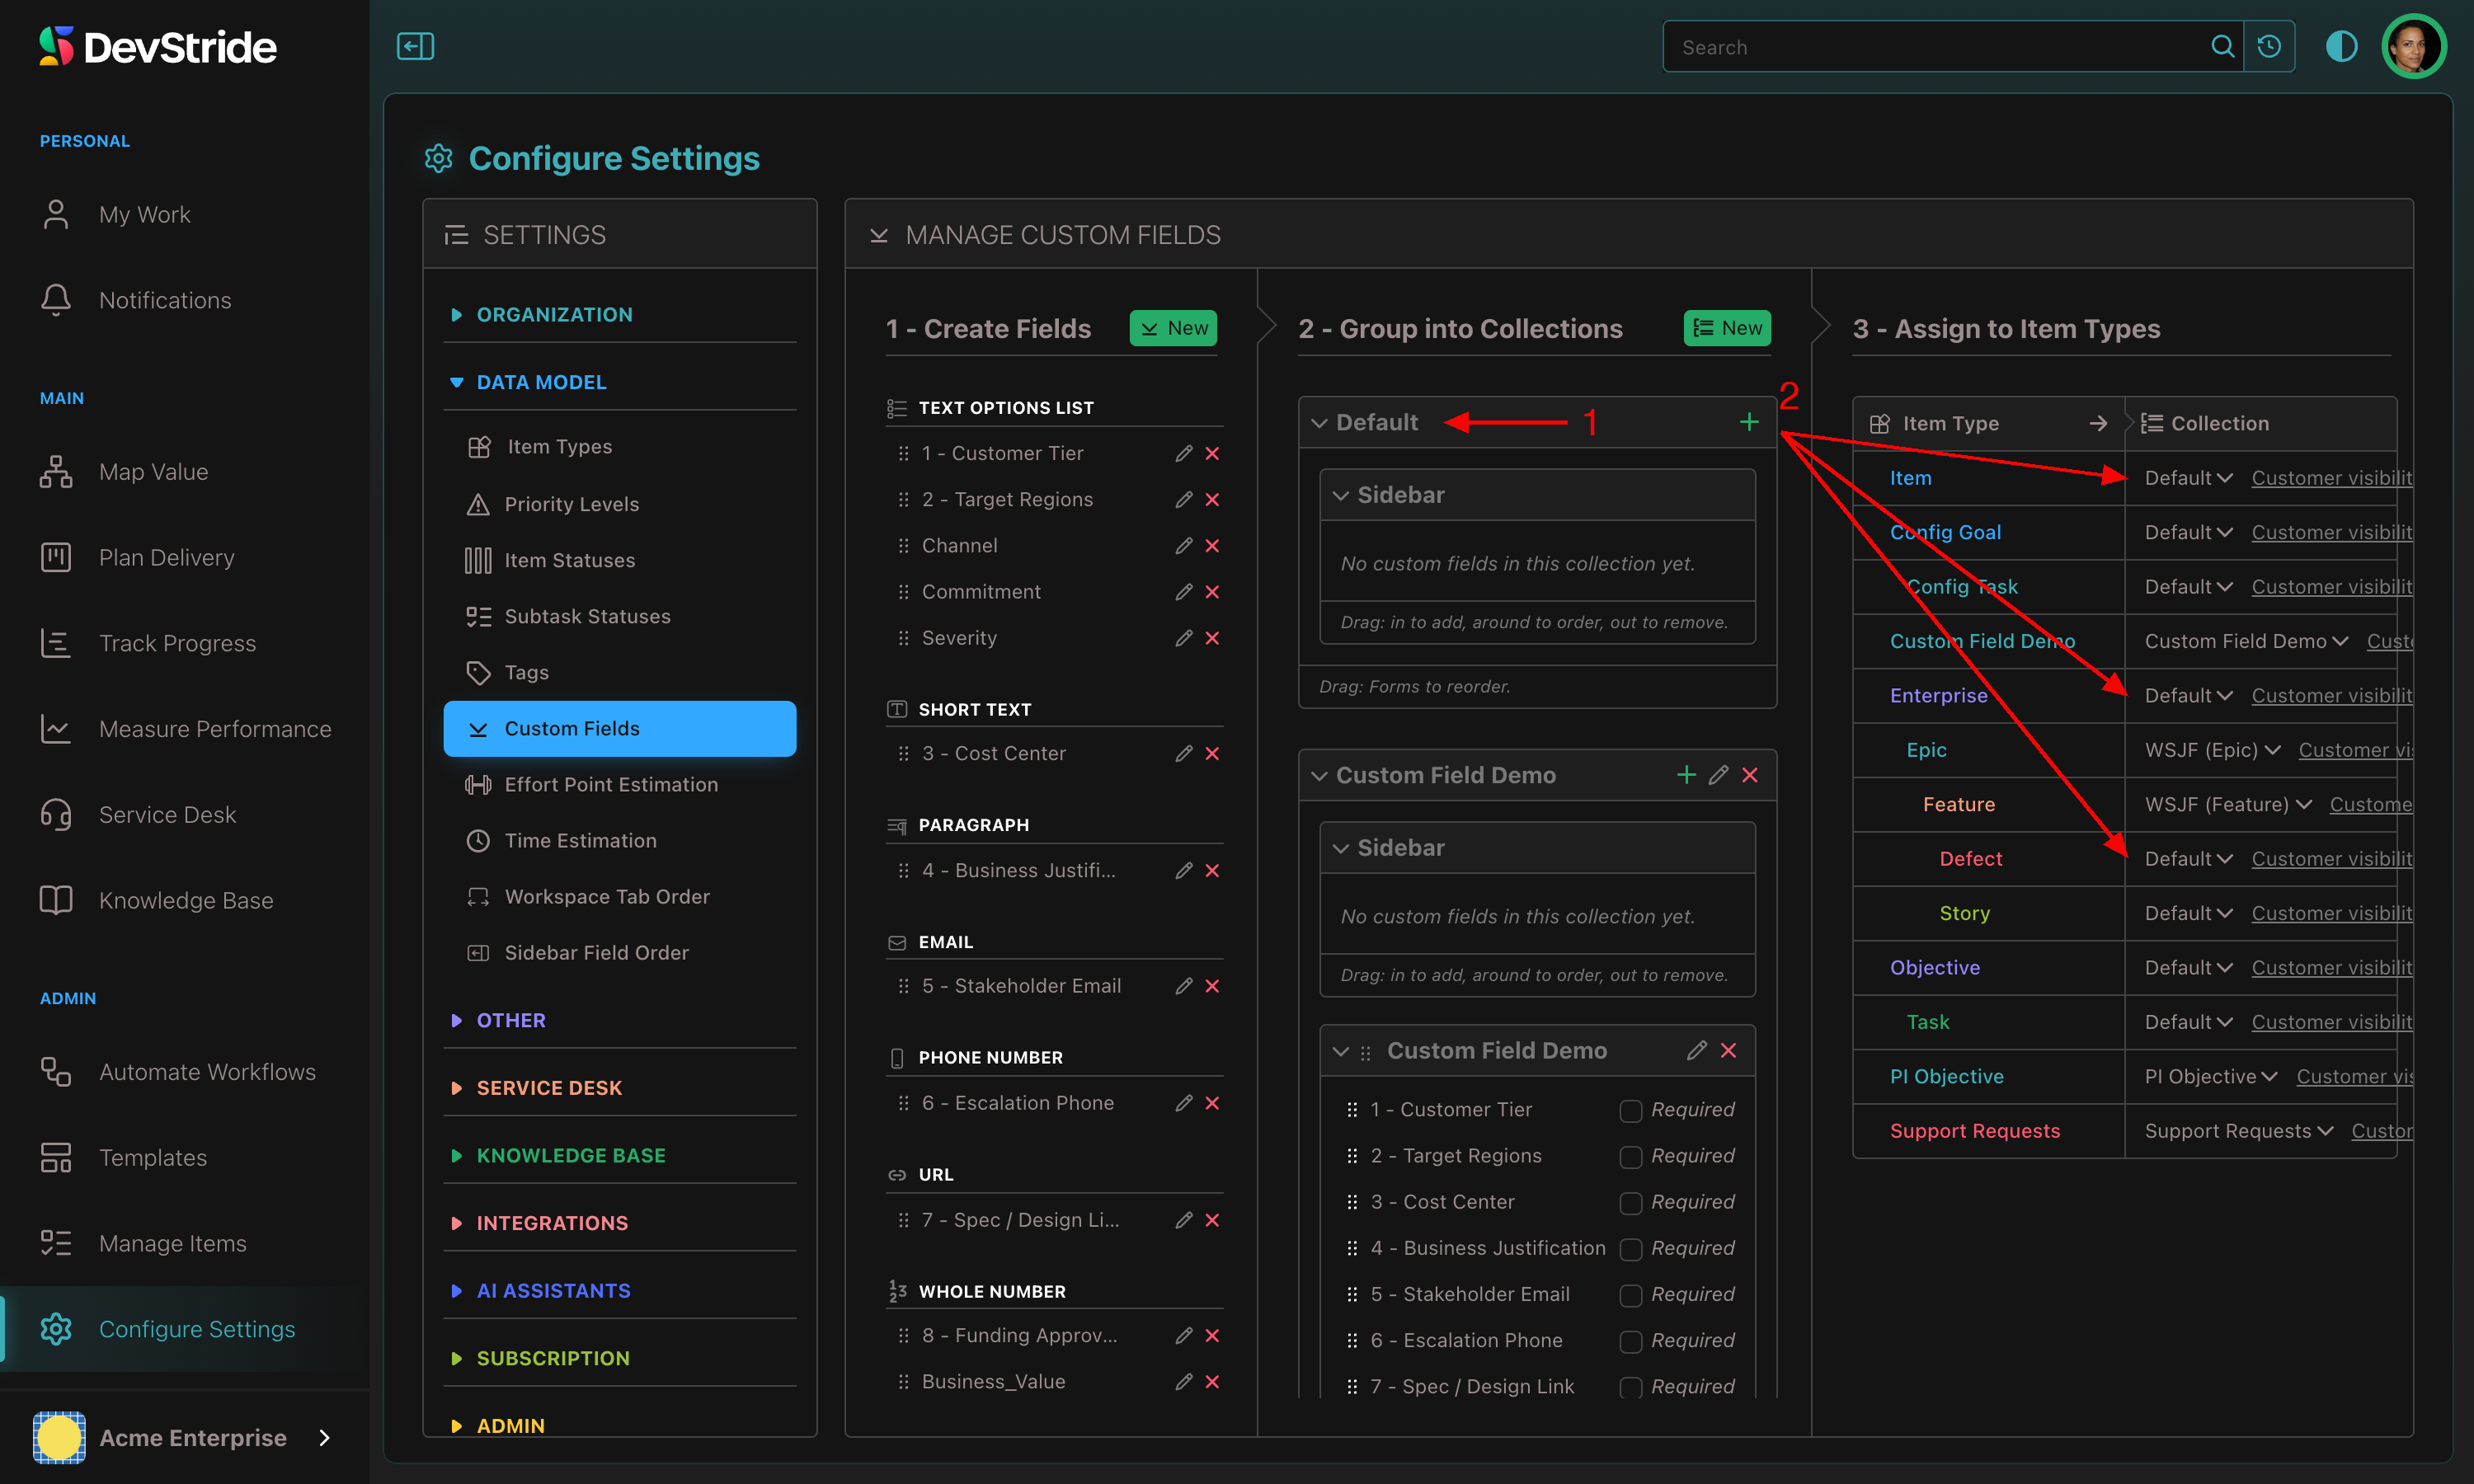
The Default collection applies to every item type you have not given its own collection. Add your organization-wide fields there.
Moving clutter off the sidebar with form groups#
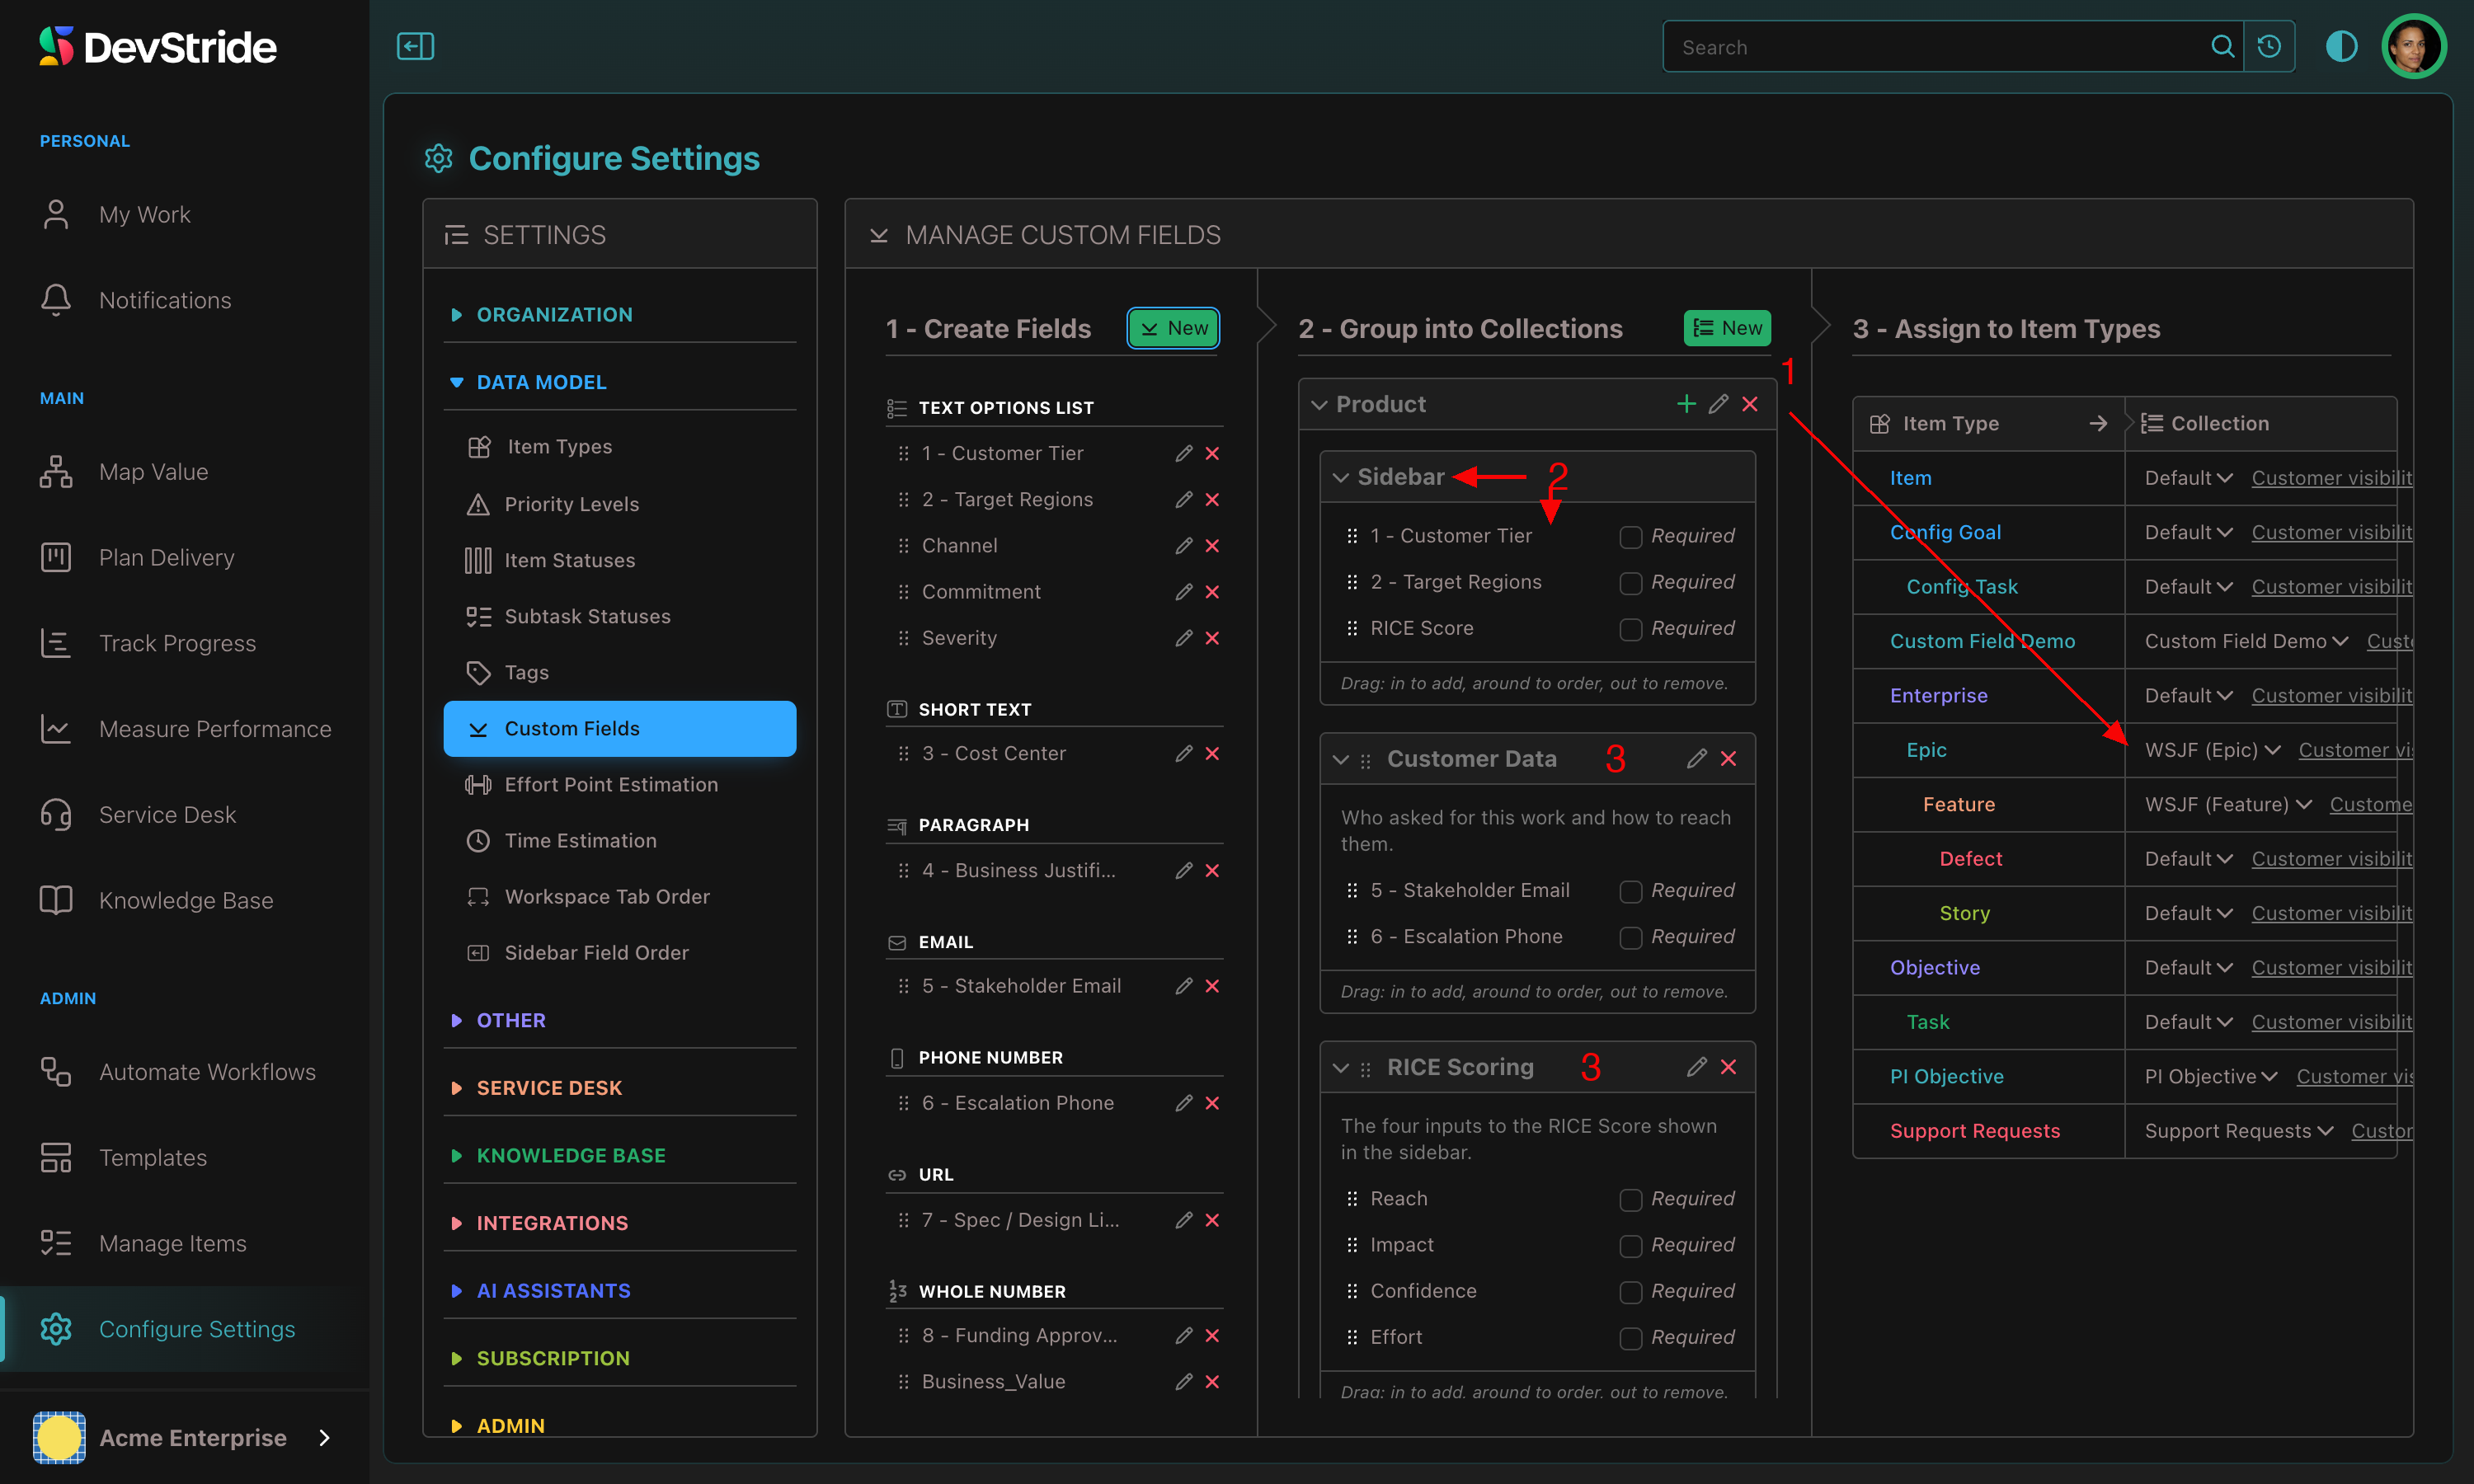
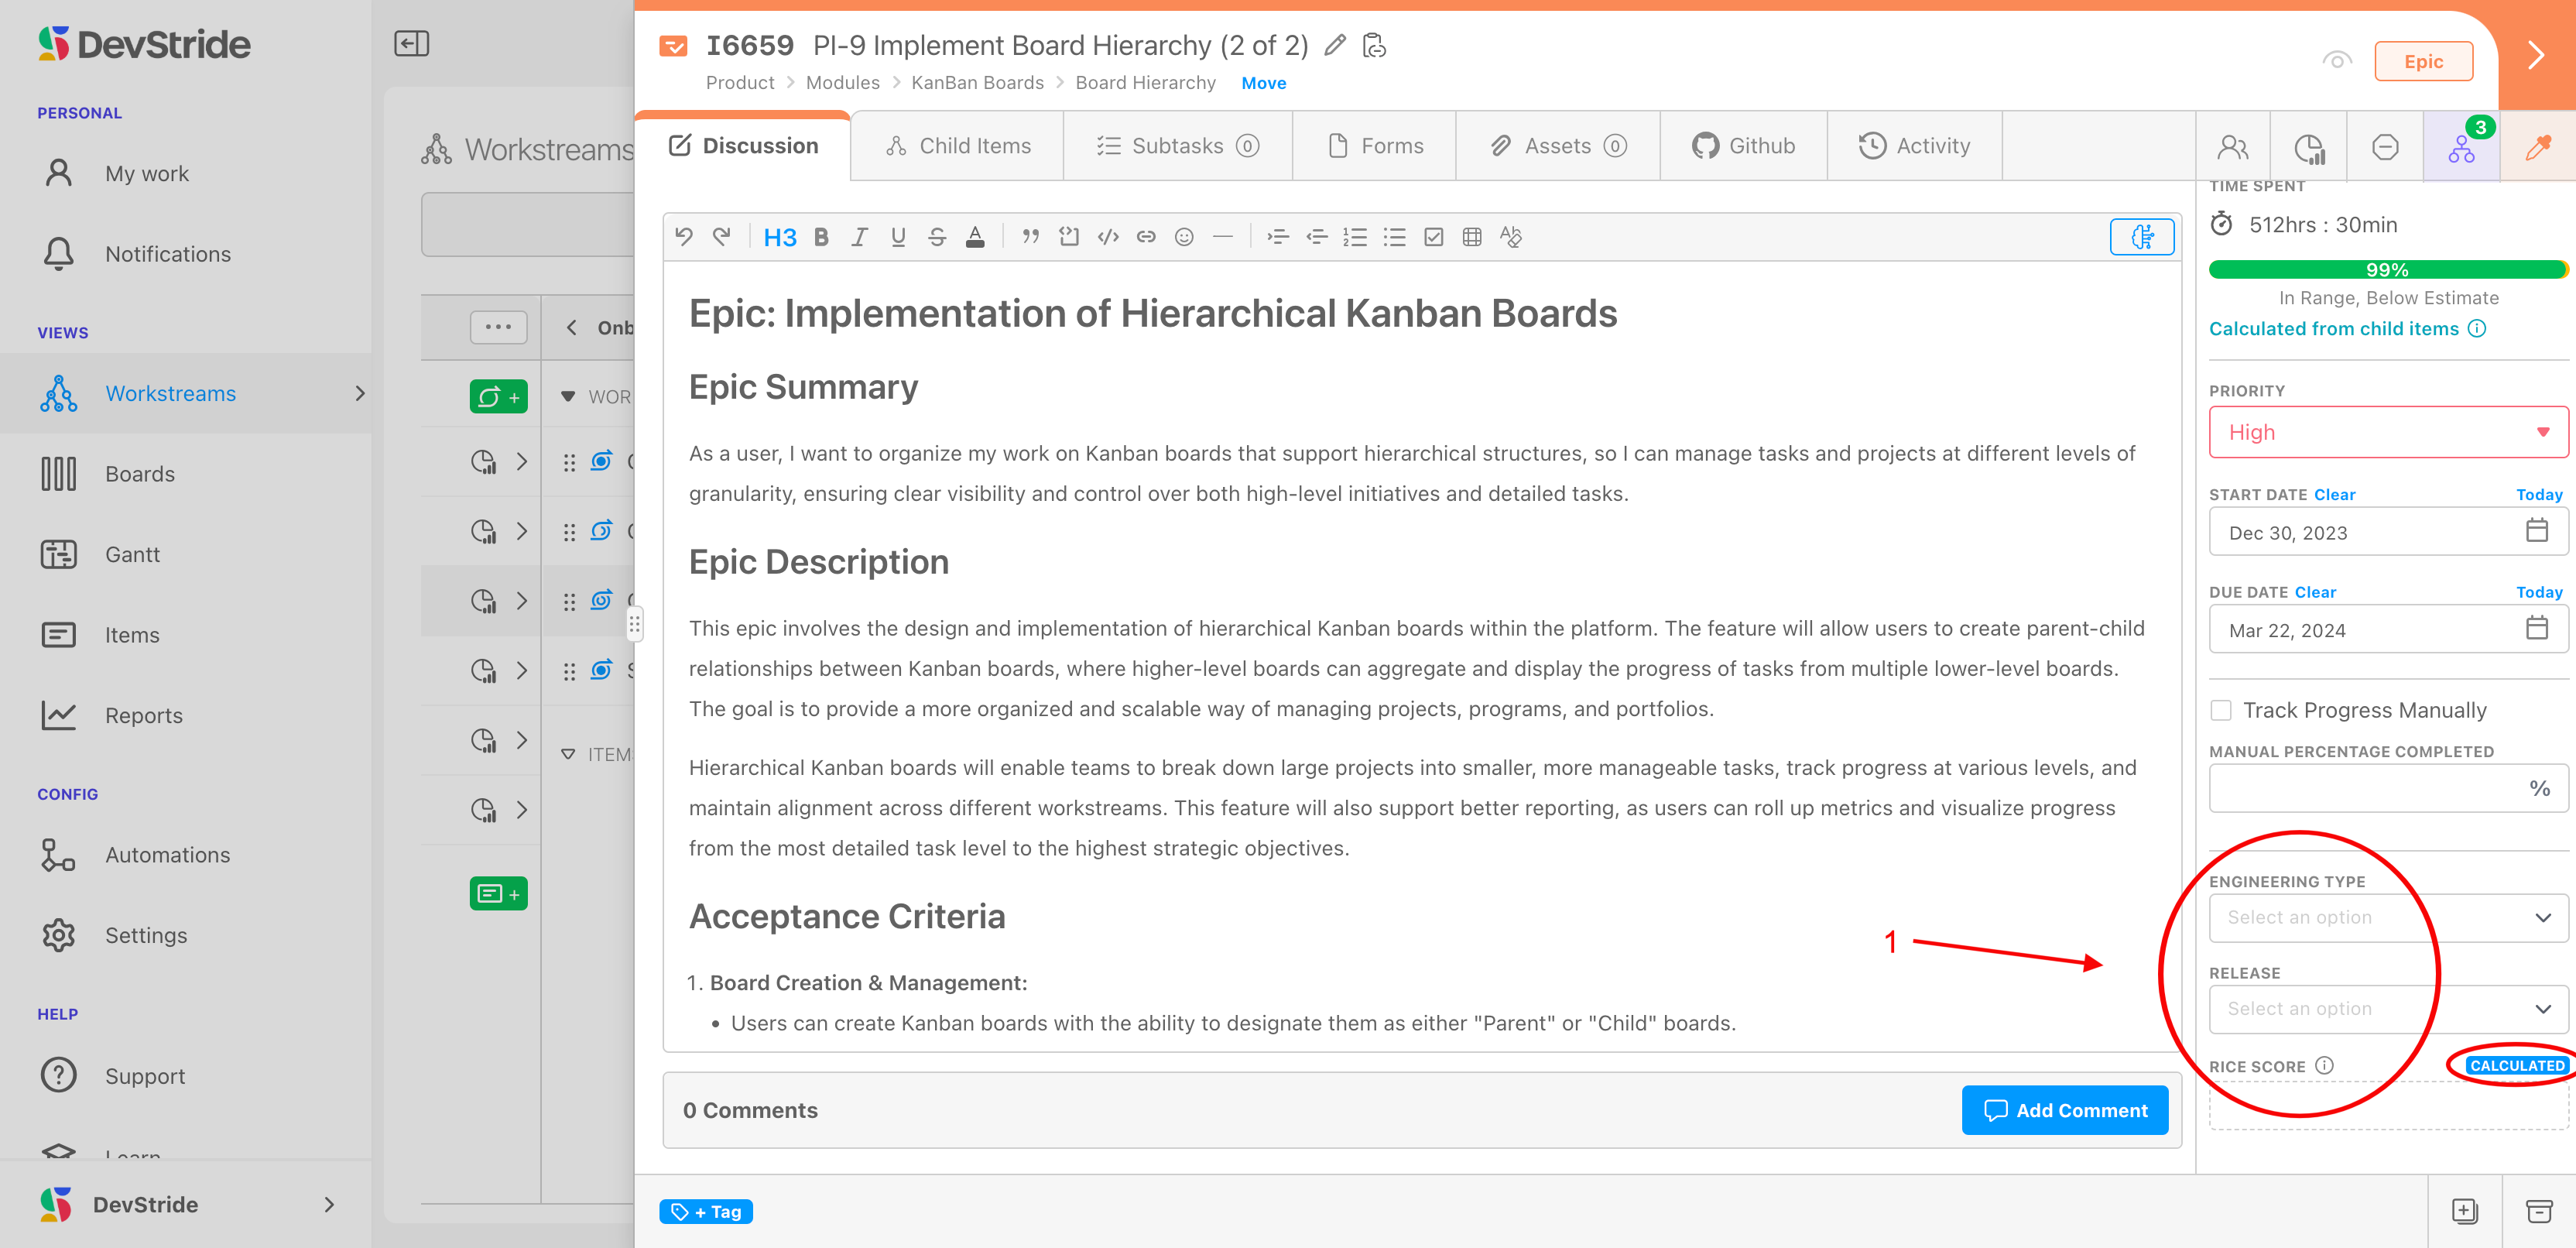
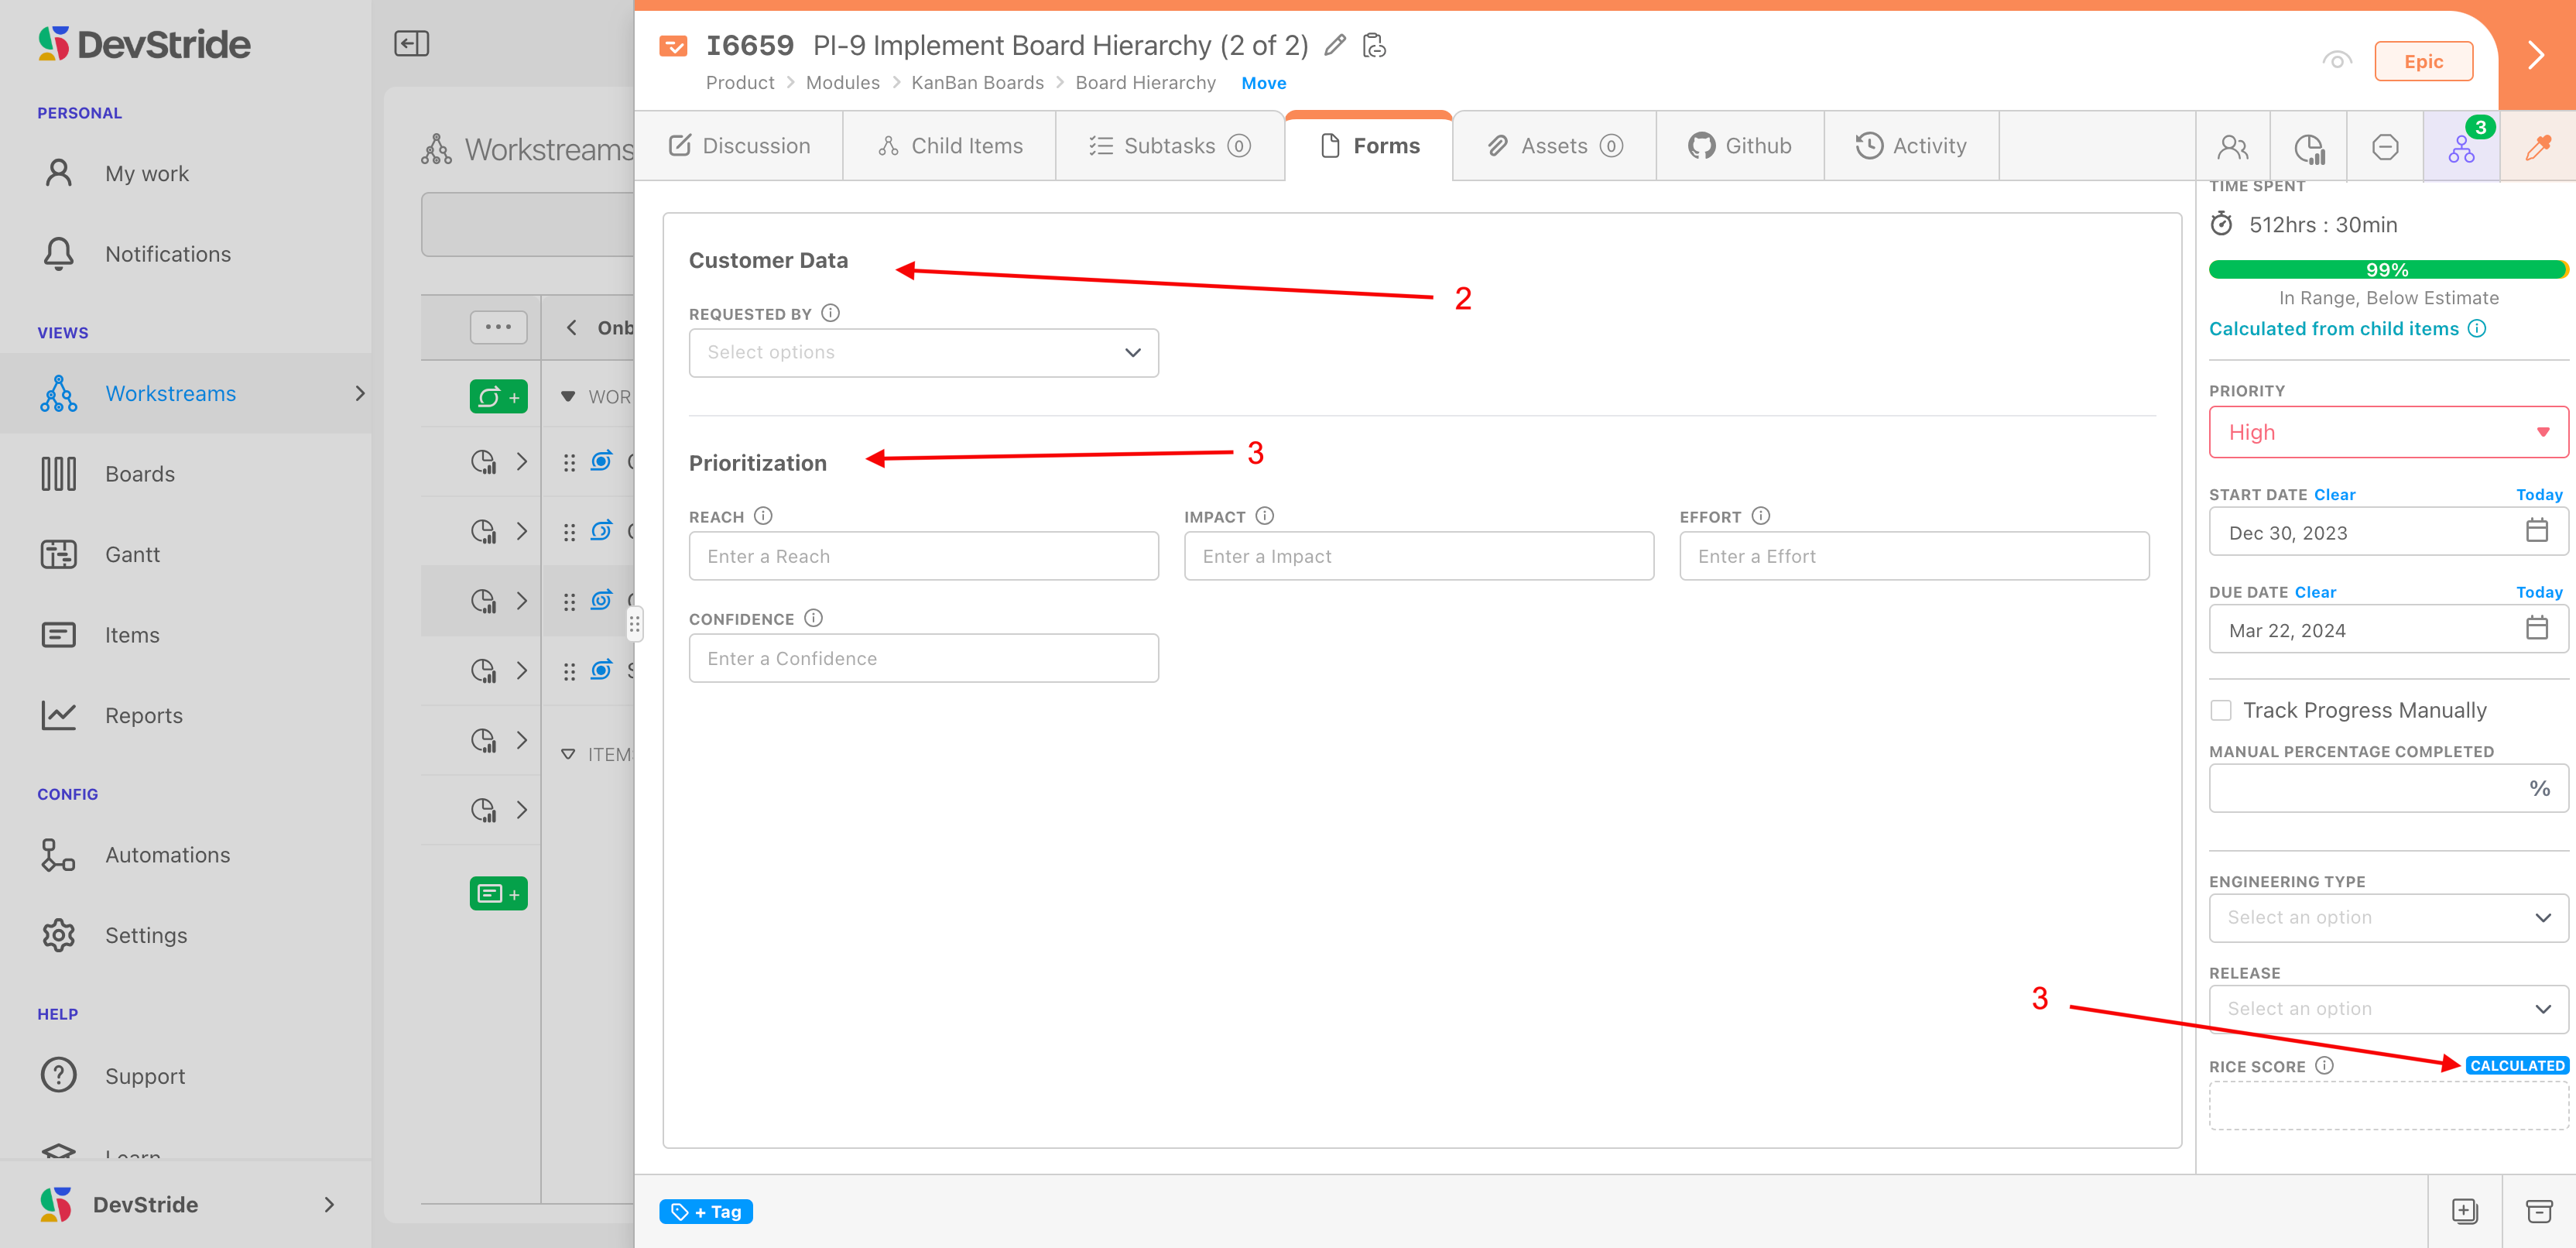
A collection with many fields makes a long sidebar. Click Add Forms in Collection and give the new group a Label (and optional Description); fields you drag into it appear as a section on the item's Forms tab instead of the sidebar. The Forms tab only appears when such fields exist.
The RICE example below keeps the four input factors on a RICE form group and the single Calculated (Number) score in the Sidebar group, so the sidebar shows the result and the inputs stay one tab away.
Step 3: Assign to item types#
In 3 - Assign to Item Types, pick a collection for each item type (or None). Items of that type now show the collection's fields.
Finer control over the sidebar
The order of sidebar fields, including promoting a single custom field to sit on its own above the group, is set per item type under Data Model → Sidebar Field Order. See Customizing the Item Drawer.
Everything above, plus CSV import of option values, is on Custom Fields.
Next: Setting Up Tags.